Table of Contents
Advertisement
Quick Links
Advertisement
Table of Contents

Subscribe to Our Youtube Channel
Related Manuals for Cocoon DVR6093


Summary of Contents for Cocoon DVR6093
- Page 1 DIGITAL VIDEO SECURITY SYSTEM Model Number: DVR6093 INSTRUCTION MANUAL...
-
Page 2: Safety Instructions
Safety Instructions Read instructions Carefully read all safety instructions and the user manual before operation. Power source Only use the supplied power adaptors. Using other power adaptors may cause damage to the unit or potentially start a fire. Do not expose the DVR unit to moisture Avoid installing the DVR unit in a location with high humidity or in a location where liquid may spill onto the unit. -
Page 3: Table Of Contents
Contents Safety Instructions – Product Overview Introduction Package Contents DVR Unit Front Panel DVR Unit Rear Panel – DVR unit Installation Installation Location DVR unit connections - Using the DVR unit for the First Time Remote Control Mouse Powering on the DVR unit Main Display Navigating the DVR Menus Quick Popup Menu... - Page 4 Contents Device 4.8.1 18-19 4.8.2 System 4.9.1 General 4.9.2 Users 4.9.3 Version 4.10 Advanced 4.10.1 Maintain 4.10.2 Events - Viewing footage on your computer Installing the Video Player Software Playing Backup Footage 23-24 - Appendinx 1 - Networking Internet Explorer - ActiveX Settings 25-26 Logging Into the DVR unit over Internet Explorer or Safari - Appendinx 2 - Troubleshooting &...
-
Page 5: Product Overview
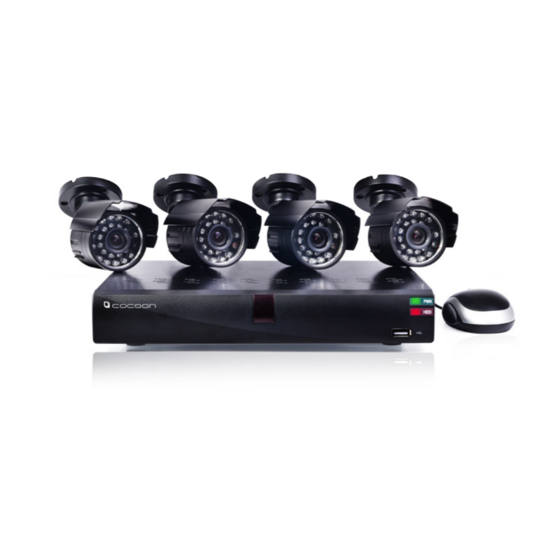
Product Overview Introduction Thank your for purchasing the Cocoon Digital Video Security System. This powerful DVR unit (Digital Video Recorder) is ideal for monitoring and recording your home or business. We trust you will get many years of carefree and reliable use out of this product. Please read and follow the user manual before first use. -
Page 6: Dvr Unit Installation
2 – DVR unit Installation Installation Location Before installing the security system, it is essential to plan where to locate the DVR unit. Below are a few points to consider • The DVR unit should be located in a central location with easy access to cameras and installed cables • If you plan to use remote viewing features, the DVR unit should be located near your modem / router or network point •... - Page 7 2 – DVR unit Installation Connect the video cable to the back of the DVR unit and connect the other end of the video cable to your monitor or TV. Note you must switch your TV or monitor to the correct INPUT once the DVR unit has been powered on Connect the mouse to the USB port (on the back of the DVR unit) Connect the power adaptor to the 4 way splitter and plug into an outlet.
-
Page 8: Using The Dvr Unit For The First Time
3 – Using the DVR unit for the First Time Remote Control Item Key title Key function Channel select 1-4 / Numeric key entry for passwords or menu entries Switch to GUI (Graphical user Interface) function Toggle camera display mode Menu Enter / Exit the main menu 5, 6, 7,... -
Page 9: Powering On The Dvr Unit
Powering on the DVR unit Connect the Power Adaptor to the back of the DVR unit Plug the Power Adaptor into a power outlet and turn the outlet switch to the ON position Once Power is connected to the DVR unit it will proceed through the boot sequence Main Display... -
Page 10: Quick Popup Menu
Quick Popup Menu Hovering the mouse near the bottom of the screen will show the popup menu for quick access to basic functions. For advanced functions see section 4 - DVR unit Menu 5 6 7 8 9 10 11 Main Menu –... -
Page 11: Dvr Unit Menu Map
4 – DVR unit Menu Map Live View Output Display Privacy Zone Record Parameters Record Schedule Main Stream Record Search Event Search Search Backup Network Sub stream Main Menu DDNS Network Email Mobile Alarm Motion Detection PTZ set Device General Users System Version... -
Page 12: Main Menu
4.2 – Main Menu Main Menu To access the main menu, click the icon or press Menu on the remote control to enter into Main menu. In the Main Menu, you can manage all DVR unit settings such as Display, Recording, Networking, etc. -
Page 13: Output
Default - reset the displayed settings to factory defaults Apply - After all changes are made click the Apply button to save Exit - If you want to cancel after making any changes, click Exit to exit the menu without changes IMPORTANT NOTE: Always click “Apply”... -
Page 14: Record
4.4 – Record IMPORTANT NOTE: Always click “Apply” after making any changes within the menu system. If you do not click Apply your changes will not be saved To access the Record settings, select Record from the main menu. Choose the tabs at the top to switch between sub-menus. -
Page 15: Schedule Recording
4.4.2 Schedule Recording The Schedule function allows you to set up automated recordings. Choose from always record, motion detection recording or no recording • Channel: Select the channel to setup • Day: Select day of the week to setup • Set the record type: 24 hours of the day are represented by 24 boxes in 2 rows. -
Page 16: Search
4.5 – Search Search To access the Search settings, select Search from the main menu. Choose the tabs at the top to switch between sub-menus. The Search menu provides access to playback recordings and backup to flash drive 4.5.1 Record Search Record Search is a search of all events by month. -
Page 17: Event Search
4.5.2 Event Search Event Search gives a listing of all events from a specified date and time by individual channel. This function is useful for viewing and backing up footage from a specific date and time range Set the Search Date Choose the CH to view, 1-4 or All Set the Search Time Choose the TYPE of event you are searching for, Normal, Alarm or All... -
Page 18: Backup
4.5.3 Backup If you know the exact date, time and channel you would like to backup, use the Backup feature, otherwise use the Event Search feature to review footage before backing up Set the Search Date Choose the CH to view, 1-4 or All Set the Search Time Choose the TYPE of event you are searching for, Normal, Alarm or All Click the Search button to show the listing of events... -
Page 19: Networking
4.6 – Networking 4.6 Networking The powerful Cocoon Digital Video Security System features advanced settings for viewing footage over the internet and on supported 3G enabled mobiles and tablets. Network setup is the most technically involved feature of the DVR unit and requires some working knowledge of networking and modifying modem / router settings. -
Page 20: Ddns
Apply your changes will not be saved 4.6.4 Email The Cocoon Digital Video Security System can email you Motion alerts if enabled. Contact your network administrator if you do not have this information Email: Enable or disable email alerts... -
Page 21: Mobile
4.6.5 Mobile Assign a user name and password for viewing over mobiles User Name: Enter the mobile login user name Password: Enter the mobile password Mobile Port: Enter the port number info will be transferred on between 1024 and 65535 IMPORTANT NOTE: Always click “Apply”... -
Page 22: Alarm
4.7 – Alarm To access the alarm setting, click Alarm in the Main Menu. This DVR unit System is equipped with Motion Detection technology. Each detection is considered an alert or alarm which can be set to trigger a recording. Using Motion Detection will save on disk space and keep you from spending hours searching through recorded footage by only viewing when motion has occurred... -
Page 23: Ptz
Overwrite – When in use the Overwrite feature will record over any recordings older than the date chosen. For example, if overwrite is set to 30 days, the DVR unit will only record over footage older than 30 days. Setting this option to Auto will overwrite the oldest footage as soon as the hard drive is out of space. -
Page 24: System
4.9 – System To access the System menu click System from the Main Menu. System contains controls to setup the date and time as well as user accounts and version information 4.9.1 General The General Setup interface allows you to setup general settings such as time and date, language and day light savings settings Date: Display the current date. -
Page 25: Users
4.9.2 Users 1. The DVR unit supports up to seven users with one Admin account 2. Select the account you wish to edit and click Edit button • User name: Enter a maximum of eight characters • Password: Enter a maximum of 6 numbers. Only numbers supported Admin is authorized to set common user’s authority. -
Page 26: Version
4.9.3 Version This tab displays the system information • Device Name • Device ID • Device Type • Hardware Version • Software Version • IE client version • MAC Address – Note if multiple DVRs are on the network the MAC address should be modified 4.10 Advanced Click the Advanced button in the Main Menu to access the Advanced settings. Advanced settings allow you to setup auto reboots, upgrade the firmware (if available) or shut down the system 4.10.1 Maintain Like your PC, maintenance should be performed periodically to keep the DVR unit in peak condition. -
Page 27: Viewing Footage On Your Computer
5 - Viewing footage on your computer Installing the Video Player Software Insert the CD into your CD Drive Click Start > Computer and navigate to the CD Directory Double click and install the Video Player software. Follow the on screen instructions Open the Video Player software Playing Backup Footage Insert your USB Flash Drive with backed up footage into your computer... - Page 28 Click the icon to enter into full screen mode. Click the icon to never place one target to top. Click the icon to place one target to top. Click the icon to place the playing record to top. Snapshot button: click the icon to capture the live image and save the captured one to directory:\\video client\capture.
-
Page 29: Appendinx 1 - Networking
6 – Appendix 1 – Networking In order to view your DVR unit on a computer or mobile over the internet you must setup your DVR unit and modem / router as per the instructions in section 4.6 Networking. If you are still having difficulty viewing over the web, see the steps below IMPORTANT NOTE: In order to use networking features of this DVR unit you must connect the DVR unit to a hi-speed internet connection. - Page 30 Scroll down to Download unsigned ActiveX controls and click Prompt Under Initialize and scrift ActiveX controls not marked as safe for scripting, click Prompt Click OK When asked to confirm changes, click Yes Enter your DVR unit’s IP address again and press enter Click the ActiveX installation box and choose install.
-
Page 31: Logging Into The Dvr Unit Over Internet Explorer Or Safari
Logging Into the DVR unit over Internet Explorer or Safari Enter your DVR unit’s IP address into IE or Safari address bar. For example http://216.138.313.28:80 The DVR unit login screen will appear in your browser. Enter your DVR unit User Name, Password, Client Port, Bitrate and click login The DVR unit interface will load. -
Page 32: Appendinx 2 - Troubleshooting & Support
7 – Appendix 2 – Troubleshooting & Support 7.1 – Troubleshooting Problem Solution I have no picture 1. Check that power is on and the Power LED is lit up 2. Check the video cable is attached from the Video Output 1 on the back of the DVR to the yellow video input on your TV or monitor 3. - Page 33 Can I add more cameras? The Cocoon DVR unit accepts up to 4 cameras. You can replace any of the cameras with other cameras however there is no way to add additional channels to the DVR...
-
Page 34: Glossary Of Terms
7.1 – Troubleshooting Problem Solution Can I delete a single recording? For security reasons you cannot delete a single event. To erase any footage you must format the entire hard drive Where do I get more help? Visit www.winplus.com.au/cocoondvr for additional guides and videos or contact Technical Support on 1300 663 907 7.2 Glossary of Terms... -
Page 35: Dvr Specifications
8 - DVR Specifications Video Compression H.264 Video System NTSC/PAL Selectable Operation System Linux (embedded) Video-input /output camera 4CH input / 2CH output Audio input /output 1CH input /1CH output (RCA) Display Resolution NTSC: 720×480 @ 30fps (each ch) PAL: 720×576 @ 25fps (each ch) Views Single Camera / Quad View / Scan Record... -
Page 36: Camera Specifications
9 - Camera Specifications Image Sensor CMOS Video Quality 420 TVL Video System Infrared IR’s Night Vision Distance Up to 10m Scan Frequency 50Hz Minimum Illumination 0 Lux (IR on) Backlight Compensation Electronic Shutter 1/50~10,000 AUTO Gain Control Automatic Lens 3.6mm Viewing Angle 65 degrees... - Page 37 Notes:...
- Page 38 Notes:...
-
Page 39: Support
10 - Support For additional support including helpful guides and videos, visit the Cocoon support website at www.winplus.com.au/cocoondvr Telephone: 1300 663 907 Email: customercare@winplus.com.au Website: www.winplus.com.au 11 - Warranty Details This product is warranted against defects for a period of One year If the product is faulty, Winplus will repair or replace the product (at its discretion) at no cost to you provided the product has been used in accordance with instructions provided. - Page 40 DIGITAL VIDEO SECURITY SYSTEM...
Need help?
Do you have a question about the DVR6093 and is the answer not in the manual?
Questions and answers
I have just installed my cameras but the quality of image is very poor almost unable to see the image I go overseas tomorrow and would like to have them working correctly