
Related Manuals for Cocoon HE180040


Summary of Contents for Cocoon HE180040
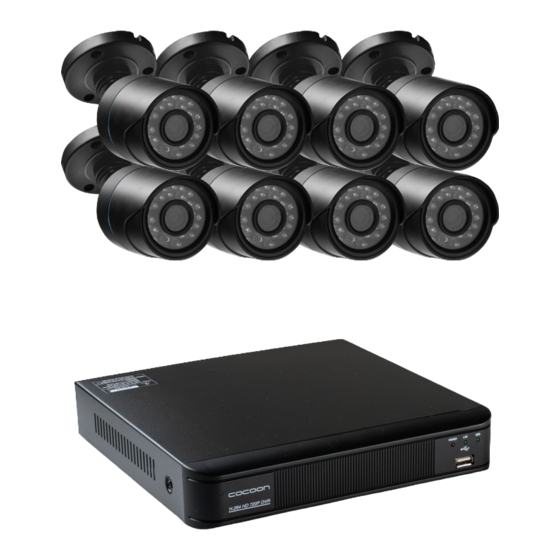
- Page 1 8 CAMERA HOME SECURITY SYSTEM WITH DVR Model Number: HE180040 INSTRUCTION MANUAL VERSION 2.0...
- Page 3 Important Getting the most out of your 8 Camera Home Security System with DVR: Read the manual It will help you set up with ease Visit www.winplus.com.au We have additional support videos and guides Call After Sales Support - 1300 663 907 Or email customercare@winplus.com.au - we’re always happy to help Warranty Note If you experience any issues with this product or its...
-
Page 4: Warranty Details
You are also entitled to have the goods repaired or replaced if the goods fail to be of acceptable quality and the failure does not amount to a major failure. AFTER SALES SUPPORT 1300 663 907 customercare@winplus.com.au YEAR WARRANTY MODEL: HE180040 PRODUCT CODE: 61059 02/2019... -
Page 5: Safety Instructions
If you think batteries might have been swallowed or placed inside any part of the body, seek immediate medical attention This DVR has been tested according to AS/NZS 60950.1 and EN 55032 After Sales Support 1300 663 907 Model Number HE180040 customercare@winplus.com.au... -
Page 6: Table Of Contents
Mobile Phone Setup 4.1 Use Apple or Android mobile to access footage 4.2 Download the Cocoon HD DVR App on your Mobile 4.3 Logging into or creating a Cocoon HD DVR Account 4.4 Adding your DVR device to the App 4.5 Navigating the App menus... - Page 7 5.3 Adding your DVR to the Cocoon HD for PC Software 5.4 Watching Footage on Cocoon HD for PC Software 5.5 PC Menu Overview 5.6 Taking a Screenshot with Cocoon HD for PC 5.7 Taking a Video with Cocoon HD for PCs Advanced Settings 6.1 Main Menu - Setup...
-
Page 8: Parts List
1 x 8 Channel Power Splitter Cable 8 x CCTV Stickers* 1 x 1m HDMI Cable 1 x 1m Ethernet Cable * Not shown 1 x Mouse 8 x Mounting Accessories for Cameras* After Sales Support 1300 663 907 Model Number HE180040 customercare@winplus.com.au... -
Page 9: Camera Specifications
1 x 3.5” SATA HDD, upgradable up to 4TB USB: 3 x USB (for mouse and backup) PTZ Control: Built-in RS485 Port Mobile Surveillance: Supports iOS & Android Input Rating: DC 12V/2A, connect to the 12V 2A adaptor After Sales Support 1300 663 907 Model Number HE180040 customercare@winplus.com.au... -
Page 10: Product Overview
6. Audio Out (RCA) 2. Video Out (BNC) 7. HDMI Port 3. VGA Port 8. USB Ports 4. Audio In (RCA) 9. RS485 Port 5. LAN Port 10. 12V Socket After Sales Support 1300 663 907 Model Number HE180040 customercare@winplus.com.au... -
Page 11: Dvr Initial Setup
NOTE: Both the DVR unit and cameras operate as soon as they are connected to a power source and the power adaptors are switched on. To turn the cameras or DVR unit off, switch off the power adaptors at the power outlet. After Sales Support 1300 663 907 Model Number HE180040 customercare@winplus.com.au... -
Page 12: Installation Location
DVR Initial Setup Cocoon DVR allows you to view footage remotely either on compatible Smartphone, Tablets or internet-ready Windows PCs. If you are wanting to set this up (instructions provided in section 4.1 Use Apple or Android mobile to access footage on page 17) you must have a constant, smooth and stable broadband internet connection via your modem/ router. -
Page 13: Dvr Operation
Before viewing footage on your monitor, smartphone or PC screen, the DVR must be fully setup and configured. Once the DVR has booted up and the start-up screen is displayed, the Cocoon DVR System will run a setup wizard to assist in setting up key features of the unit such as time &... -
Page 14: Navigating The Dvr Menu & Logging In
Press ‘Login’ You will now have access to the main menus functions which are outlined in section 6.1 Main Menu - Setup on page 25 After Sales Support 1300 663 907 Model Number HE180040 customercare@winplus.com.au... - Page 15 If you wish, you may use the space provided below to write your password, then keep this manual in a secure location. User (Device) Name:___________ (Device) Password:___________ After Sales Support 1300 663 907 Model Number HE180040 customercare@winplus.com.au...
-
Page 16: Quick Pop-Up Menu
Once you have set your username and password, your Home Security System is fully setup. To setup and view your cameras on mobile see sectionsection 4.1 Use Apple or Android mobile to access footage on page 17 or for PC see section 5.1 Cocoon HD Software for PC Use on page 21... -
Page 17: Mobile Phone Setup
On the DVR main menu, press ‘Information’ , then ‘System’ – here you will find the device ID and QR codes iOS: Using a QR code reader, scan the iOS QR code to download the app ‘Cocoon HD’ Alternatively search and download the “Cocoon HD” app in the iOS Appstore Android: Using a QR code reader, scan the Android QR code. -
Page 18: Logging Into Or Creating A Cocoon Hd Dvr Account
Mobile Phone Setup 4.3 Logging into or creating a Cocoon HD DVR Account If you don’t have a Cocoon HD DVR Account, use the ‘Register’ button and input the required fields to create one NOTE: Your DVR’s username and password cannot be used to log into the app. If you have never used the app, you will need to create a new username and password on the app. -
Page 19: Navigating The App Menus
Enter the login account of other user(s) you wish to grant access to view your footage. They must be a registered user of the Cocoon HD app. To register, they must follow the registration process outlined in section 4.3 Logging into or creating a Cocoon HD DVR Account on page 18 4.6 Viewing your DVR footage... -
Page 20: Take Screenshots (Photos) Or Video
NOTE: Your cameras will continue to capture footage and record to your DVR Videos/Photos will be saved in the media menu of the Cocoon HD App. To access the media menu, select the back arrow in the top left corner to arrive back to the “My Device” page and then click the “Media”... -
Page 21: Pc Setup
5.2 Logging into Cocoon HD for PC If you have already installed the Cocoon HD App for iOS or Android on your phone and registered an account, the same account can be used for Cocoon HD software for your PC (see section 4.3 Logging into or creating a Cocoon HD DVR Account on page 18). -
Page 22: Adding Your Dvr To The Cocoon Hd For Pc Software
If you have already added your DVR with the Cocoon HD APP for iOS or Android, then your DVR will also be shown on the software Cocoon HD for PC, and you will not be required to add it again. -
Page 23: Pc Menu Overview
Wait for the DVR to synchronize over the internet and to start streaming footage to the Cocoon HD For PC software. Once correctly paired the colour of the icon next to each camera will turn green. This may take several minutes. -
Page 24: Taking A Screenshot With Cocoon Hd For Pc
Right click the channel and select “Take a snapshot” A folder (titled ‘Cocoon HD’) will be automatically generated on your desktop with the photo(s) saved into the folder 5.7 Taking a Video with Cocoon HD for PCs While viewing the camera feed, highlight a channel by clicking on it. -
Page 25: Advanced Settings
IMPORTANT NOTE: Always click ‘Apply’ after making any changes in the menu. If you do not click ‘Apply’ , your changes will not be saved. Changing some settings will also require a system reboot. After Sales Support 1300 663 907 Model Number HE180040 customercare@winplus.com.au... -
Page 26: Live
• Exit: If you want to cancel after making any changes, click ‘Exit’ to exit the menu without changes IMPORTANT NOTE: Always click ‘Apply’ after making any changes within the menu system. If you do not click ‘Apply’ , your changes will not be saved After Sales Support 1300 663 907 Model Number HE180040 customercare@winplus.com.au... -
Page 27: Record
If unticked: When the hard drive is full, a warning message ‘The remaining space is insufficient’ will display and the DVR will stop recording Snap tab Display snapshot settings After Sales Support 1300 663 907 Model Number HE180040 customercare@winplus.com.au... -
Page 28: Schedule
NOTE: Time selected will be highlighted in blue blocks. As default, the DVR is scheduled for 24/7 motion recording, but no scheduled manual recordings PIR tab Passive infrared sensors can physically detect motion and activate recording NOTE: PIR sensors are not included After Sales Support 1300 663 907 Model Number HE180040 customercare@winplus.com.au... -
Page 29: Alarm
Configure how video loss is handled by the DVR Passive infrared sensors can physically detect motion and activate recording. NOTE: PIR sensors are not included Other Alarm Configure how other events are handled by the DVR After Sales Support 1300 663 907 Model Number HE180040 customercare@winplus.com.au... -
Page 30: Network
• FPS: Set framerate to send over the network, frame rates depend on the host and local • bandwidth • Encode: Supports VBR and CBR • Quality: Select between Higher, Medium, Low, Lower, Lowest • Max Bitrate: Set the maximum bitrate that each channel will transmit After Sales Support 1300 663 907 Model Number HE180040 customercare@winplus.com.au... - Page 31 Advanced Settings Email tab The Cocoon HD Home Security System can email you motion alerts if settings are enabled. Contact your network administrator if you do not have this information. We recommend using a webmail service such as Gmail, Yahoo etc •...
-
Page 32: Users
Advanced Settings 6.1.7 Users Configure all user settings using the following steps. Your Cocoon Home Security System can limit specific MAC addresses for additional security. Adding a new user Press the ‘Add’ button at the bottom of the User Management sub-menu... -
Page 33: Ptz
• Cruise: Press the ‘Add’ button to add cruise lines to a camera. NOTE: A maximum of 8 cruise lines can be added • Track: Set a movement track (to control the pan, tilt and zoom for PTZ Cameras After Sales Support 1300 663 907 Model Number HE180040 customercare@winplus.com.au... -
Page 34: Advanced
Search for images captured on the DVR. On the right-hand side, enter the start and end times to search, then press ‘Search’ A list of image files will be shown. Double-click on a file to view After Sales Support 1300 663 907 Model Number HE180040 customercare@winplus.com.au... -
Page 35: Main Menu - Backup
NOTE: A log file can be exported to a USB flash drive using the ‘Export’ button 6.4.4 Network Displays a list of your DVR’s current network settings. This is useful to confirm which IP address your DVR has been assigned. After Sales Support 1300 663 907 Model Number HE180040 customercare@winplus.com.au... -
Page 36: Online Users
To change between users, select the ‘Logoff’ button, then press ‘OK’ to confirm. 6.7 Main Menu - Shutdown To safely shut down the DVR, select the ‘Shut down’ button, then press ‘OK’ to confirm. After Sales Support 1300 663 907 Model Number HE180040 customercare@winplus.com.au... -
Page 37: Disposal Of Packaging
Observe any local regulations regarding the disposal of electrical consumer goods and dispose of it appropriately for recycling. Contact your local authorities for advice on recycling facilities in your area. After Sales Support 1300 663 907 Model Number HE180040 customercare@winplus.com.au... -
Page 38: Faqs
Can I add more cameras? The Cocoon DVR Unit accepts up to 8 cameras. You can replace any of the cameras with other cameras, however there is no way to add additional channels to... - Page 39 Can I add a bigger hard drive? Yes, the Cocoon DVR Unit accepts HDD’s up to 4TB in size. If you are unfamiliar with hard drives and changing computer components, we strongly suggest you consult a professional.
-
Page 40: Glossary Of Terms
PTZ Control Some higher end cameras are equipped with PTZ or Pan / Tilt / Zoom functionality. When connected to the DVR, the DVR can be used to control the camera After Sales Support 1300 663 907 Model Number HE180040 customercare@winplus.com.au... - Page 41 After Sales Support 1300 663 907 Model Number HE180040 customercare@winplus.com.au...
-
Page 42: Repair And Refurbished Goods Or Parts Notice
Please telephone us on 1300 663 907 or write to us at: Winplus Australasia PO Box 537 Bayswater Business Centre, Victoria, Australia 1300 663 907 - Hours: Mon-Fri 8:30am - 6:00pm AEST customercare@winplus.com.au AFTER SALES SUPPORT 1300 663 907 customercare@winplus.com.au YEAR WARRANTY MODEL: HE180040 PRODUCT CODE: 61059 02/2019...
Need help?
Do you have a question about the HE180040 and is the answer not in the manual?
Questions and answers