Table of Contents
Advertisement
Quick Links
Advertisement
Table of Contents

Subscribe to Our Youtube Channel
Related Manuals for Powerline BSG10X


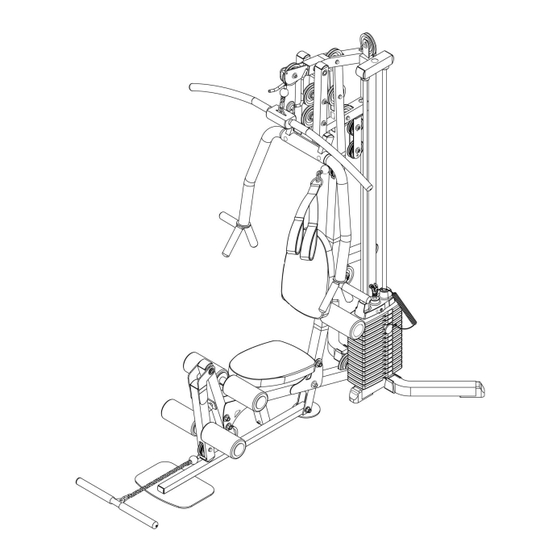
Summary of Contents for Powerline BSG10X
- Page 1 BSG10X O w n e r ’ S M a n u a l...
-
Page 2: Before You Begin
BefOre YOu BeGin Thank you for purchasing the Powerline BSG10X. This gym is part of the Powerline line of quality strength training machines, which let you target specific muscle groups to achieve better muscle tone and overall body conditioning. To maximize your use of the equipment please study this Owner’s Manual thoroughly. -
Page 3: Important Safety Instructions
Forest Park, IL 60130 USA damaged the equipment. • Assemble and operate the BSG10X on a solid, level surface. Locate the unit a few feet from the walls or Retain this Owner’s Manual for future furniture to provide easy access. -
Page 4: Safety Guidelines
SafetY GuidelineS Successful resistance training programs have one prominent feature in common...safety. Resistance training has some inherent dangers, as do all physical activities. The chance of injury can be greatly reduced or completely removed by using correct lifting techniques, proper breathing, maintaining equipment in good working condition, and by wearing the appropriate clothing. -
Page 5: Assembly Tips
Assembly of the BSG10X takes professional installers about 2 hours to complete. If this is the first time you have assembled this type of equipment, plan on significantly more time. rofessional installers are highly recommended However, if you acquire the appropriate tools, obtain assistance, and follow the assembly steps se- quentially, the process will take time, but is fairly easy. - Page 6 S t e p Be careful to assemble all components in the sequence they are presented. nOte: finger tighten all hardware in this step. • Be careful to not remove the shipping straps holding the lower frame against the main upright. Stand the gym upright being careful to prevent the gym from falling over until Rear Leg (B) is attached.
- Page 7 S T E P S t e p S T E P Above shows STEP 1 assembled and completed.
- Page 8 S t e p Be careful to assemble all components in the sequence they are presented. nOte: finger tighten all hardware in this step. Secure the lower frame to Main Frame (A) by using: Two 75 (3/8” x 3” hex head bolt)* Four 56 (3/8”...
- Page 9 S T E P S T E P S t e p Above shows STEP 2 assembled and completed.
- Page 10 S t e p Be careful to assemble all components in the sequence they are presented. Install Press Arms (J) and (K) into Press Arm Frame and secure using: Two 73 (3/8” x 2 1/2” carriage bolt) Two 56 (3/8” washer) Two 63 (3/8”...
- Page 11 S T E P S t e p S T E P Above shows STEP 3 assembled and completed.
- Page 12 S t e p Be careful to assemble all components in the sequence they are presented. Install chrome Guide Rods (F) into lower Main Frame (A) and Rear Leg (B) as shown in the diagram. Slide two Rubber Donuts (28) onto each chrome Guide Rod (F). Tilt Guide Rods (F) away from Main Frame (A) and install weight plates (46).
- Page 13 S T E P S t e p S T E P Above shows STEP 4 assembled and completed.
- Page 14 S t e p Be careful to assemble all components in the sequence they are presented. Install pre-assembled Seat Assembly (Q) and Back Rest Assembly (Q) into adjustment sockets. Install Safety Catch Bolts (65) and Spring Lock Washers (57) into ends of brackets. Turn the two locking T-Shaped Pop Pins (10) to secure the seat or back rest after positioned.
- Page 15 S T E P S T E P S t e p Above shows STEP 5 assembled and completed.
- Page 16 S t e p Be careful to assemble all components in the sequence they are presented. Install one Foam Roller (25) onto Foam Roller Bar (1) using a Plastic Washer (26) and Plastic End Cap (27) as shown. Do this three times: onto one side of each of the three Foam Roller Bars (1). Slide (partially assembled) Foam Rollers Bar (1) into holes in Main Frame (A) under Back Pad (Q), in front of Seat Pad (Q) and into the lower hole in the leg extension.
- Page 17 S T E P S t e p S T E P Above shows STEP 6 assembled and completed.
- Page 18 iMpOrtant SafetY inStructiOnS Be sure that all users carefully read and understand all warning, safety and maintenance labels on the machine before each use. Failure to do so may result in serious injury. It is imperative that you retain this Owner’s Manual and be sure all warning labels are legible and intact.
- Page 19 Warning Safety and Maintenance of Cables Although Powerline Equipment provides the highest quality of materi- als and workmanship in its products, the fact remains that component parts eventually wear out over time and with use. This is particularly true with reference to pliable moving parts such as cables.
- Page 20 Routine inspection and maintenance is of critical impor- tance to ensure the maximum safety and performance of the BSG10X. Powerline Equipment uses the highest qual- NUTS/BOLTS/FASTENERS: ity materials available, but wear is inevitable. Therefore, l Periodically inspect all nuts and bolts.
Need help?
Do you have a question about the BSG10X and is the answer not in the manual?
Questions and answers