Table of Contents
Advertisement
WARNING: If the information in this manual is
not followed exactly, fire or explosion may result
causing property damage, personal injury or loss
of life.
Do not store or use gasoline or other flammable
vapors and liquids in the vicinity of this or any
other appliance.
WHAT TO DO IF YOU SMELL GAS:
∗
Do not try to light any appliance.
∗
Do not touch any electrical switch; do not use
any phone in your building.
∗
Immediately call your gas supplier from a
neighbor's phone. Follow the gas supplier's
instructions.
∗
If you cannot reach your gas supplier, call the
fire department.
Installation and service must be performed by a
qualified installer, service agency or the gas
supplier.
Installer: Please leave this manual with the appliance owner for future reference
Optima/ag3600
Optima/ag3600
For use with natural gas or propane*
U
SERS'
O
PERATION AND
M
AINTENANCE
This appliance may be installed in an
a f t e r m a r k e t
manufactured home (USA only) or mobile
home, where not prohibited by local codes.
This appliance is only for use with the type
of gas indicated on the rating plate. This
appliance is not convertible for use with
other gases, unless a certified kit is used.
*Conversion kit required for Propane use
7116 Beatty Dr
Mission, BC V2V 6B4
Canada
Direct Vented
Top or Rear Vent
Gas Room Heater
I
NSTALLATION
p e r m a n e n t l y
M
ANUAL
l o c a t e d ,
200-0217
December 2006
Serial # 6040 forward
Advertisement
Table of Contents

Related Manuals for Archgard Optima


Summary of Contents for Archgard Optima
- Page 1 Optima/ag3600 Optima/ag3600 Direct Vented Top or Rear Vent Gas Room Heater For use with natural gas or propane* WARNING: If the information in this manual is not followed exactly, fire or explosion may result SERS’ NSTALLATION causing property damage, personal injury or loss of life.
- Page 2 Optima/ag 3600 This appliance conforms to CMR 248 3.00—10.00 MA Code - C O Detector 5.08: Modifications to NFPA-54, Chapter 10 (2) Revise 10.8.3 by adding the following additional requirements: (a) For all side wall horizontally vented gas fueled equipment installed in every dwelling, building or structure used in whole or in part for residential purposes, includ-...
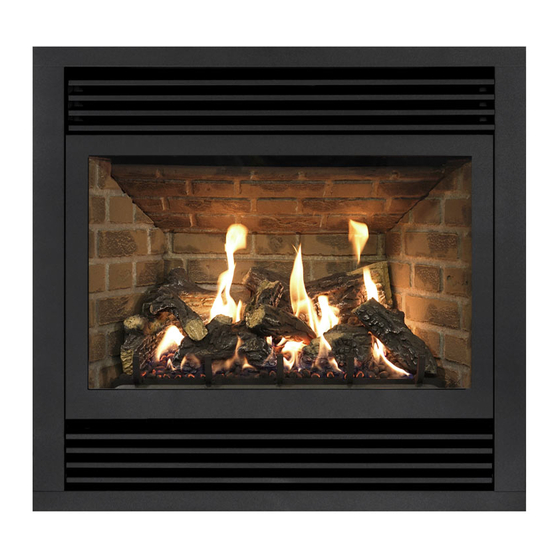
- Page 3 Thank you for purchasing the Optima/AG3600 Zero Clearance Direct Vented Fireplace Gas Heater. The Optima/AG3600 is one of the most advanced direct vented zero clearance gas heaters on the market. It is designed using the latest technology and manufactured to the highest quality.
-
Page 4: Table Of Contents
Venting - Rear Vent Venting - Top Vent Horizontal Venting Instructions Vertical Venting Instructions Operation Instructions - Safety Information Operation Instructions - Start Up & Shut Down Procedures Maintenance Troubleshooting Servicing Important Information Replacement Parts List Archgard Warranty Warranty Registration Card... -
Page 5: Caution & Safety Information
This gas appliance must not be connected to a chimney flue serving a separate solid fuel burning appliance. FOR YOUR SAFETY - Do not install or operate your Archgard Optima/AG3600 Direct Vent Gas Fireplace without reading and understanding this manual. Any installation or operational deviation from this instruction manual voids the Archgard Industries Warranty and may prove hazardous. -
Page 6: General Information
This appliance is tested and certified to the following US and Canadian gas appliance standards. - ANSI Z21.88b-2003 / CSA 2.33b-2003 Vented Gas Fireplace Heaters, - CAN/CGA-2.17-M91 Gas-Fired Appliance fo Use at High Altitudes Please contact Archgard Industries Ltd., if you have any questions regarding the certification of this appliance. INSTALLATION CODES This appliance must be installed by a qualified gas appliance installer. -
Page 7: Appliance Dimensions
Optima/ag 3600 APPLIANCE DIMENSIONS... -
Page 8: Installation Clearances
Optima/ag 3600 INSTALLATION CLEARANCES MANTLE & SIDEWALL CLEARANCES CORNER FRAME DIMENSIONS Mantle Height from Floor (B) Mantle Depth (A) 40" (1016 mm) 12" (305 mm) 39" (991 mm) 10-5/16" (262 mm) 38" (965 mm) 8-9/16" (217 mm) 37" (940 mm) 6-7/8"... -
Page 9: Electrical Connections, Fan System
WARNING: Before starting, make certain the power supply is turned OFF. The Optima/AG3600 comes complete with a temperature activated fan and rheostat installed and wired to an internal junction box. The heat sensor is factory set to close the circuit to the... -
Page 10: Glass Door Removal
❖ If the glass door is damaged, it must be replaced with another glass door certified for this ❖ appliance. Replacement glass doors are available through your Archgard dealer (See Replacement ❖ Parts page 36) Replacing the Glass Door Check the condition of the glass and the gasket before installing door. -
Page 11: Log Placement
3600 LOG PLACEMENT The Archgard pan burner and fiber logs are designed to give a realistic fire package, and are created to maintain their appearance from the day they were originally installed. Care must be given when first installing the logs and when removed for servicing, as they can be damaged or broken if not handled properly. - Page 12 Optima/ag 3600 LOG PLACEMENT - CONTINUED STEP 1 - PLACE REAR LOG (#146) ON PINS AND BURNER AS SHOWN STEP 2 - PLACE LEFT LOG (#144) ON PIN AND LOG AS SHOWN...
- Page 13 Optima/ag 3600 LOG PLACEMENT - CONTINUED STEP 3 - PLACE FRONT LOG (#147) ON PINS AND BURNER AS SHOWN STEP 4 - PLACE RIGHT LOG (#145) ON PIN AND LOGS AS SHOWN...
- Page 14 Optima/ag 3600 LOG PLACEMENT - CONTINUED STEP 5 - PLACE RIGHT LOG (#148) AND EMBERS AS SHOWN STEP 6 - PLATINUM EMBERS SHOULD BE PLACED ON BURNER AS SHOWN...
-
Page 15: Installation Instructions
Optima/ag 3600 INSTALLATION INSTRUCTIONS PRECAUTIONS This appliance must be installed by a qualified gas installer and the installation conform to ❖ the installation codes. This appliance needs fresh air for safe operation and must be installed so there are ❖... - Page 16 Optima/ag 3600 INSTALLATION INSTRUCTIONS GAS CONNECTIONS Before connecting the appliance to the gas supply line, double check that the appliance you have purchased is designed for the gas type you are using. The gas type markings are located on the certification label and also on the appliance’s gas valve.
- Page 17 Optima/ag 3600 INSTALLATION INSTRUCTIONS CHECKING & ADJUSTING PILOT pilot flame should have Thermocouple characteristic as shown in the illustration Electrode to the right. The flame should not have yellow tips should engulf thermocouple and thermopile. It can be adjusted be turning the screw marked Thermopile “pilot”...
-
Page 18: Optional Wall Switch Or Thermostat
3600 OPTIONAL WALL SWITCH OR THERMOSTAT If a wall mounted switch or a wall mounted thermostat is desired, Archgard recommends that the device be wired as shown in Fig 1. This will allow the original on/off rocker switch to be used incase the device that is mounted to the wall is inoperable. -
Page 19: Top / Rear Vent Conversion
Optima/ag 3600 TOP / REAR VENT CONVERSION The appliance is easily converted from top vent to rear vent. The steps for converting are as follows: 1. Remove the top vent outer shell cover (#1) 2. Remove the top vent heat shield cover (#2) 3. -
Page 20: Allowable Termination Locations
Optima/ag 3600 ALLOWABLE TERMINATION LOCATIONS... -
Page 21: Approved Vent Components
The appliance will not function without being connected to a proper venting system. This appliance may only use direct vent system supplied by Archgard Industries or Simpson Dura- Vent direct vent systems with the appropriate adaptor dependent upon the venting guidelines within this manual. -
Page 22: Venting Components - Parts List
ARCHGARD VENTING COMPONENTS PART # DESCRIPTION TVK-1 Archgard Flex Vent Kit with 36” (914 mm) vent length (includes TK-1) TVK-2 Archgard Flex Vent Kit with 60” (1.52 M) vent length (includes TK-1) TVK-10 Archgard Flex Vent Kit with 120” (3.05 M) vent length (includes TK-1) - Page 23 Optima/ag 3600 SELKIRK PARTS LIST PART # DESCRIPTION 4" x 6 " LENGTHS 1604006 4DT- 6 DIRECT-TEMP 6" PIPE LENGTH 1604006B 4DT- 6B DIRECT-TEMP 6" PIPE LENGTH BLACK 1604009 4DT- 9 DIRECT-TEMP 9" PIPE LENGTH 1604009B 4DT- 9B DIRECT-TEMP 9" PIPE LENGTH BLACK...
-
Page 24: Venting - Rear Vent
This appliance will not function without being connected to a proper venting system. This appliance may use 4" & 7" gas flex vents with Optima/AG3600 listed vent components, Selkirk (Direct-Temp) 4” x 6 ⅝” venting or Simpson Dura-Vent 4" x 6 ⅝"... -
Page 25: Venting - Top Vent
This appliance will not function without being connected to a proper venting system. This appliance may use 4" & 7" gas flex vents with Optima/AG3600 listed vent components, Selkirk (Direct-Temp) 4” x 6⅝”” venting or Simpson Dura-Vent 4" x 6⅝"... -
Page 26: Horizontal Venting Instructions
Optima/ag 3600 INSTALLATION INSTRUCTIONS TOP VENT HORIZONTAL VENTING Example 1 V Value = 3A (12') = 12' H Value = 4B (8') + 1C (3') = 11' V Value = Total length of all vertical sections in feet. H Value = Total length of all horizontal sections in feet. -
Page 27: Vertical Venting Instructions
Optima/ag 3600 INSTALLATION INSTRUCTIONS Example 1 TOP VENT VERTICAL VENTING V Value = 3A (12') + 1C (3') = 15' H Value = 2B (4') =4' V Value = Total length of all vertical sections in feet. H Value = Total length of all horizontal sections in feet. -
Page 28: Operation Instructions - Safety Information
Optima/ag 3600 OPERATION INSTRUCTIONS FOR YOUR SAFETY, READ BEFORE LIGHTING INITIAL OPERATION ❖ Check that the appliance is properly vented and connected to the gas supply. Check the logs and branches are properly placed. ❖ Check all external parts, such as grills, door and control cover are properly attached and fastened. -
Page 29: Operation Instructions - Start Up & Shut Down Procedures
Optima/ag 3600 OPERATION INSTRUCTIONS START-UP PROCEDURE Set the thermostat, if present, to the lowest level. Set the remote switch to the OFF position. Set the flame adjustment knob to the HI position. Press slightly and turn the control knob clockwise to the OFF position and wait 5 minutes;... -
Page 30: Maintenance
Optima/ag 3600 MAINTENANCE CAUTION: Do not conduct maintenance on the appliance while it is operating or while hot CLEANING THE APPLIANCE The exterior surfaces and glass may be cleaned with a soft, non-abrasive cloth and water or a suitable, mild, non-abrasive cleaner. -
Page 31: Troubleshooting
Optima/ag 3600 TROUBLESHOOTING Please check to make sure the instructions are followed exactly before attempting trouble shooting of the appliance. WARNING: Troubleshooting and servicing of gas and electrical devices of the appliance should only be conducted by a qualified service technician. - Page 32 Optima/ag 3600 TROUBLESHOOTING SYMPTOM ACTION The main burner does not turn 3. Check to make sure the thermostat is set high enough to turn on the on with the pilot lit. (cont’d) appliance. 4. Check that the remote switch or the thermostat is turned on.
-
Page 33: Servicing
SERVICING SERVICING UNDER WARRANTY Before servicing, read the terms and conditions of the Archgard warranty at the back of the manual. Contact the authorized Archgard dealer which you purchased the appliance from and provide them with details of the problem and the installation information that the installer filled out at the back of the manual. - Page 34 Optima/ag 3600 SERVICING REPLACING MAJOR GAS COMPONENTS If any of the major gas components need to be replaced, such as the pilot or the gas valve, we recommend replacing the complete gas component assembly. The assembly is designed to be quickly and easily replaced with minimal inconvenience to the customer.
-
Page 35: Important Information
Optima/ag 3600 IMPORTANT INFORMATION * Please have the installer fill out the installation information for warranty and future reference. APPLIANCE ODV-3600 Top / Rear MODEL NUMBER SERIAL NUMBER NATURAL GAS SIT 820 Nova GAS TYPE VALVE TYPE DATE PURCHASED OWNER... -
Page 36: Replacement Parts List
LOCA- Part # Description Unit TION 200-0217 OWNER’S MANUAL, OPTIMA/AG3600 DVT / DVR 301-0077 ORIFICE, MALE #54 for PROPANE - DRILL TO #54 301-0077 ORIFICE, MALE #43 for NATURAL GAS - DRILL TO #43 307-0056 GLASS, CERAMIC (22 ⅜" x 33 ⅛") - Page 37 Optima/ag 3600 REPLACEMENT PARTS BURNER ORIFICE BURNER PAN...
-
Page 38: Archgard Warranty
This Limited Warranty is made by ARCHGARD INDUSTRIES LTD., hereinafter referred to as “Archgard”. Archgard warrants to the original purchaser of an Archgard gas burning fireplace (s) that the product will be free of defects in materials and workmanship under normal use and service, for a “lifetime”. -
Page 40: Warranty Registration Card
POSTAGE WARRANTY REGISTRATION RCHGARD NDUSTRIES 7116 BEATTY DRIVE MISSION, B.C. CANADA V2V 6B4 FOLD DOWN AT LINE FOLD DOWN AT LINE & TAPE CLOSED ODV - 3600 Model # : Serial #: Date Installed: yyyy Name: Address: City: State/Prov: ZIP: Phone: ( _____ ) Dealer's Name &... - Page 42 Archgard Industries Ltd. 7116 Beatty Drive Mission, B.C. V2V 6B4 Canada Telephone: (604) 820 - 8262 Fax: (604) 820 - 8881 Telephone Toll Free: 1 - 877 - 820 - 9800 Fax Toll Free: 1 - 866 - 820 - 2802...
Need help?
Do you have a question about the Optima and is the answer not in the manual?
Questions and answers