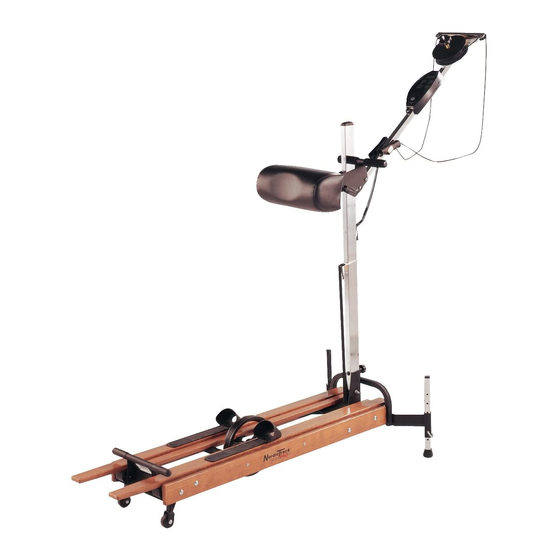
NordicTrack Classic Pro User Manual
Exerciser
Hide thumbs
Also See for Classic Pro:
- User manual (20 pages) ,
- User manual (16 pages) ,
- User manual (20 pages)
Advertisement
Table of Contents
- 1 Table of Contents
- 2 Important Precautions
- 3 Before You Begin
- 4 Assembly
- 5 How to Adjust the Ski Exerciser
- 6 How to Use the Ski Exerciser
- 7 Maintenance and Storage
- 8 Trouble-Shooting
- 9 Conditioning Guidelines
- 10 Part List
- 11 Exploded Drawing
- 12 How to Order Replacement Parts
- 13 Limited Warranty
- Download this manual
Model No. NTCCXC80180
QUESTIONS?
As a manufacturer, we are com-
mitted to providing complete
customer satisfaction. If you have
questions, or if parts are missing
or damaged, we will guarantee
complete satisfaction through
direct assistance from our factory.
TO AVOID UNNECESSARY
DELAYS, PLEASE CALL DIRECT
TO OUR CUSTOMER SERVICE
DEPARTMENT. The trained techni-
cians on our customer hot line
will provide immediate assistance,
free of charge to you.
CUSTOMER SERVICE
DEPARTMENT:
1-888-936-4266
Mon.–Fri., 8:00 am–6:30 pm;
Eastern Standard Time
(excluding holidays)
CAUTION
Read all precautions and instruc-
tions in this manual before using
this equipment. Save this manual
for future reference.
U
SER'S
Visit our website at
www.nordictrack.com
new products, prizes,
fitness tips, and much more!
M
ANUAL
Advertisement
Table of Contents

Related Manuals for NordicTrack Classic Pro


Summary of Contents for NordicTrack Classic Pro
- Page 1 Mon.–Fri., 8:00 am–6:30 pm; Eastern Standard Time (excluding holidays) CAUTION Visit our website at Read all precautions and instruc- www.nordictrack.com tions in this manual before using this equipment. Save this manual new products, prizes, for future reference. fitness tips, and much more!
-
Page 2: Table Of Contents
ICON assumes no responsibility for personal injury or property damage sustained by or through the use of this product. SAVE THESE INSTRUCTIONS ® NordicTrack is a registered trademark of ICON Health & Fitness, Inc. -
Page 3: Before You Begin
BEFORE YOU BEGIN Thank you for selecting the innovative NordicTrack ® country ski exerciser. If you have additional ques- CLASSIC PRO cross-country ski exerciser. Cross- tions, please call our Customer Service Department country skiing is one of the most effective exercises for... -
Page 4: Assembly
SSEMBLY Place all parts of the ski exerciser in a cleared area and remove the packing materials; do not dispose of the packing materials until assembly is completed. Assembly requires only the included flat wrench tool. 1. Align the holes in the Leg Bracket (2) with the holes in the Front Frame (1). - Page 5 4. Lift the Upper body Arm (27) into position as shown. Be sure the Snap Buttons (40) are fully extended and locked into position on both sides of the Hip Pad Slide (42). 5. The Console (66) requires two “AA” batteries (not includ- ed).
-
Page 6: How To Adjust The Ski Exerciser
OW TO DJUST THE XERCISER HOW TO ADJUST THE RESISTANCE OF THE SKIS For greater adjustments To vary the intensity of your exercise, the amount of in the cord leg resistance can easily be adjusted by moving the length, one resistance clamp on the upright. - Page 7 DESCRIPTION OF THE CONSOLE 2. To use the pulse mode, the pulse The console has five independent displays to provide monitor must be Pulse continuous exercise feedback. The displays are worn. Plug the pulse Monitor described below. monitor into the jack on the bottom of the console.
-
Page 8: How To Use The Ski Exerciser
OW TO SE THE XERCISER range of motion for your stride. Increase the leg resistance if you slide away from the hip pad. As you exercise, you may want to increase or Arm Cord decrease your stride depending on your comfort level. -
Page 9: Maintenance And Storage
AINTENANCE TORAGE Inspect and tighten all parts each time you use the ski 4. Wipe any excess oil away from the area around the exerciser. Resistance Pad. Tighten the Resistance Knob. CLEANING THE SKI EXERCISER Inspect the bottom of the Pulley. If the resistance disk (located above the Resistance Pad) has grooves worn Wipe your ski exerciser with a clean, dry cloth after into it, it may be necessary to replace it. - Page 10 9. Slide the resistance strap back onto the flywheel. 1. Remove the batteries from the console. Note: If the resistance strap is frayed on both sides, it may be necessary to replace it. See the back 2. Slide the resistance strap off the flywheel. cover of this manual for information on how to order replacement parts.
-
Page 11: Trouble-Shooting
ROUBLE-SHOOTING Most ski exerciser problems can be solved by following the steps below. Find the problem that applies, and follow the steps listed. If further assistance is needed, please call our Customer Service toll-free at 1-888-936-4266, Monday–Friday, 8:00 am–6:30 pm Eastern Standard Time (excluding holidays). Department. - Page 12 b. Roughen the surface of the resistance pad with 100-grit sandpaper. Oil the leather resistance pad with one or two drops of light household oil. Spread the oil over the resistance pad. c. Oil the 3/8” washers and the thrust washer if needed. PROBLEM: The flywheel and/or the resistance strap offers no resistance.
-
Page 13: Conditioning Guidelines
ONDITIONING UIDELINES The following guidelines will help you to plan your your goal is to burn fat, adjust the intensity of your exercise program. Remember that proper nutrition and exercise until your heart rate is near the lowest num- adequate rest are essential for successful results. ber in your training zone as you exercise. - Page 14 SUGGESTED STRETCHES The correct form for several basic stretches is shown at the right. Move slowly as you stretch—never bounce. 1. Toe Touch Stretch Stand with your knees bent slightly and slowly bend forward from your hips. Allow your back and shoulders to relax as you reach down toward your toes as far as possible.
- Page 15 NOTES...
-
Page 17: Exploded Drawing
—M NTCCXC80180 XPLODED RAWING ODEL R0100A... - Page 18 CUSTOMER RECORD Model No.: Serial No.: Retailer Name: Purchase Date: Retailer Address:...
-
Page 19: How To Order Replacement Parts
• The MODEL NUMBER of the product (NTCCXC80180) ® • The NAME of the product (NordicTrack CLASSIC PRO cross-country ski exerciser) • The KEY NUMBER and DESCRIPTION of the part(s) on page 16 of this manual. -
Page 20: Limited Warranty
WHAT IS COVERED—The entire NordicTrack ® CLASSIC PRO cross-country ski exerciser (“Product”) is warranted to be free of all defects in material and workmanship. WHO IS COVERED—The original purchaser or any person receiving the Product as a gift from the origi- nal purchaser.
Need help?
Do you have a question about the Classic Pro and is the answer not in the manual?
Questions and answers