Curtis TLP Service Manual
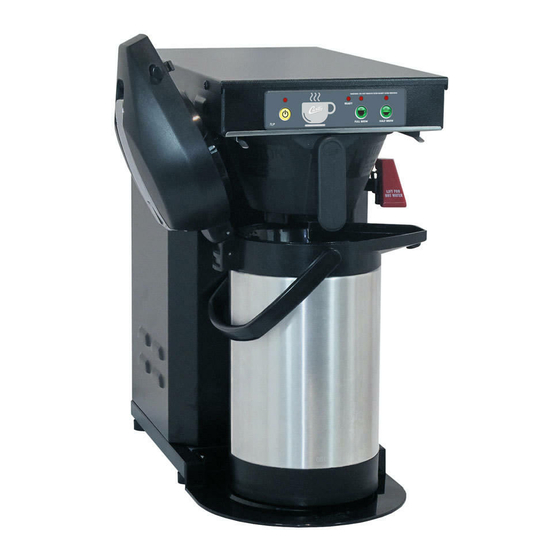
Tlp brewer
Hide thumbs
Also See for TLP:
- Specification sheet (2 pages) ,
- User manual (25 pages) ,
- Diagnostics manual (28 pages)
Advertisement
MODEL
• TLP
CAUTION: Please use
this setup procedure
before attempting to use
this brewer. Failure to
follow the instructions can result
in injury or the voiding of the
warranty.
CAUTION: DO NOT
connect this brewer to hot
water. The inlet valve is
not rated for hot water.
IMPORTANT: This equip-
ment is to be installed
to comply with the
applicable federal, state,
or local plumbing and electrical
codes having jurisdiction.
WARNING: To avoid
scalding, do NOT remove
brew cone while brew
indicator light is flashing.
IMPORTANT: The
brewcycle is adjusted
at the factory to fill a
standard 2.5 liter airpot with 2.2
liters of brewed coffee. The dura-
tion of the brewcycle is set from 3
to 4 minutes.
C
ISO 9001:2008 REGISTERED
WILBUR CURTIS CO., INC.
6913 West Acco Street
Montebello, CA 90640-5403
For the latest information go to
www.wilburcurtis.com
Tel: 800-421-6150
Fax: 323-837-2410
Service Manual – TLP Brewer
Important Safeguards/Symbols
This equipment is designed for commercial use. Any servicing other than cleaning and routine maintenance should be
performed by an authorized Wilbur Curtis Company Service Technician.
• DO NOT immerse the unit in water or any other liquid
• To reduce the risk of fire or electric shock, DO NOT open service panels. There are no user serviceable parts
inside.
• Keep hands and other items away from hot areas of the unit during operation.
• Never clean with scouring powders or harsh chemicals.
Symbols
WARNINGS – To help avoid personal injury
Important Notes/Cautions – from the factory
Sanitation Requirements
System Requirements
•
Water Source: 20 ‑ 100 PSI. Must have a Minimum Flow Rate of 1/2 GPM (preferred flow rate is 1 gpm).
•
Electrical: See attached schematic for your model.
Setup Steps
1. The unit should be level (left to right ‑ front to back), on a secure surface.
2. Connect the water line to the water inlet fitting on the rear of the unit. Water volume flow to the machine should be
consistent. Use tubing sized sufficiently to provide a minimum flow rate of one gallon per minute.
NSF International requires the following water connection:
1. A quick disconnect or additional coiled tubing (at least 2x the depth of the unit) is required so that the unit
can be moved for cleaning.
2. This unit must be installed with adequate backflow protection to comply with applicable federal, state and
local codes.
3. Water pipe connections and fixtures directly connected to a potable water supply shall be sized, installed
and maintained in accordance with federal, state, and local codes.
3. Connect the unit to electrical outlet with appropriate amperage rating (see serial tag on machine). Once power has been
supplied to the unit, flip the toggle switch to the 'ON' position (located on the rear of the unit), the water tank will begin to
fill. When the water level in the tank reaches the probe, the heating element will turn on.
4. Turn on the control panel by pressing the ON/OFF button.
5. The heating tank will require 20 to 30 minutes to reach operating temperature (200°F). The READY‑TO‑BREW light will
come on.
6. Prior to brewing, dispense 12 ounces of hot water through the hot water faucet.
7. Run brew cycle of at least 16 ounces to purge the water line of any air trapped in the lines after filling.
Brewing Coffee
1. Place a clean, empty air-
2. Place a new filter into
pot in position, centered
under the brew cone.
For the latest specifications and information go to www.wilburcurtis.com
W
C
C
ilbur
urtis
ompany
3. Slide the brewcone into
the brewcone. Pour the
position on brew rails.
proper amount of ground
coffee into the filter.
, i
.
nC
4. Press the BREW button.
The indicator light above
the selected brew button
will flash during the brew-
cycle.
1
Advertisement
Table of Contents

Related Manuals for Curtis TLP


Summary of Contents for Curtis TLP
- Page 1 Important Safeguards/Symbols This equipment is designed for commercial use. Any servicing other than cleaning and routine maintenance should be performed by an authorized Wilbur Curtis Company Service Technician. • DO NOT immerse the unit in water or any other liquid •...
-
Page 2: Temperature Table
Changing the TLP Program CAUTION: These steps involve working with The TLP features a dynamic memory. In the event of a power loss, it will remember ALL program settings. hot water. Avoid against splashing and spilling. Brew Temperature – Factory Pre‑Set to 200°F Function to set brew temperature, 170°... -
Page 3: Pulse Brew
Brew Volume - Factory Pre-set Full Brew to 2.2 Liters When setting the brew volume, place an empty airpot under the brewcone to determine volume level. The factory default for the Half Brew but- ton is half the brew volume of the Full Brew button. The brew volume of the Half Brew button can be set independently (see Half Brew Volume below). -
Page 4: Error Codes
Occasionally, an error reported may be a problem with the water supply or electrical power; NOT directly associated with a fault of the Curtis system itself. An example of this includes a clogged water filter — indicated by a water level error code. -
Page 5: Parts Diagrams
PARTS DIAGRAMS... -
Page 6: Electrical Schematic
ELECTRICAL SCHEMATIC... -
Page 7: Cleaning The Coffee Brewer
Cleaning the Coffee Brewer Regular cleaning and preventive maintenance is essential in keeping your coffee brewer looking and working like new. CAUTION – Do not use cleansers, bleach liquids, powders or any other substance containing chlorine. These products promote corrosion and will pit the stainless steel. USE OF THESE PRODUCTS WILL VOID THE WARRANTY. -
Page 8: Product Warranty Information
Curtis equipment that have not been purchased from the Wilbur Curtis Company, Inc. The Wilbur Curtis Company will not accept any responsibility if the following conditions are not met. The warranty does not cover and is void under the following circumstances: 1) Improper operation of equipment: The equipment must be used for its designed and intended purpose and function.
Need help?
Do you have a question about the TLP and is the answer not in the manual?
Questions and answers