Table of Contents
Advertisement
Quick Links
Models Included
u TPC2S
CAUTION: Please
use this setup proce-
dure before attempt-
ing to use this brewer. Failure
to follow the instructions can
result in injury or the voiding of
the warranty.
IMPORTANT
Equipment to be
installed to comply
with applicable federal, state,
or local plumbing/electrical
codes having jurisdiction
.
CAUTION: DO NOT
connect this brewer
to hot water. The
inlet valve is not rated for hot
water.
ISO 9001:2008 REGISTERED
WILBUR CURTIS CO., INC.
6913 West Acco Street
Montebello, CA 90640-5403
For the latest information go to
www.wilburcurtis.com
Tel: 800-421-6150
Fax: 323-837-2410
W
ilbur
Service Manual, Milano Single Head Coffee Brewer
Important Safeguards & Symbols
This equipment is designed for commercial use. Any servicing other than cleaning and routine maintenance should be
performed by an authorized Wilbur Curtis Company service technician.
•
DO NOT immerse the unit in water or any other liquid
•
To reduce the risk of fire or electric shock, DO NOT open service panels. There are no user serviceable parts inside.
•
Keep hands and other items away from hot areas of the unit during operation.
•
Never clean with scouring powders or harsh chemicals.
Symbols
WARNINGS – To help avoid personal injury
Important Notes/Cautions – from the factory
Sanitation Requirements
The Curtis Milano Brewer is Factory Pre-Set and Ready to Go... Right from the Carton.
Following are the Factory Settings for your Coffee Brewing System:
• Brew Temperature = 200°F
• Brew Volume = Set to Vessel Requirement.
System Requirements:
• Water Source 20 – 90 PSI (Minimum Flow Rate of 1 GPM)
• Electrical: See attached schematic for standard model or visit www.wilburcurtis.com for your model.
SETUP STEPS
The unit should be level (left to right and front to back), located on a solid counter top. Connect a water line from the
water filter to the brewer.
NOTE: A water filtration system must be used to help maintain trouble-free operation. Air must be purged from the car-
tridge prior to connection to equipment. In areas with extremely hard water, we highly recommend the use of a Curtis
approved water filter. For our full line of filters, please log on to www.wilburcurtis.com.
NSF International requires the following water connection:
1. A quick disconnect or additional coiled tubing (at least 2x the depth of the unit) so that the machine can be
moved for cleaning underneath the unit.
2. This equipment is to be installed with adequate back flow protection to comply with applicable federal, state
and local codes.
3. Water pipe connections and fixtures directly connected to a potable water supply shall be sized, installed and
maintained in accordance with federal, state, and local codes.
1. A 3/8" NPT x 3/8" Flare elbow has been supplied for water line connection. Use tubing sized sufficiently to provide a
minimum of 1.0 GPM.
2. To hookup the InterLock grinder, Locate the jack labeled "Class 2 Wiring Only" on brewer and grinder. Connect the two
with the cable plug.
3. Connect the unit to an appropriate electrical power circuit.
4. Turn on the toggle (STANDBY/ON) switch behind the unit. The heating tank will start to fill. When the water level in
the tank rises to the correct volume, the heating elements will energize automatically. With the G4 system there is no
danger of element burnout
5. The heating tank will require 20 to 30 minutes to reach operating temperature (200°F). You will be notified when
READY-TO-BREW appears on the control panel LCD screen.
6. Prior to brewing, dispense 12 ounces of hot water through the hot water faucet.
7. Brew a cycle of at least 12 ounces, to purge the water lines of any air that may be trapped after filling.
FOR THE LATEST SPECIFICATIONS AND INFORMATION GO TO WWW.WILBURCURTIS.COM
C
C
urtis
caused by an empty tank.
, i
ompany
nC
• Water Bypass = On for LARGE & MEDIUM Brew Only
• Sleep Mode = Off
.
1
Advertisement
Table of Contents

Subscribe to Our Youtube Channel
Related Manuals for Curtis TPC2S


Summary of Contents for Curtis TPC2S
- Page 1 NOTE: A water filtration system must be used to help maintain trouble-free operation. Air must be purged from the car- to follow the instructions can tridge prior to connection to equipment. In areas with extremely hard water, we highly recommend the use of a Curtis result in injury or the voiding of approved water filter.
-
Page 2: Brewing Instructions
Your Curtis Generation 3 System is Factory Pre‑Set for Optimum Performance. After connection to water and power; the rear toggle switch must be on. You will hear a beep, indicating power is available to the UCM (Uni- versal Control Module). - Page 3 Programming Control Module – Menu Tree The flow chart displays the sequence of menu items that can be accessed through the UCM.
-
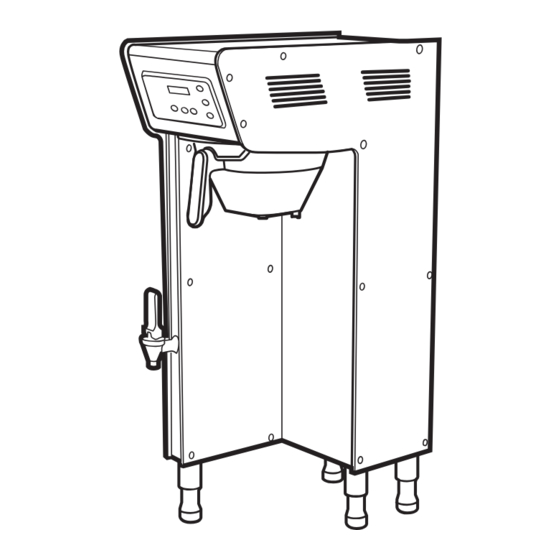
Page 4: Parts Diagram
PARTS DIAGRAM... -
Page 5: Parts List
PARTS LIST ITEM № PART № DESCRIPTION WC-61565 PANEL, L-SHAPED WC-61562 COVER, FRONT WC-37176 KIT, UCM & LABEL INSTRUCTIONS WC- 728 CONTROL MODULE, 220V TP2S/TP2T WC-39593 LABEL, UCM OVERLAY 3-BATCH SINGLE WC-39592 LABEL, UCM OVERLAY 2-BATCH SINGLE WC-39591 LABEL, UCM OVERLAY 1-BATCH SINGLE WC-3417 BREWCONE ASSY, W/SPLASH POCKET BRN WC-1853... -
Page 6: Electrical Schematic
ELECTRICAL SCHEMATIC... - Page 7 TLCG1509S Milano 1.5 Gallon Server Instructions BREWING INTO SERVERS Use only coffee or water in the insulated dispenser. Do not use the thermoserver to dispense any other beverage. Preheating is recommended. Place a clean and empty server centered under the brewcone of the Milano brewer. Make sure the screen reads READY TO BREW.
-
Page 8: Timer Instructions
Cleaning and Sanitizing Instructions for TLCG15 . . . Continued 3. Cleaning and sanitizing body assembly. a. Fill the unit with cleaning solution. With a sponge brush, thoroughly clean inside liner. b. Rinse the unit with a fresh water rinse. c. - Page 9 Timer Setting Example How to set the freshness timer for 1½ hours. Press START/STOP once. Press HOUR button once. Press MINUTE button twice. Press START/STOP button once to start timer. (Bottom bar will flash). To interrupt timer, press START/STOP button again. Screen will return to 1½ hrs.
-
Page 10: Product Warranty Information
Product Warranty Information The Wilbur Curtis Company certifies that its products are free from defects in material and workmanship under normal use. The following limited warranties and conditions apply: 3 Years, Parts and Labor, from Original Date of Purchase on digital control boards.
Need help?
Do you have a question about the TPC2S and is the answer not in the manual?
Questions and answers