IKEA RENLIG FWM6 User Manual
Renlig
Hide thumbs
Also See for RENLIG FWM6:
- User manual (56 pages) ,
- Manual (56 pages) ,
- User manual (5 pages)
Table of Contents
Advertisement
Quick Links
Advertisement
Table of Contents

Related Manuals for IKEA RENLIG FWM6


Summary of Contents for IKEA RENLIG FWM6
- Page 1 RENLIG FWM6...
- Page 3 ENGLISH...
-
Page 4: Table Of Contents
Technical data Daily use Electrical connection Helpful hints and tips Environment concerns Washing programmes IKEA GUARANTEE Subject to change without notice. Safety information For your safety and correct operation of the appliance, read this manual carefully before installation and use. Always keep these instructions with the appliance even if you move or sell it. - Page 5 ENGLISH Installation • Refer to the instructions on the label of each item (garment) before washing. • A qualified and competent person must • Do not overload the appliance. See the do the electrical and the plumbing instal- Washing Programme Table. lation.
- Page 6 ENGLISH • Never use the appliance if the power • The drain hose must be placed at a supply cable, the control panel, the work- height of not less than 44 cm and not ing surface or the base is damaged so more than 90 cm.
-
Page 7: Product Description
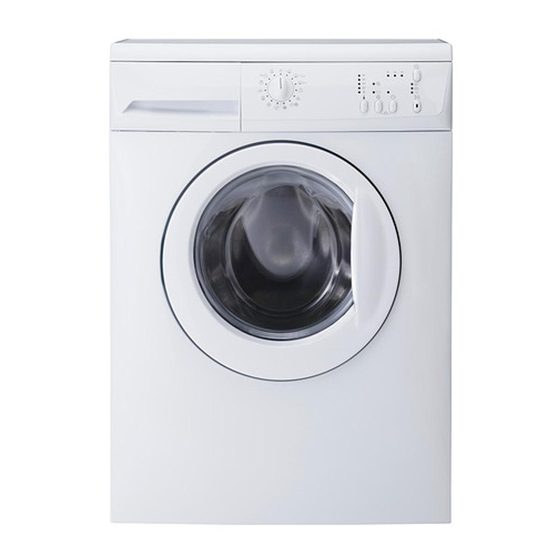
ENGLISH Product description Detergent dispenser drawer Control panel Door opening handle Rating Plate Adjustable feet Detergent dispenser drawer Compartment for powder or liquid de- tergent used for main wash. If using liquid detergent pour it just before starting the programme. Compartment for liquid additives (fabric softener, starch). -
Page 8: Control Panel
ENGLISH Control panel Below is a picture of the control panel. It shows the programme selector dial as well as the buttons and the indicator lights. These are presented by relevant numbers on the following pages. 90˚ 60˚ 40˚ 30˚ Programme selector dial Super Quick button Delay Start button... - Page 9 ENGLISH Table of Symbol = Main Wash =Easy Iron = 5 shirts = Delay Start = Miniprogramme Programme selector dial It allows you to switch the appliance On/Off and/or to select a programme. Delay Start button This button allows you to delay the start of the programme by 3, 6 or 9 hours.
-
Page 10: First Use
ENGLISH Temperature button By pressing this button you can select the most suitable tem- perature for washing your laundry . First use • Ensure that the electrical and water • Before the first wash, run a cotton connections comply with the installa- cycle at the highest temperature tion instructions. - Page 11 ENGLISH • Rotate the flap Warning! Do not use the flap in upwards. Ensure "DOWN" position with: to fit the flap • Gelatinous detergent or thick deter- completely in. gent. • Carefully put the • Powder detergent. drawer back. • With programmes with prewash. •...
- Page 12 ENGLISH Select the available options by pressing Important! The selected delay can be buttons 5, 6 and 7 changed only after selecting the washing programme again. Depending on the programme, different The door will be locked throughout the de- functions can be combined. These must be lay time.
-
Page 13: Helpful Hints And Tips
ENGLISH You can select now a new programme. During this time the drum continues to turn at regular intervals until water draining. Opening the door Follow the below instructions to empty out After the programme has started the door is the water: locked. -
Page 14: Washing Programmes
ENGLISH Rust: oxalic acid dissolved in hot water or a Ink: depending on the type of ink, moisten rust removing product used cold. Be careful the fabric first with acetone , then with ace- with rust stains which are not recent since tic acid;... - Page 15 ENGLISH COTTONS White and coloured Main wash Spin 90°-60°- cotton (normally- Rinses Rinse Hold 6 kg 40°-30°-Cold lightly soiled items). Max. final Super 3 kg spin at Quick 1200 rpm Extra Rinse COTTONS White and coloured Prewash Spin +PREWASH cotton (heavy-nor- Main wash Rinse Hold 6 kg...
- Page 16 ENGLISH RINSE Single rinse and spin Rinse Spin to starch or soften Max. final Rinse Hold hand washed gar- spin at 700 Extra Rinse ments. rpm for syn- 6 kg thetic and delicate items. DRAIN For emptying out the Draining of water of the last water rinse in programmes...
-
Page 17: Consumption Values
ENGLISH 5 SHIRTS Synthetics and mixed Main wash Spin 30° fabrics. Suitable for 5 Rinses - 6 shirts lightly Max. final 2 kg soiled. spin at 900 MINIPROG- Synthetics and deli- Main wash Spin RAMME cates. Lightly soiled Rinses 30° items or which only Max. -
Page 18: Care And Cleaning
ENGLISH Programmes Load Energy con- Water con- Approximate Remaining (kg) sumption sumption (li- programme moisture (kWh) tre) duration (mi- nutes) Wool/Hand wash 30 °C Standard cotton programmes Standard 60 1.07 54.5 °C cotton Standard 60 0.79 °C cotton Standard 40 0.61 °C cotton 1) At the end of spin phase. - Page 19 ENGLISH • open the filter cover by pressing the special hook and by rotating the cover up- wards; Warning! Keep the filter cover open until the filter removal. • Use a stiff brush to clean and remove • before removing all washing powder residue.
- Page 20 ENGLISH • Turn off the water tap. • Unscrew the hose from the tap. • Clean the filter in the hose with a stiff brush. • Screw firmly the inlet hose back onto the tap. The filter is inserted correctly when the indicator on its top is visible and •...
-
Page 21: What To Do If
ENGLISH The dangers of freezing 5. place a bowl on the floor; 6. let the drain hose run along the floor, If the appliance is installed in a place where place the external extremities of the the temperature could drop below 0°C, drain and inlet hoses in the bowl proceed as follows to remove any water re- placed on the floor and let water drain... - Page 22 ENGLISH Problem Possible cause Solution The delay start has been selected. If the laundry are to be washed immediately, cancel the delay start. The water tap is closed The red in- Open the water tap. dicator light of button 4 blinks). The inlet hose is squashed or Check the inlet hose connection.
- Page 23 ENGLISH Problem Possible cause Solution Check whether there are any leaks Check the water inlet hose connec- from one of the inlet hose fittings. It tion. is not always easy to see this as the water runs down the hose; check to see if it is damp.
-
Page 24: Technical Data
ENGLISH Model description (MOD): ..... Product number (PNC): ......Serial number (S.N.): ....... Made In Italy © Inter IKEA Systems B.V. 1999 000.000.00 21552 Technical data Dimensions Width (cm) 59,6 Height (cm) 84,5 Depth (cm) 53,7 max. Minimum 0,5 bar (0,05 MPa) -
Page 25: Environment Concerns
IKEA GUARANTEE How long is the IKEA guarantee valid? Which appliances are not covered by the IKEA five (5) years guarantee? This guarantee is valid for five (5) years... - Page 26 • The use of the appliance in a non-domes- placed parts become the property of IKEA. tic environment i.e. professional use. What will IKEA do to correct the problem? • Transportation damages. If a customer IKEA appointed service provider will exam-...
- Page 27 Please refer to the last page of this manual guarantee exists only if the appliance com- for the full list of IKEA appointed contacts plies and is installed in accordance with: and relative national phone numbers.
- Page 28 Hétköznap 8 és 10 óra között 0900 235 45 32 ma-vr 9.00-21.00 Nederland and/or 0, 1 0 EUR/min (niet lokaal)Incl. BTW zat 9.00-20.00 0900 BEL IKEA zon 9.00-18.00 Norge 815 22052 Takst innland 8 til 20 ukedager Österreich 0810 300486...
- Page 32 © Inter IKEA Systems B.V. 2008 AA-596939-1...
Need help?
Do you have a question about the RENLIG FWM6 and is the answer not in the manual?
Questions and answers