
Related Manuals for Burley Plus Trailercycle Bike Conversion Kit


Summary of Contents for Burley Plus Trailercycle Bike Conversion Kit
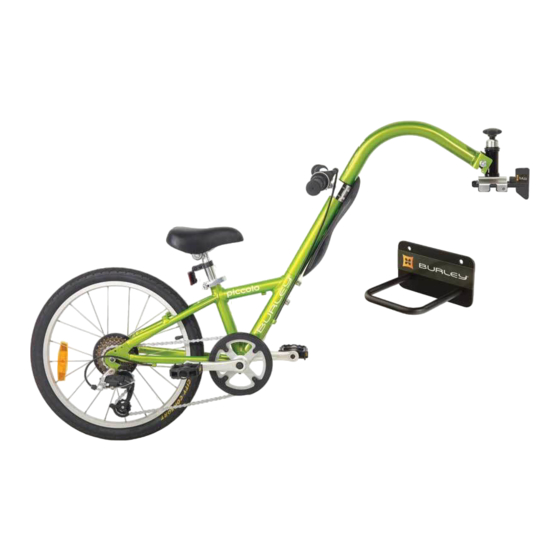
- Page 1 Owner’s Instruction Manual Trailercycle Bike Conversion Kit Burley Compatible with 2012 and newer Piccolo and Kazoo...
-
Page 2: Table Of Contents
Important Before using your trailercycle bike conversion kit, please familiarize yourself with this Burley manual. See Burley Bike Manual for complete instructions on bike use and maintenance. For questions and additional information, please contact your authorized Burley dealer or visit www.burley.com... - Page 3 Burley Plus Overview: 1. Front frame & fork assembly 2. Wheel assembly 3. Front brake assembly (short cable) 4. Rear brake assembly (long cable) 5. Parts bag Additional Parts (not included): 1 Trailercycle frame, 1 handlebar Required Tools (not included):...
-
Page 4: Frame Assembly
1. Loosen frame coupling bolts and trailercycle, push detent button and remove towbar. 2. Insert end of Burley Plus front frame tube into frame coupling and align so that detent button engages in detent hole in frame as shown above. Progressively tighten clamp bolts,... -
Page 5: Wheel Installation
Wheel Installation: 1. Place wheel into fork, with axles in fork dropout slots, as shown above. Make sure axle nuts and retention washers are on the outside of the forks. 2. Begin tightening axle nuts and insert the bent tab of the retention washer into the small hole in the fork. -
Page 6: Handlebar Assembly
Handlebar Assembly: 1. On trailercycle, remove handlebar by removing bolts in trailercycle stem faceplate. 2. On Burley Plus bicycle, remove stem face plate, place handlebar into stem and replace face plate, as shown above. Center handlebar and tighten face plate bolts to 5-6 N·m (45-55 in-lb). -
Page 7: Rear Brake Installation
Rear Brake Installation: 1. Install rear brake caliper (has longer cable) onto frame behind seatpost, as shown above. 2. Align caliper so that rim is centered between brake pads, and tighten nut to 8-10 N·m (70-85 in-lb). 3. If necessary, adjust brake pads so that they are in line with sides of rim and do not contact tire during brake operation. -
Page 8: Front Brake Installation
Front Brake Installation: 1. Install front brake caliper (has shorter cable) onto front of fork, as shown above. 2. Align caliper so that rim is centered between brake pads, and tighten nut to 8-10 N·m (70-85 in-lb). 3. If necessary, adjust brake pads so that they are in line with sides of rim and do not contact tire during brake operation. -
Page 9: Before You Ride
• Inspect tire for cracks or worn spots. • Repair or replace any damaged or worn-out parts. Contact your authorized Burley dealer for replacement of any damaged or worn-out parts. See Burley Bike Manual for complete instructions on bike use and maintenance. -
Page 10: Safety Guidelines
The red reflector that came with the trailercycle must remain attached and visible at all times. Use good judgement when deciding if weather, road, or traffic conditions are safe to use a Burley. Failure to comply with the instructions and safety guidelines in this manual could result in serious... - Page 11 Maintaining Your Burley: • Inspect chain, chainring and rear cog(s); replace if worn. • Clean and lubricate pivot points on derailleur (Piccolo only), wipe excess lubricant to prevent dirt buildup. • Inspect derailleur cable for fraying and replace as necessary (Piccolo only).
-
Page 12: Warranty
The Limited Warranty does not cover products which are used in rental operations and Burley will not be liable for any incidental or commercial damages relating to such use. - Page 13 Burley Design 1500 Westec Drive Eugene, OR 97402 USA P. 541.687.1644 800.423.8445 F. 541.687.0436 burley@burley.com Burley.com Copyright ©2012 by Burley Design LLC “Burley” is a registered trademark of Burley Design LLC New 03/12 Plus Manual 2012 Rev 0...
Need help?
Do you have a question about the Plus Trailercycle Bike Conversion Kit and is the answer not in the manual?
Questions and answers