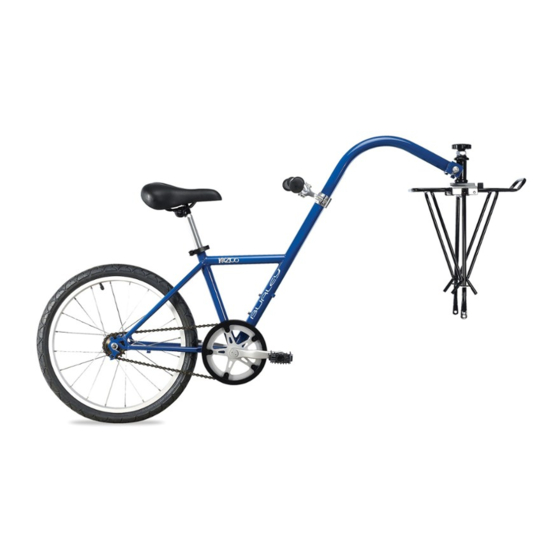
Burley PICCOLO Owner's And Safety Manual
Trailercycle
Hide thumbs
Also See for PICCOLO:
- Owner's instruction & safety manual (26 pages) ,
- Owner's instruction and safety manual (24 pages) ,
- Owner's instruction manual (16 pages)

Related Manuals for Burley PICCOLO


Summary of Contents for Burley PICCOLO
-
Page 1: Table Of Contents
Section Page Introduction Parts Inventory Initial Piccolo Assembly III. Installing the Moose Rack Hitching the Piccolo to Your Bicycle Starting and Stopping Technique Safety Guidelines VII. Safety Checklist VIII. Trailercycle Maintenance and Care Transferring or Installing Additional Moose Racks Warranty... -
Page 2: Introduction
When Loaning or Selling Your Trailercycle If you loan or sell your Burley Piccolo, supply the new user with this manual, and be sure they use only the Burley Moose Rack when towing the Piccolo. (It may be easiest to loan your bike with its Moose Rack installed). -
Page 3: Parts Inventory
Parts Inventory BURLEY DEALER: Please verify that you have received all of the parts listed. Do not proceed with as sem bly if any parts are miss ing; contact Burley im me di ate ly for replacement parts. Sub-assemblies are indented. -
Page 4: Initial Piccolo Assembly
8" from the junction of the Piccolo top tube and the tongue. The top edge of the stem should never be more than 12" from this junction. Torque the two stem bolts and the handlebar bolt to 9 ft.-lb. -
Page 5: Installing The Moose Rack
IMPORTANT: This rack includes hardware only for attachment to bikes with threaded eyelets in the rear dropout. Consult with Burley before attempting to mount the Moose Rack to a bike without threaded eyelets in the rear dropout. IMPORTANT: Use only the ad just able stays provided with the Moose Rack to attach the rack to the bi cy cle. - Page 6 A & B must be less than 3/4” Rack must be level with in 3°. If pulling a Piccolo trailercycle, a non-level rack can ad verse ly af fect handling. Burley Piccolo Owner’s Instruction & Safety Manual...
- Page 7 Tight en into place. Torque all bolts to 5–6 ft.-lb. Split Lock Seat Stay 16mm Washer 12mm Band Clamp 16mm Split Lock Washer 16mm 12mm 16mm Split Lock Washer 12mm Split Lock Washer Holes for 12mm Bicycle Fender Burley Piccolo Owner’s Instruction & Safety Manual...
-
Page 8: Hitching The Piccolo To Your Bicycle
See your Burley dealer for repair or replacement of the hitch. For instructions on maintenance of your Piccolo hitch see section “VIII. Trailercycle Main te nance and Care.”... -
Page 9: Starting And Stopping Technique
Piccolo must be attached to Burley Moose Rack, using Burley attachment hard ware. Rack or hard ware from other suppliers may break or come loose, resulting in ac ci dent and serious injury. Starting and Stopping Technique IMPORTANT: Before using your Piccolo, be sure the handlebars, stem, and seat are properly adjusted for your child. -
Page 10: Safety Guidelines
A frequent safety check of your bicycle is essential. Inspect and maintain your trailercycle as outlined in sections “VII. Safety Check lists” and “VIII. Trailercycle Maintenance and Care” of this manual. Have your Burley dealer maintain and inspect your bicycle and trailercycle if you are not qualifi ed to do so. - Page 11 Observe Age and Height Restrictions The Burley Piccolo is made for use with children ages 4-10, who are fi t and alert. Your child must have suffi cient strength and co or di na tion to pedal and hold on to the handlebars tightly.
- Page 12 The Piccolo hitch is rated for a maximum of 85 lbs. plus the weight of the Piccolo. Do not attach a trailer to the Piccolo, as it will overload the hitch and create a long, unwieldy vehicle. Likewise, do not exceed above weight limits by attaching a rack, panniers, or other cargo to the Piccolo.
- Page 13 Ride on Clean, Paved Surfaces Your Burley Piccolo is not intended for off-road use. Towing a child off road can be especially dan ger ous. Any bumps or ir reg u lar i ties could cause a crash and serious in ju ry to both cyclists.
- Page 14 Know Your Handlebar Stem Your Piccolo handlebar stem is unique in that it mates to an ovalized tube. This prevents rotation of the handlebars during use. Refer to section II for instructions on adjusting and tightening the handlebar stem.
-
Page 15: Safety Checklist
Unless you are a qual i fi ed bi cy cle me chan ic, contact your Burley dealer to per form all repairs and main te nance. Hitch Maintenance... - Page 16 Inspect hitch spindle and headset for smooth operation; ensure that all nuts are securely tight ened. Check and tighten all mounting screws and hardware on both Piccolo and Moose Rack—es pe cial ly the handlebar stem bolts and rack hard ware.
-
Page 17: Transferring Or Installing Additional Moose Racks
Additional Moose Racks are available at a reasonable cost. If you or your family have more than one bike, you may choose to have your Burley dealer install a Moose Rack on a second bike to allow you to easily switch your Burley Pic co lo from one bike to the other. - Page 18 Notes Burley Piccolo Owner’s Instruction & Safety Manual...
- Page 19 Notes Burley Piccolo Owner’s Instruction & Safety Manual...
-
Page 20: Warranty
About Burley Design Cooperative Burley has been supplying products to the bi cy cle in dus try since 1975. Burley products are designed and man u fac tured at our Eu gene, Oregon shop. As worker- own ers of our cooperatively owned busi ness, we bring an un com mon degree of personal pride and attention to our work.
Need help?
Do you have a question about the PICCOLO and is the answer not in the manual?
Questions and answers