Table of Contents
Advertisement
Advertisement
Table of Contents

Subscribe to Our Youtube Channel
Related Manuals for Euro Appliances EP8060DS


Summary of Contents for Euro Appliances EP8060DS
-
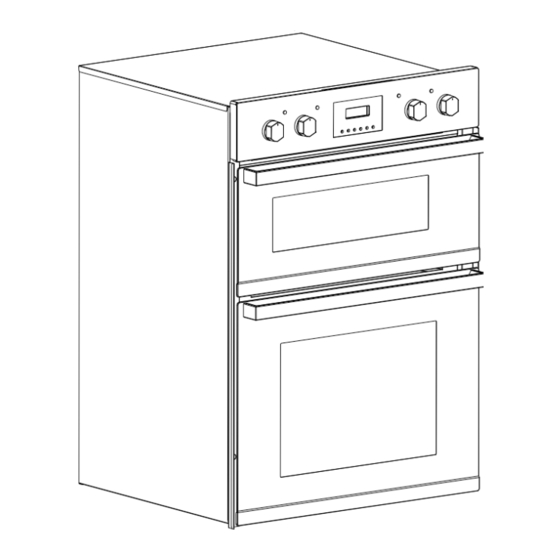
Page 1: Double Oven
Double Oven Instruction Manual EP8060DS EURO APPLIANCES BY EUROSTYLE GROUP... -
Page 2: Table Of Contents
Contents Environmental note Important safety information 4 – 6 Specifications Control panel Oven programmer/timer display Setting and using the oven programmer/timer Selecting manual operation mode Setting the time of day The oven timer Setting the minute minder function Setting the duration function Setting the end cook function Setting the start and end time function Selecting a cooking function and temperature... -
Page 3: Environmental Note
Environmental note The packaging materials that we use are environmentally friendly and can be recycled. Please discard all packaging material with due regard for the environment... -
Page 4: Important Safety Information
IMPORTANT SAFETY INFORMATION Your safety is of the utmost importance to our company. Please make sure that you read this instruction booklet before attempting to install or use the appliance. If you are unsure of any of the information contained in this booklet, please contact the Technical Department. General Information o This appliance is designed for domestic household use and can be built into a standard kitchen cabinet or housing unit. - Page 5 o If it is necessary for younger family members to be in the kitchen, please ensure that they are kept under close supervision at all times. General Safety o This appliance is not intended for use by persons (including children) with reduced physical sensory or mental capabilities, or lack of experience and knowledge, unless they have been given supervision or instruction concerning use of the appliance by a person responsible for their safety.
- Page 6 Installation This appliance must be correctly installed by a suitably qualified person, strictly in accordance with the manufacturer’s instructions. o We decline any responsibility for injury or damage, to person or property, as a result of improper use or installation of this appliance. o Heat, steam and moisture will be created during use of the appliance, take care to avoid injury and ensure that the room is adequately ventilated.
-
Page 7: Specifications
Specifications Dimensions Height: 885 mm Width: 595 mm Depth: 565 mm Product specifications o Energy efficiency class: A o LED full programmer o 2 Cooling fans o Thermostatically controlled grills o Double-glazed removable doors Top oven: static oven and grill o 4 functions o Capacity: 36 litres Main oven: multifunction oven... -
Page 8: Control Panel
Control panel 2 5 0 2 5 0 2 0 0 2 0 0 5 6 7 8 9 10 13 1) Secondary oven thermostat control knob 2) Secondary oven operating light 3) Secondary oven function selection knob 4) Secondary oven power indicator light 5) Timer “minute minder”... -
Page 9: Setting And Using The Oven Programmer/Timer
Setting and using the oven programmer/timer Selecting manual operation mode After your appliance is connected to your mains supply for the first time, the numbers on the timer display will flash. Before you can select a cooking function or set a temperature, you must set the appliance into “manual operation”... -
Page 10: Setting The Minute Minder Function
Setting the minute minder function (main and secondary oven) You are able to set the minute minder at any time, regardless of whether an oven function has been selected. You can set a period of time using the minute minder function and an alarm will sound when this period of time has elapsed. o Press the “minute minder”... -
Page 11: Setting The Duration Function
Setting the duration function (main oven only) This function will allow you to set a countdown time similar to the minute minder function. However the oven will no longer continue to heat, once the countdown period has elapsed. o Use the main oven thermostat control knob (15) to set the temperature that you require. -
Page 12: Setting The End Cook Function
Setting the end cook function (main oven only) This function is similar to the duration function, however instead of selecting a period of time that you wish the oven to switch off after. You select the time of day that you wish the oven to switch off at. o Use the main oven thermostat control knob (15) to set the temperature that you require. -
Page 13: Setting The Start And End Time Function
Setting the start and end time function (main oven only) This function will allow you to set a time in the future that the oven switches on at and a time that the oven will switch off at. o Use the main oven thermostat control knob (15) to set the temperature that you require. -
Page 14: Selecting A Cooking Function And Temperature
Selecting a cooking function and temperature Selecting manual operation mode After your appliance is connected to your mains supply for the first time, the numbers on the timer display will flash. Before you can select a cooking function or set a temperature, you must set the appliance into “manual operation”... -
Page 15: Selecting A Main Oven Function
FAN AND GRILL: This method of cooking utilises the top element in conjunction with the fan, which helps to provide a quick circulation of heat. This function is suitable where quick browning is required and “sealing” the juices in, such as steaks, hamburgers, some vegetables etc. FAN AND LOWER ELEMENT: This method of cooking utilises the bottom element in conjunction with the fan, which helps to circulate the heat. -
Page 16: Main Oven Thermostat Control Knob
Selecting a secondary oven function and temperature The secondary oven function selection knob should be used to select the particular mode of cooking that you require. The appliance will utilise different elements within the oven cavity, depending on the oven function that you select. When a function is selected, the secondary oven power indicator light will come on. -
Page 17: Warnings
Warnings o Keep the oven door closed when using any of the grill functions. o Do not use aluminium foil to cover the grill pan or heat items wrapped in aluminium foil under the grill. The high reflectivity of the foil could potentially damage the grill element. -
Page 18: Cleaning And Maintenance
Cleaning and maintenance Cleaning operations must only be carried out when the oven is cool. The appliance should be disconnected from your mains supply before commencing any cleaning process. o The oven should be thoroughly cleaned before it is operated for the first time and after each use. -
Page 19: Door Removal
Door removal In order to obtain easier access to the oven chamber for cleaning, it is possible to remove the door. To do this, tilt the safety catch part of the hinge upwards. Close the door lightly, lift and pull it out towards you .In order to fit the door back on to the cooker , do the inverse. -
Page 20: Installation
INSTALLATION The installation must be carried out by a suitably qualified person, in accordance with the current version of the following. o UK Regulations and Safety Standards or their European Norm Replacements. o Building Regulations (issued by the Department of the Environment). o Building Standards (issued by the Scottish Development Department). -
Page 21: Connecting The Mains Supply Cable
Connecting the mains supply cable o The mains terminal block is located on the rear of the oven and the terminals are accessible by removing the terminal block cover. You should remove the cover screw to access this. o The cable connections must be made in accordance with the diagram below: CONNECTION DIAGRAM Caution! Voltage of heating elements 230V Recommended type... -
Page 22: Replacing The Mains Supply Cable
Replacing the mains supply cable If the mains supply cable is damaged, then it must be replaced with a suitable replacement. The mains supply cable should be replaced in accordance with the following instructions: o Switch the appliance off at the control switch. o Open the terminal block on the back of the oven. -
Page 23: Installing The Oven Into The Kitchen Cabinet
Installing the oven into the kitchen cabinet Positioning the appliance o Ensure that the aperture that you will be fitting the oven into is of the size given in the above diagram. o The oven must be fitted into an oven housing with the ventilation cut-outs shown in the “Ventilation requirements”... -
Page 24: Ventilation Requirements
Ventilation requirements (Figure shows the ventilation and cut-out requirements for the installation of the appliance into a tall housing unit). Ensure that the oven has been securely fixed into the housing unit. The fixing of the oven into the housing is made by using four screws. These should be screwed through the oven cabinet and into the housing unit. -
Page 25: My Appliance Isn't Working Correctly
My appliance isn’t working correctly o The oven isn’t coming on. * Check that the oven is in manual operation mode. * Check that you have selected a cooking function and a cooking temperature. o There appears to be no power to the oven and grill. * Check that the appliance has been connected to the electrical mains supply correctly. - Page 26 o The oven light is not working * Refer to page 19 and follow the “Replacing the oven bulb” section. o I am getting condensation in my oven * Steam and condensation is a natural by product of cooking any food with high water content, such as frozen food, chicken etc.
-
Page 27: Oven Main Cooking Instruction
Oven main function cooking instruction: use the back elements and fan working mode Temperature WEIGHT Finished Time PREHEAT FOOD Tray Position setting (minutes) mins Beef 200℃ 40-50 Pork 200℃ 70-80 Chicken 200℃ 50-60 Duck 50-60 200℃ Steak 180℃ 20-30 Bread 200℃... - Page 28 Use the upper element working mode: Tray Temperature WEIGHT Finished Time PREHEAT FOOD minute Position setting mins 250℃ Beef 20-25 250℃ Pork 25-30 250℃ Chicken 40-45 Banger 250℃ 15-20 250℃ Hamburger 15-20 250℃ Corn 20-25 250℃ Vegetable 15-20 Use lower element + fan working mode Temperature WEIGHT Finished Time...
- Page 29 Eurostyle Group trading as Euro Appliances Service Line: (08) 8165 1012 Fax: (08) 8165 1018 Email: admin@eurostylegroup.com.au...
Need help?
Do you have a question about the EP8060DS and is the answer not in the manual?
Questions and answers