Table of Contents
Advertisement
Quick Links
Advertisement
Table of Contents

Related Manuals for Euro Appliances EO605VBK


Summary of Contents for Euro Appliances EO605VBK
- Page 1 U S A G E A N D C A R E G U I D E PRODUCT CODE: EO605VBK...
- Page 2 Thank you for choosing this product. This User Manual contains important safety information and instructions on the operation and maintenance of your appliance. Please take the time to read this User Manual before using your appliance and keep this book for future reference. Icon Type Meaning...
-
Page 3: Table Of Contents
CONTENTS 1.SAFETY INSTRUCTIONS ....................3 1.1 General Safety Warnings ....................3 1.2 Installation Warnings ...................... 5 1.3 During Use........................6 1.4 During Cleaning and Maintenance ................. 7 2.INSTALLATION AND PREPARATION FOR USE .............. 8 2.1 Instructions for the Installer .................... 8 2.2 Installation of the Oven .................... -
Page 4: Safety Instructions
1. SAFETY INSTRUCTIONS • Carefully read all instructions before using your appliance and keep them in a convenient place for reference when necessary. • This manual has been prepared for more than one model therefore your appliance may not have some of the features described within. - Page 5 the oven. • Handles may get hot after a short period during use. • Do not use harsh abrasive cleaners or scourers to clean the oven door glass and other surface. They can scratch the surfaces which may result in shattering of the door glass or damage to surfaces.
-
Page 6: Installation Warnings
heating a room. • Do not use the oven door handles to lift or move the appliance. • All possible measures have been taken to ensure your safety. Since the glass may break, care should be taken while cleaning to avoid scratching. Avoid hitting or knocking the glass with accessories. -
Page 7: During Use
• Any materials (i.e. cabinets) around the appliance must be able to withstand a minimum temperature of 100°C. • The appliance must not be installed behind a decorative door, in order to avoid overheating. 1.3 DurinG uSe • When you first use your oven you may notice a slight smell. -
Page 8: During Cleaning And Maintenance
• Make sure the appliance control knobs are always in the “0” (stop) position when it is not in use. • The trays incline when pulled out. Take care not to spill or drop hot food while removing it from the ovens. -
Page 9: Installation And Preparation For Use
2. INSTALLATION AND 2.2 inStallation of the oven PREPARATION FOR USE The appliances are supplied with installation kits and can be installed in a WARNING : This appliance must be worktop with the appropriate dimensions. installed by an authorised service The dimensions for hob and oven person or qualified technician, according to installation are given below. - Page 10 Installation under a worktop Installation in a wall unit After making the electrical connections, insert the oven into the cabinet by pushing it forward. Open the oven door and insert 2 screws in the holes located on the oven frame. While the product frame touches the wooden surface of the cabinet, tighten the screws.
-
Page 11: Electrical Connection And Safety
2.3 eleCtriCal ConneCtion anD Safety WARNING: The electrical connection Blue of this appliance should be carried out by an authorised service person or qualified electrician, according to the instructions in this guide and in compliance with the current local regulations. WARNING: THE APPLIANCE MUST BE EARTHED. -
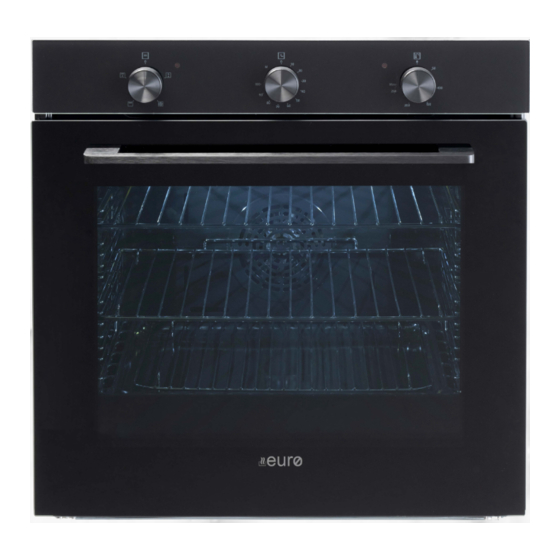
Page 12: Product Features
3. PRODUCT FEATURES Important: Specifications for the product vary and the appearance of your appliance may differ from that shown in the figures below. List of Components 1. Control Panel 2. Oven Door Handle 3. Oven Door Control Panel 4. Oven Function Control Knob 5. -
Page 13: Use Of Product
4. USE OF PRODUCT Warning: When grilling, the oven door must be closed and the oven temperature should be adjusted to 190°C. 4.1 oven ControlS Grill and Fan Oven function control knob Function: The oven’s Turn the knob to the corresponding symbol thermostat and of the desired cooking function. -
Page 14: Accessories
the “0” position, the oven will not operate. Operating by adjusting the timer The Wire Grid for Deep Trays Set the desired cooking time by turning the Make sure the wire grid is correctly placed timer knob to between 0 and 100 minutes. within a deep tray. - Page 15 The Wire Grid The wire grid is best used for grilling or for processing food in oven-friendly containers. WARNING Place the grid to any corresponding rack in the oven cavity correctly and push it to the end. The Water Collector In some cases of cooking, condensation may appear on the inner glass of the oven door.
-
Page 16: Cleaning And Maintenance
5. CLEANING AND and outside of the glass parts. Then, rinse and dry them thoroughly with a dry MAINTENANCE cloth. Cleaning the Stainless Steel Parts (if 5.1 CleaninG available) WARNING: Switch off the appliance and allow it to cool before cleaning is •... -
Page 17: Maintenance
3. Place the glass under the location bracket (x) in the direction of C. Removal of the Wire Shelf To remove the wire rack, pull the wire rack as shown in the figure. After releasing it from the clips (a), lift it up. If the oven door is a triple glass oven door, the third glass layer can be removed the same way as the second... - Page 18 Replaceable light source by a professional The lamp is designed specifically for use in household cooking appliances. It is not suitable for household room illumination. EN - 17...
-
Page 19: Troubleshooting & Transport
6. TROUBLESHOOTING & TRANSPORT 6.1 troubleShootinG If you still have a problem with your appliance after checking these basic troubleshooting steps, please contact an authorised service person or qualified technician. Problem Possible Cause Solution Check whether there is power supplied. Oven does not switch on. - Page 20 Pronto Service + Support: 1800 440 335 Email: service@eurostylegroup.com.au HEAD OFFICE 65 Glynburn Road, Glynde SA 5070 Ph: 08 8165 1012 www.euroappliances.com.au 52438912...
Need help?
Do you have a question about the EO605VBK and is the answer not in the manual?
Questions and answers