Advertisement
Quick Links
Advertisement

Subscribe to Our Youtube Channel
Related Manuals for Euro Appliances MILAN EMEO45SX


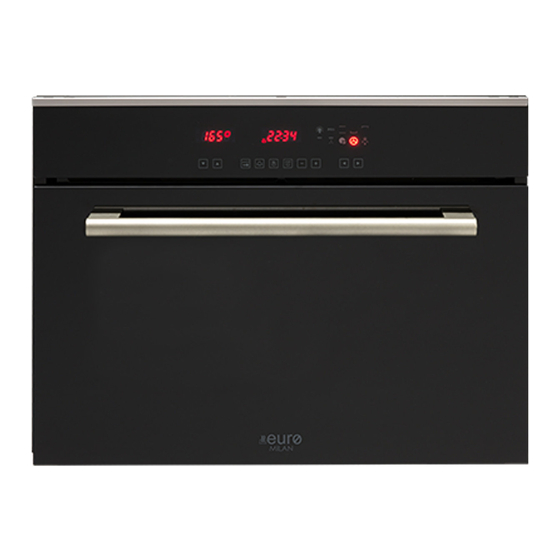
Summary of Contents for Euro Appliances MILAN EMEO45SX
- Page 2 User instructions Thank you for choosing one of our products. We hope you will get the very best performance from this appliance. Therefore we would ask you to carefully comply with the the suggestions and instructions in this manual for proper use of our products. The manufacturer shall not be held liable for damage to persons and property which is due to poor or incorrect installation of the appliance.
-
Page 3: Declaration Of Ce Compliance
DECLARATION OF CE COMPLIANCE This appliance is in compliance with the following European Directives: 93/68 : General regulations 2014/35/CE : Concerning low tensions 2014/30/CEE : Electromagnetic compatibility CE Regulation n° 1935/2004 : this appliance is suitable to come in contact with food products. INSTRUCTIONS FOR THE USER This manual is an integral part of the appliance. - Page 4 Improper repair work can cause serious accidents, damage the appliance and equipment as well as impair proper operation. Appliances repaired in technical service centres must undergo routine tests, especially a continuity test of the earth circuit. THIS PRODUCT WAS DESIGNED FOR HOME USE. THE MANUFACTURER WILL NOT BE HELD LIABLE FOR DAMAGE TO PERSONS OR PROPERTY CAUSED BY IMPROPER INSTALLATION, OR BY IMPROPER, WRONG OR SENSELESS USE.
- Page 5 All work on the appliances must be carried out by qualified personnel. For maintenance, moving, installation and cleaning of the appliance use suitable prevention and protection equipment (gloves, etc.). Lifting and moving of appliances weighing more than 25 kg must be carried out using proper equipment, or by two persons, in order to avoid risks or injuries.
- Page 6 BLUE - NEUTRAL ( N ) BROWN - PHASE ( L ) YELLOW-GREEN - EARTH ( Attention: earth connection is required by law. The manufacturer will in no way be held liable if accident prevention standards area not observed. Insertion into the furniture unit: The appliance can be inserted either under a worktop or into a column.
- Page 7 BUILT-IN DIAGRAM Fig. 1...
- Page 8 Fig. 2 Column Under top...
- Page 9 Before using the oven for the first time After unpacking the oven, installing it in the furniture unit and removing the accessories (drip pan and racks), it is advisable to run it at the highest temperature for about 20 minutes to remove any oily residues left from the manufacturing process which may cause unpleasant odours during cooking.
- Page 11 FUNCTION BUTTONS Decreases temperature Increases temperature O N /O F F ON/OFF and Controls Lock Function Minute minder Cooking time S T O P End time Time setting Time setting Program setting Program setting OPERATION The timer flashes on the display when switched on for the first time or after a power cut, and the oven cannot be operated;...
- Page 12 COOKING TIME SEMIAUTOMATIC OPERATION It is recommended to set the duration of cooking O N /O F F Switch on the oven by pressing and releasing the , then press and release the key. On the timer display the symbol A appears. Set the desired time of cooking with the keys - and + up to 10h and 00m.
-
Page 13: Automatic Operation
AUTOMATIC OPERATION It is recommended to set the duration and the end of cooking O N /O F F Switch on the oven by pressing and releasing the , then press and release the and set the duration of cooking with the keys. - Page 14 DISPLAY SYMBOLS Pot: when it lights up, it shows that a cooking function is on. The pot does not light up when the oven light, preheating or defrosting function is activated. When the pot is flashing, it shows the end of a cooking time. During the delayed start phase, the symbol is off and lights up when the oven starts cooking.
- Page 15 PIZZA FUNCTION This kind of cooking is ideal for pizza and vegetable dishes. FAN OVEN MODE This provides even heating with the fan and allows different dishes to be cooked at the same time on different levels. DEFROST MODE This function allows to reduce the defrost time for frozen food. The fan runs without any heating of the oven.
- Page 16 Table of cooking suggestions Type of dish Temp. Cooking time in Level Cycle °C minutes (from bottom) Bread and biscuits Pizza 20/30 Bread 190/200 45/60 Bread with filling 150/160 20/25 1 or 2 White bread 175/210 25/40 1 or 2 Biscuits 140/150 20/30...
- Page 17 Foods to be grilled Cooking time in minutes Over Under Cuts of thin meat Cuts of normal meat Fish (e.g. trout, salmon) Sausages Toast Depending on the type of food (e.g. meats, fish, poultry, etc.), you will need to turn the food to expose both sides to the infrared rays.
-
Page 18: Cleaning And Maintenance Of The Oven
CLEANING AND MAINTENANCE OF THE OVEN Important: Before performing any maintenance, you must either unplug the oven or disconnect the power supply via the omni-polar switch of the electrical system. Cleaning the oven: Let the oven cool after each use and clean it to keep burnt on residues from being repeatedly heated. - Page 19 How to remove the oven door (fig. 4) To make it easier to clean the oven, it is possible to remove the door from the hinges as follows: The hinges A are equipped with 2 mobile U-bolts B. When the U-bolts B are lifted, the hinges are disconnected from their housing. After this, lift the door up and pull it outwards, holding the door on both sides near the hinges.
- Page 20 Cleaning the side rails - Fig. 5 The side rails are to be hooked onto the wall of the oven. Slide the racks and tray provided into the side rails. To remove the side rails press on part A as shown . Fig.
Need help?
Do you have a question about the MILAN EMEO45SX and is the answer not in the manual?
Questions and answers