HP Z1 G2 User Manual
Hide thumbs
Also See for Z1 G2:
- Maintenance and service manual (94 pages) ,
- User manual (75 pages) ,
- Technical white paper (26 pages)
Table of Contents
Advertisement
Quick Links
Advertisement
Table of Contents
Troubleshooting

Related Manuals for HP Z1 G2


Summary of Contents for HP Z1 G2
- Page 1 HP Z1 G2 Workstation User Guide...
- Page 2 Bluetooth is a trademark owned by its Development Company, L.P. to change without notice. The only proprietor and used by Hewlett-Packard warranties for HP products and services are Company under license. First Edition: January 2014 set forth in the express warranty statements Intel is a trademark of Intel Corporation in accompanying such products and services.
-
Page 3: About This Guide
About this guide This guide provides setup and basic troubleshooting information for the HP Z1 G2 Workstation. It includes these topics: Guide topics Locating HP resources on page 1 HP Z1 G2 Workstation features on page 7 Setting up and using the workstation on page 11... - Page 4 About this guide...
-
Page 5: Table Of Contents
Support ........................... 3 Product documentation ......................4 Product diagnostics ........................5 Product updates ........................6 2 HP Z1 G2 Workstation features ..................7 Components ..........................7 Front and bottom components ..................7 Side components ....................... 8 Rear components ...................... 9 Product specifications ...................... - Page 6 System Recovery ..................... 34 System Recovery from a recovery partition image ......... 34 Creating recovery discs with HP Recovery Disc Creator on HP Workstations ..35 Creating a recovery disc ............35 Using HP Recovery Disc operating system discs ......36 5 Setting up, backing up, restoring, and recovering Windows 8 ........
- Page 7 HP Installer Kit for Linux (HPIKL) ....................46 Setting up Red Hat Enterprise Linux ..................46 HPIKL driver disc ..................... 47 Installing with the HP Red Hat Linux driver disc ............47 Setting up SUSE Linux Enterprise Desktop (SLED) ................ 48 Setting up preloaded SLED ..................48 Installing SLED with the DVD Installer Kit ..............
- Page 8 Cleaning the monitor ......................59 Cleaning the mouse ........................ 60 viii...
-
Page 9: Locating Hp Resources
Locating HP resources This section provides information on the following resources for your HP workstation: Topics Product information on page 1 Technical specifications ● Regulatory, safety and environmental notices ● Accessories ● System board ● Serial number, Certificate of Authenticity, and Genuine ●... - Page 10 On some workstations, this label is on the bottom panel. Microsoft Label (GML) (if ® applicable) Linux For information on running Linux on HP workstations, go to http://www.hp.com/ linux/, and then select Linux on Workstations from the list on the left. Chapter 1 Locating HP resources...
-
Page 11: Support
You can find the expressly provided HP Limited Warranty applicable to your product located with the user guides on your computer and/or on the CD or DVD provided in the box. For some countries or regions where the warranty is not provided in printed format, you may request a printed copy from http://www.hp.com/go/orderdocuments... -
Page 12: Product Documentation
To learn how to remove and replace workstation components, go to http://www.hp.com/go/sml. Product notifications Subscriber's Choice is an HP program that allows you to sign up to receive driver and software alerts, proactive change notifications (PCNs), the HP newsletter, customer advisories, and more. Sign up at http://www.hp.com/go/... -
Page 13: Product Diagnostics
Windows 7 dagnostics tools The UEFI Diagnostics utility is preinstalled on select Windows 7 workstations. For additional information, see the workstation Maintenance and Service Guide at http://www.hp.com/support/workstation_manuals. Windows 8 diagnostics tools The UEFI Diagnostics utility is preinstalled on select Windows 8 workstations. -
Page 14: Product Updates
Go to File > System Information. Note the BIOS version and date and compare it with the BIOS versions that appear on the HP website. In Windows 7, you can also find the BIOS version number by following these steps: Go to Start >... -
Page 15: Hp Z1 G2 Workstation Features
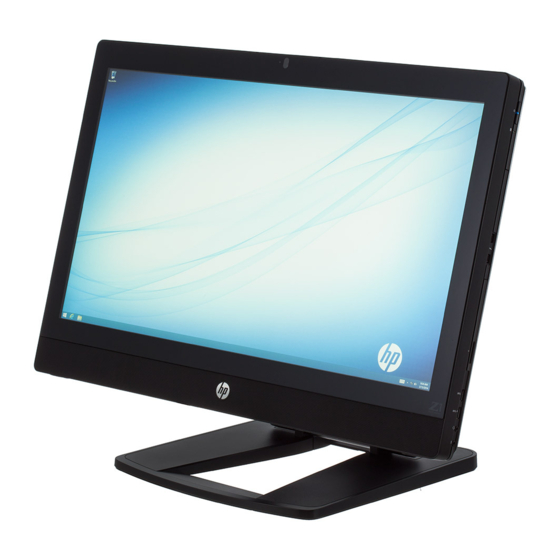
HP Z1 G2 Workstation features The HP Z1 G2 Workstation is offered in both a touch and a non-touch model. The touch model has a glossy glass front, and the non-touch model has a matte surface, surrounded by a plastic bezel. -
Page 16: Side Components
USB 3.0 ports (2) Power button The bottom USB port is also a battery charging port. Hard drive activity light Headphone jack Slimline tray optical drive (or Microphone jack optional Thunderbolt module) Memory card reader Chapter 2 HP Z1 G2 Workstation features... -
Page 17: Rear Components
Rear components Handle Power cord connector Subwoofer jack (orange) USB 2.0 ports (4) Audio line-out jack (green) Optical S/PDIF audio output Audio line-in jack (blue) RJ-45 network connector DisplayPort connector Security cable slot Components... -
Page 18: Product Specifications
Values represent individual shock events and do not indicate repetitive shock events. Operating random: 0.5g (rms), 5-300 Hz, up to 0.0025 g Vibration Non-operating random: 2.0g (rms), 5-500 Hz, up to 0.0150 g NOTE: Values do not indicate continuous vibration. Chapter 2 HP Z1 G2 Workstation features... -
Page 19: Setting Up And Using The Workstation
Setting up and using the workstation Topics Setting up the workstation on page 11 Display options on page 25 Using the webcam on page 29 Installing optional components on page 29 Security on page 29 Product recycling on page 29 Setting up the workstation Location and ventilation Proper ventilation for the system is important for workstation operation. -
Page 20: Setup Procedure
Setup procedure The HP Z1 G2 Workstation weighs 19.2 kg (42.3 lbs) for the non-touch model and 21.0 kg (46.3 lbs) for the touch model, and must be removed from the box by two people. WARNING! If a product is shipped in packaging marked with this icon , the product must always be lifted by two people to avoid personal injury due to product weight. - Page 21 Slide the latches on the bottom of the workstation outward and open the chassis. Insert the USB wireless transceiver in the internal USB port, and close the chassis. NOTE: Keep in mind the following: An outline around the internal USB port identifies the maximum area allowed for an internal USB device.
- Page 22 Press down on the front of the unit, and then press in on the green button until you hear a click. Raise the unit up to its highest horizontal position. Chapter 3 Setting up and using the workstation...
- Page 23 Rotate the monitor to its full vertical upright position (some force is required). Connect the power cord and peripherals. IMPORTANT: DO NOT insert the USB wireless transceiver at this location. Refer to steps 3 and 4 for instructions. Connect the workstation to a grounded AC power outlet (1) and turn on the unit (2). Setting up the workstation...
-
Page 24: Connecting Bluetooth Devices
Connect the unit to the Internet through the wireless feature or with an RJ-45 network cable. To set up a WLAN and connect to the Internet, you need a broadband modem (either DSL or cable) (purchased separately), high-speed Internet service purchased from an Internet service provider, and a wireless router (purchased separately). -
Page 25: Disabling Wlan
● Disabling WLAN NOTE: The HP Z1 G2 Workstation is WLAN-enabled by default. NOTE: Disabling the WLAN functionality through the system BIOS or by removing the wireless modules from the system will also disable the Bluetooth features. The WLAN can be disabled through the system BIOS, through the operating system, or by removing the wireless modules from the system. -
Page 26: Using Touchscreen Gestures
To re-enable, select Enable. To remove the wireless modules, see one of the following for information on removal and replacement of components: The Maintenance and Service Guide for your workstation at http://www.hp.com/support/ ● workstation_manuals Videos for your workstation at http://www.hp.com/go/sml ●... -
Page 27: Tapping
NOTE: On Windows 8, when many apps are revealed on the Start screen, you can slide your finger to move the screen left or right. To drag, press and hold an object, and then drag the object to move it. ●... -
Page 28: Scrolling
Scrolling Scrolling is useful for moving the pointer up, down, left, or right on a page or image. Place two fingers on the screen and then drag them in an up, down, left, or right motion. ● Pinching/stretching Pinching and stretching allows you to zoom out or in on images or text. Zoom in by placing two fingers together on the display and then move your fingers apart. -
Page 29: Rotating (Select Models Only)
Rotating (select models only) Rotating allows you to turn items such as photos. Anchor the forefinger of your left hand on the object you want to rotate. Using your right hand, ● slide your forefinger around in a sweeping motion from 12 o’clock to 3 o’clock. To reverse the rotation, move your forefinger from 3 o’clock to 12 o’clock. -
Page 30: Left-Edge Swipe
Left-edge swipe The left-edge swipe reveals your open apps so that you can switch to them quickly. Gently swipe your finger inward from the left edge of the display to switch between apps. Without ● lifting your finger, swipe back toward the left edge to reveal all open apps. Bottom-edge swipe The bottom-edge swipe allows you to open a list of apps available on your computer. -
Page 31: Flicking (Windows 7 Models Only)
Flicking (Windows 7 models only) Touch the screen in a light, quick flicking motion up, down, left, or right to navigate through screens or quickly scroll through documents. NOTE: For the flick movement to work, a scrollbar must be present in the active window. Dragging Press your finger on an item on the screen, and then move your finger to drag the item to a new location. - Page 32 (Windows 7) Select Start > Control Panel > Hardware and Sound > Tablet PC ● Settings> Other. (Windows 8) From the Start screen, select Control Panel, then select Hardware and ● Sound, then select Tablet PC Settings, then select Other. These preferences are specific to the touchscreen and the computer.
-
Page 33: Display Options
Display options Adjusting display brightness The HP Z1 G2 Workstation uses two methods to control the display brightness. The backlight brightness settings control the overall brightness of the internal display panel only. ● The pixel color brightness settings control the individual pixel color intensity for the internal display ●... - Page 34 Right-click a blank area on the display desktop to open the system display-control window. Select the NVIDIA control panel. Select the HP Z1 G2 display panel icon. A green box outlines the icon. On the left side of the NVIDIA Control Panel, select Adjust desktop color settings, and select the internal display panel to adjust the settings.
-
Page 35: Adding An External Monitor
The brightness slider is set to 50%. Move the slider up or down to adjust the brightness. At the bottom of the window, select Apply or OK to save the changes. Adding an external monitor To connect a monitor to the workstation: Determine the correct cable and/or adapter requirements for the monitor. -
Page 36: Using The Hp Z1 G2 Workstation As A Monitor
To switch back, simultaneously press Ctrl+Shift+S+D on the HP Z1 G2 Workstation keyboard to reinstate the internal graphics source and place the workstation display panel in standby mode. On the HP Z1 G2 Workstation, move the mouse or press the space bar to wake up the display panel. -
Page 37: Adjusting The Audio Signal
Adjusting the audio signal There is no hardware volume control on the HP Z1 G2 Workstation. (However, some keyboards ● do have volume buttons, usually in the upper-right corner.) Volume can be adjusted with the operating system (OS) master control or the software (SW) audio ●... - Page 38 For information about recycling HP components or products, go to http://www.hp.com/go/recycle. Chapter 3 Setting up and using the workstation...
-
Page 39: Setting Up, Backing Up, Restoring, And Recovering Windows 7
Backing up, restoring, and recovering Windows 7 on page 32 CAUTION: Do not add optional hardware or third-party devices to the HP workstation until the operating system is successfully installed. Adding hardware might cause errors and prevent the operating system from installing correctly. -
Page 40: Transferring Files And Settings
In case of system failure, you can use the backup files to restore the contents of your computer. See Backing up your information on page NOTE: HP recommends that you print the recovery procedures and save them for later use, in case of system instability. Backing up your information NOTE: Windows includes the User Account Control feature to improve the security of your computer. -
Page 41: System Restore
You should create your initial backup immediately after initial system setup. As you add new software and data files, you should continue to back up your system on a regular basis to maintain a reasonably current backup. Your initial and subsequent backups allow you to restore your data and settings if a failure occurs. -
Page 42: System Recovery
CAUTION: System Recovery deletes all data and programs that you have created or installed. A Windows system from the HP factory ships with a recovery partition. You can use the recovery partition to recover the factory operating system. Turn off the computer. If necessary, press and hold the power button until the computer turns off. -
Page 43: Creating Recovery Discs With Hp Recovery Disc Creator On Hp Workstations
HP Recovery Disc Creator is a software program that offers a way to create recovery discs on HP Workstations. After you successfully set up the computer, you can create recovery discs using HP Recovery Disc Creator if the hard drive becomes corrupted. -
Page 44: Using Hp Recovery Disc Operating System Discs
Creating recovery discs with HP Recovery Disc Creator on HP Workstations on page Use the steps provided in this section if you used HP Recovery Disc Creator to create a Windows 7 operating system DVD and a Driver DVD. If you cannot use the recovery discs that you created using the HP Recovery Disc Creator, you must obtain a Windows 7 operating system DVD to reboot the computer and repair the operating system. -
Page 45: Setting Up, Backing Up, Restoring, And Recovering Windows 8
Internet, Microsoft activates your operating system. This process takes about 15 to 30 minutes. Carefully read and follow the instructions on the screen. We recommend that you register your computer with HP, so you can receive important software updates, request support, and sign up for special offers. -
Page 46: Downloading Windows 8 Updates
For more details about the tools provided, see Help and Support. From the Start screen, type help, and then select Help and Support. HP recommends that you print the recovery procedures and save them for later use, in case of system instability. - Page 47 Store personal files in the Documents library, and back it up regularly. ● Back up templates that are stored in their associated programs. ● Save customized settings that appear in a window, toolbar, or menu bar by taking a screen shot ●...
-
Page 48: Creating Recovery Media And Backups
Recovery Media creation is finished. On most systems, this partition is 10 GB in size. HP recommends that you not delete this recovery partition. If the partition is deleted, you will be unable to restore the Windows 8 factory recovery partition to the hard drive using the recovery USB drive. -
Page 49: Using Windows 8 Refresh
Windows. The Reset recovery tool reinstalls the operating system and HP programs and drivers that were installed at the factory. Software not installed at the factory must be reinstalled. Any personal files must be restored from backups you made. -
Page 50: Using Windows 8 Reset
If possible, back up all personal files. If possible, check for the presence of the HP Recovery partition: from the Start screen, type This PC, and then select This PC. NOTE: If the HP Recovery partition is not listed, or you cannot check for its presence, you must recover using the recovery media that you created. -
Page 51: Recovery Using The Windows 8 Recovery Usb Flash Drive
If possible, back up all personal files. If possible, check for the presence of the HP Recovery partition: from the Start screen, type This PC, and then select This PC. NOTE: If the HP Recovery partition is not listed, or you cannot check for its presence, you must recover using the recovery media that you created. -
Page 52: Recovery Using Windows 8 Restore Media
The Windows 8 restore media consists of a Windows 8 operating system disc and a Windows 8 driver disc. For U.S. support, go to http://www.hp.com/support. For worldwide support, go to http://www8.hp.com/us/en/contact-hp/ww-contact-us.html. You can also order the media by calling support. -
Page 53: Setting Up And Restoring Linux
● HP certifies and supports Red Hat Enterprise Linux (RHEL) on HP workstations. ® HP certifies and supports SUSE Linux Enterprise Desktop (SLED) on HP workstations. ● HP offers a SLED 11 preload on some Z series Workstations. ● This chapter describes how to set up and restore the Linux operating system. It includes these topics:... -
Page 54: Hp Installer Kit For Linux (Hpikl)
HP Installer Kit for Linux (HPIKL) The HP Installer Kit for Linux helps users install certified versions of RHEL or SLED on HP workstations. It is available as an operating system option on all HP workstations. The kit contains tested drivers that augment and/or replace those found in RHEL or SLED, to ●... -
Page 55: Hpikl Driver Disc
The driver disc is used during this phase. All content added by HP is in the /HP directory on the disc. You can use it to build your own image or to browse the HP content. -
Page 56: Setting Up Suse Linux Enterprise Desktop (Sled)
Setting up SUSE Linux Enterprise Desktop (SLED) HP offers a 64-bit SLED 11 preload on some Z series Workstations and supports 64-bit SLED 11 on other workstations. Various versions of SLED are certified and supported by SUSE on HP workstations. For more information, go to the SUSE certification bulletin search page at https://www.suse.com/yessearch/... -
Page 57: Restoring Sled (Preloaded Systems Only)
Proprietary graphics drivers supported by HP and the graphics vendors are available with the HP Installer Kit for Linux, with the SLED 11 preload on Z series Workstations, and from HP Workstation Support at http://www.hp.com/go/workstationsupport. -
Page 58: Updating The Workstation
Updating the workstation HP is constantly working on improving your total workstation experience. To be sure that your workstation leverages the latest enhancements, HP recommends that you install the latest BIOS, driver, and software updates on a regular basis. Updating the workstation after first start... -
Page 59: Upgrading Bios
HP workstation. If you did not purchase your device from HP, HP recommends visiting the HP website first to see if your device and its drivers have been tested for HP workstation compatibility. If no driver is available, go to the device manufacturer's website to download the latest drivers. -
Page 60: Diagnostics And Minor Troubleshooting
The serial number and product number labels can be found on a pull-out card at the side of the display. For a listing of all worldwide support phone numbers, go to http://www.hp.com/support, select your region, and then, in the upper-right corner, select Connect with HP in the upper-right corner. Chapter 8 Diagnostics and minor troubleshooting... -
Page 61: Locating Id Labels
Locating ID labels To assist in troubleshooting, product, serial, and authentication numbers are available on each computer. All workstations have a serial number (unique for each workstation) and product number. Have ● these numbers available when you contact support. The Certificate of Authentication (COA) is used only for systems with Windows 7 preinstalled. ●... -
Page 62: Locating Warranty Information
To extend a standard product warranty, go to http://www.hp.com/hps/carepack. HP Care Pack Services offer upgraded service levels to extend and expand a standard product warranty. HP troubleshooting resources and tools This section provides information on the HP Help and Support Center, online support, and helpful hints for troubleshooting. Online support Online access and support resources include web-based troubleshooting tools, technical knowledge databases, driver and patch downloads, online communities, and product change notification services. -
Page 63: Troubleshooting A Problem
To help you troubleshoot problems with your system, HP provides the HP Support Center. The HP Support Center is a portal to an extensive selection of online tools. To access the HP Support Center and troubleshoot a problem with the workstation, complete the following steps: Visit http://www.hp.com/go/workstationsupport. -
Page 64: Helpful Hints
● If you have installed an operating system other than the factory-installed operating system, confirm ● that it is supported on your system by visiting http://www.hp.com/go/quickspecs. Verify that the internal display panel is lit. ● If the internal display panel is dim, turn up the brightness. -
Page 65: Customer Self Repair
NOTE: Some components are not eligible for Customer Self Repair and must be returned to HP for service. Call support for further instructions before attempting to remove or repair these components. Other troubleshooting options The following additional troubleshooting techniques and tools are located in the Maintenance and Service Guide at http://www.hp.com/support/workstation_manuals:... -
Page 66: Routine Care
Routine Care The cleaning methods listed below are applicable to both the touch and the non-touch models of the HP Z1 G2 Workstation. General cleaning safety precautions Never use solvents or flammable solutions to clean the computer. ● Never immerse any component in water or cleaning solutions; apply any liquids to a clean cloth ●... -
Page 67: Cleaning The Chassis
Cleaning the chassis Follow the safety precautions in the Maintenance and Service Guide for your workstation before ● cleaning the computer. To remove light stains or dirt, use plain water with a clean, lint-free cloth or swab. ● For stronger stains, use a soft microfiber cloth or chamois moistened with mild dish washing liquid ●... -
Page 68: Cleaning The Mouse
Cleaning the mouse Follow the safety precautions in the Maintenance and Service Guide for your workstation before cleaning the mouse. If the mouse has an on/off switch, turn it off. Wipe the body of the mouse with a soft microfiber cloth or chamois moistened with alcohol-free glass cleaning fluid or water with mild soap solution.