Table of Contents
Advertisement
Advertisement
Table of Contents

Related Manuals for BionX PL250HT SL XL


Summary of Contents for BionX PL250HT SL XL
- Page 1 User Manual Limited Edition PL250HT SL XL PL350HT SL XL...
-
Page 2: User Precautions
1. Read all of the enclosed installation and operating instructions from the manufacturer and follow the instructions, if any, prior to its first use. 2. Familiarize yourself with your electric bicycle and the functions of the BionX system in a safe environment before participating in road traffic for the first time. -
Page 3: Table Of Contents
Table of Contents User Precautions Description of the BionX Propulsion System BionX Propulsion System Components Inserting or Removing the Console Inserting and Removing the Battery Handling and Charging the Battery Assist Mode / Generate Mode Operating the BionX Propulsion System... -
Page 4: Description Of The Bionx Propulsion System
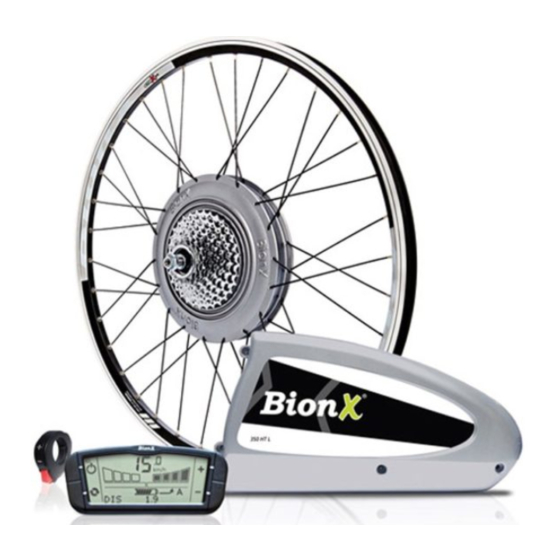
Description of the BionX Propulsion System BionX Propulsion System Components Battery Motor Console • Lithium Manganese (LiMn), • DC rear, HT hub motor • Removable white G2 console 48V, 8.8Ah, 423Wh • White, nom. 250W (EU) • Illuminated LCD display with • Removable, lockable... -
Page 5: Inserting Or Removing The Console
Power Supply • A surface mounted reed • Power supply to recharge switch - connected to the the LiMn-battery BionX console and magnet • Input voltage: 100-240V • Upon activation assistance • Output voltage: 26V is shut off (“kill switch”) • Max. charge current: 3.45A generate mode is activated • Output: 90W... -
Page 6: Inserting And Removing The Battery
“click” when the lock cylinder is properly closed “click” Removing the battery Turn off the BionX propulsion system (no illustration) Lightly press on the battery release arm, insert the key and turn clockwise The lock cylinder will protract, freeing the battery release arm (no illustration) -
Page 7: Handling And Charging The Battery
Charging the battery: WARNING Only use the BionX power supply that was supplied with the bicycle to charge the battery. The use of other power supplies can damage the battery. The BionX power supply should be used exclusively for rechargeable batteries of the specified type. - Page 8 Extreme temperatures will affect battery life, especially during charging. Avoid charging in direct sunlight or in very hot or cold temperatures. This will reduce the life of the battery considerably. We recommend charging the battery at temperatures around 20 °C (room temperature). The battery should be warmed to room temperature before it is charged, particularly when it was exposed to cold temperatures during a ride.
-
Page 9: Assist Mode / Generate Mode
< 25 % Assist Mode / Generate Mode The Bionx propulsion system operates in four assist levels in the assistance mode, and in four charging levels in the generate mode. In the assistance mode, your pedaling is assisted proportionally by an electric motor that drives the rear wheel. -
Page 10: Operating The Bionx Propulsion System
Operating the BionX Propulsion System Power (bicycle) mode 7. Speedometer 8. Trip distance/average speed/ Cycle chronometer/odometer State of charge 9. Assist (A) or generate level (G) indicator Turn the system on Briefly push either the key or key. The battery will beep 4 times and you will see a countdown, this is the... - Page 11 Turn on backlight and bicycle light (if applicable) Push and hold key for 4 seconds - display backlight and bicycle light (if available, battery integrated) are turned on. Turn off backlight Push and hold key again for 4 seconds. Select the cycling computer functions Briefly push the key to change between: Trip Distance...
-
Page 12: Programming The Basic Settings
Programming the Basic Settings In general, all basics settings for your BionX electric propulsion system are pre-set. Basic display functions can be set by entering the programming mode. Contact your dealer to customize the advanced functions of your system. Turn on the programming mode Simultaneously push until the display shows “0000”. -
Page 13: Installing/Removing The Rear Wheel
Installing/Removing the Rear Wheel We recommend the removal and installation of the rear wheel to be done by a qualified dealer. Should you have to do this yourself, please follow the instructions below: WARNING Always turn off the propulsion system prior to plugging in or unplugging the motor cables. CAUTION It is essential that the axle nuts are tightened with a torque of 40Nm/30lb-ft;... -
Page 14: Maintenance And Care
40Nm 40Nm 40Nm (30lb-ft) (30lb-ft) (30lb-ft) Installing the rear wheel • Guide the rear wheel axle into the two dropouts and make sure that the brake disc (on models with disc brakes) is inserted between the brake pads • Also make sure that the flat area at the left of the rear axle (torque reaction collar) is aligned so that it fits into the left dropout • Install the rear wheel with both sides of the axle inserted all the way in the dropouts • Tighten the axle nuts on the rear wheel with 40Nm/30lb-ft (= VERY TIGHT!). -
Page 15: Cleaning
For repair of your electric bicycle consult your qualified dealer. All of the original spare parts for your electric bicycle can be purchased through your dealer. If you need spare keys for the battery, please contact your dealer. Please retain the key number for your records. BionX Key Number... -
Page 16: Troubleshooting
Troubleshooting The system does not turn on Check the battery and make sure that it is charged. The battery must be correctly inserted in the docking station and the lock must be completely closed. Also check that all connectors of your wiring harness are properly engaged. -
Page 17: Warranty Information And Guarantee
BionX reserves the right to reject the coverage of this warranty if the accompanying documentation of BionX components is not accurate or complete. - Page 18 “Handling and Charging of the Battery“. f) The model, serial or product number on BionX product has been changed, deleted, blurred or removed. The seal (serial number sticker) on the battery housing has been broken or obviously manipulated.
- Page 19 BionX, BionX Design and powered by BionX are trademarks of BionX International Corporation. ©2011 BionX International Corporation. All Rights Reserved.
- Page 20 Your dealer bionxinternational.com...
Need help?
Do you have a question about the PL250HT SL XL and is the answer not in the manual?
Questions and answers