
Related Manuals for Extech Instruments 475040-SD


Summary of Contents for Extech Instruments 475040-SD
- Page 1 User's Guide Digital Force Gauge with SD Memory Models 475040-SD (5kg) and 475044-SD (20kg)
-
Page 2: Meter Description
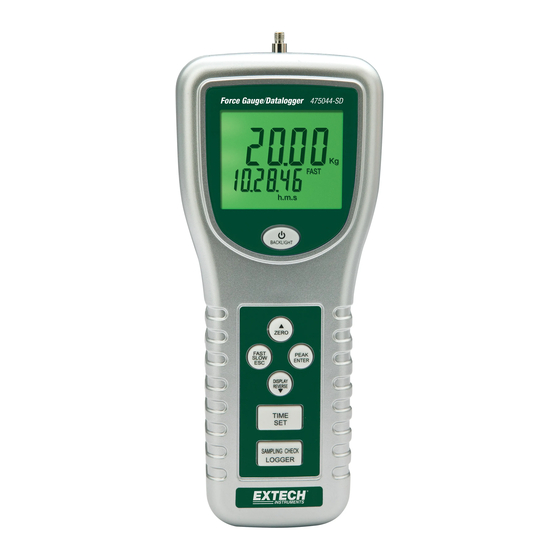
Introduction Congratulations on your purchase of this Extech Meter. This meter is shipped fully tested and calibrated and, with proper use, will provide years of reliable service. Meter Description Universal Sensing Head LCD Display Power/BACKLIGHT Button ▲/ZERO Button Fast/SLOW/ESC Button DISPLAY REVERSE/ ▼... - Page 3 METER BACK AND MOUNTING SCREW DESCRIPTION 1. Mounting screws: Hex head (#4 Allen wrench) with a thread size of metric (ISO) M5 x 0.8. The spacing between screws is 60.0 mm (2.36”) 2. Battery compartment access screws 3. Battery compartment 60mm (2.36”) 475040-044-SD-EU-EN v1.7 11/13...
-
Page 4: Getting Started
Getting Started Tension and Compression The meter automatically indicates TENSION (pull) or COMPRESSION (push) force during use. Compression displays as a negative (-) value and Tension displays as a positive value. Tension Compression Attaching measurement Adaptors Attach the adapter to the Sensing Head. Choose the adaptor to match the type of measurement to be performed Sensing Head Alignment The sensing head with adapter must be in line with the object being measured. -
Page 5: Operating Procedure
Operating Procedure Normal Measurement Press the Power button to turn the meter ON. Press and HOLD the Power button for >2seconds to turn the meter OFF. If necessary, change the displayed units. See the Setup Menu section Zero the meter by pressing the ZERO button. Apply the force and the average reading will be displayed on the LCD. - Page 6 Datalogger Preparation for datalogger Insert an SD card (from 1G size up to 16G, ≤ 4G recommended) into the SD card slot at the bottom of the meter. The card must be inserted with the front of the card (label side) facing toward the rear of the meter.
- Page 7 Peak Hold Datalogging Power on the meter Press the PEAK button. The display “PEAK” and “FAST” icons will appear. Press the ZERO button to zero the display. Press the " LOGGER button. The LCD will indicate " DATA RECORD " at the programmed peak hold sampling time, in milliseconds, will briefly appear on the bottom of the LCD.
- Page 8 SD Card File and Data structure When an SD card is used for the first time a folder is created on the card and named FGA01. Up to 99 spreadsheet documents (each with 30,000 readings) can be stored in this folder. When datalogging begins a new spreadsheet document named FGA01001.xls is created on the SD card in the FGA01 folder.
- Page 9 Example Excel data screen, Peak Mode Example Excel data screen 475040-044-SD-EU-EN v1.7 11/13...
-
Page 10: Setup Menu
Setup Menu In the Normal mode, press and Hold the SET Button >2 seconds to enter the Setup mode. With each press of the SET button the programmable functions will appear in this order: Sd F SD memory card Format dAtE Set clock time ( Year/Month/Date, Hour/Minute/Second ) SP-t... -
Page 11: Battery Replacement And Disposal
PoFF - Auto Power ON/OFF Use the ▲ button or ▼ button to select "yES" or "no". yES - Auto Power Off is enabled no - Auto Power Off is disabled When the desired condition is set, press the ENTER button to store the setting. bEEP - Beeper ON/OFF Use the ▲... -
Page 12: Specifications
Specifications 475040-SD Resolution 475044-SD Resolution 3 to 5000g 0.02 to 20.00kg 0.01 Range 0.10 to 176.40 oz 0.02 0.07 to 44.10lb 0.01 0.03 to 49.03N 0.01 0.3 to 196.12N 0.02 ± (0.4% Rdg + 1 digit) ± (0.5% Rdg + 2 digit) Accuracy* *@3000g &...
Need help?
Do you have a question about the 475040-SD and is the answer not in the manual?
Questions and answers