Dirt Devil vacuum cleaner Owner's Manual
Dirt devil vacuum cleaner
Hide thumbs
Also See for vacuum cleaner:
- Owner's manual (36 pages) ,
- Owner's manual (28 pages) ,
- Owner's manual (8 pages)
Table of Contents
Advertisement
Available languages
Available languages
Quick Links
Download this manual
See also:
Owner's Manual
WARNING:
Cleaner
assembly
may
include small parts. Small
parts can present a choking
hazard.
Español - página E1
OWNER'S MANUAL
Operating and Servicing
Instructions
• Please read these
instructions carefully before
using your Upright.
• Let us help you put your
vacuum together or answer
any questions, call:
1-800-321-1134
(USA & Canada)
www.dirtdevil.com
Warranty Registration
• Online at: www.dirtdevil.com
• Mail: Royal Appliance Mfg
7005 Cochran Rd.
Glenwillow, Ohio 44139
For quick reference, please record your
vacuum information below.
Model #:
Mfg. Code:
(Mfg. code located on the lower backside of cleaner)
©2005 All rights reserved #1-113196-000
11/05
Advertisement
Table of Contents

Related Manuals for Dirt Devil vacuum cleaner


Summary of Contents for Dirt Devil vacuum cleaner
- Page 1 OWNER’S MANUAL Operating and Servicing Instructions • Please read these instructions carefully before using your Upright. • Let us help you put your vacuum together or answer any questions, call: 1-800-321-1134 (USA & Canada) www.dirtdevil.com Warranty Registration • Online at: www.dirtdevil.com •...
-
Page 2: Safety Instructions
• READ ALL INSTRUCTIONS BEFORE USING THE APPLIANCE. • ALWAYS FOLLOW THESE SAFETY INSTRUCTIONS. • BRING VACUUM CLEANER TO UPRIGHT POSITION WHEN USING THE HOSE AND ATTACHMENTS. • DO NOT LEAVE VACUUM CLEANER UNATTENDED WHEN PLUGGED IN. -
Page 3: Save These Instructions
• Keep the vacuum cleaner on the floor. Only the hand-held vacuum cleaners may be set on furniture. • Vacuum cleaner must be in the upright position to lift the rotating brush off the carpet when doing above floor cleaning. -
Page 4: Table Of Contents
Troubleshooting Guide ......Page 12 LIMITED WARRANTY To the consumer, Royal Appliance Mfg. Co. warrants this vacuum cleaner to be free of defects in material or workmanship commencing upon the date of the original purchase. Refer to your vacuum cleaner carton for the length of warranty and save your original sales receipt to validate start of warranty period. -
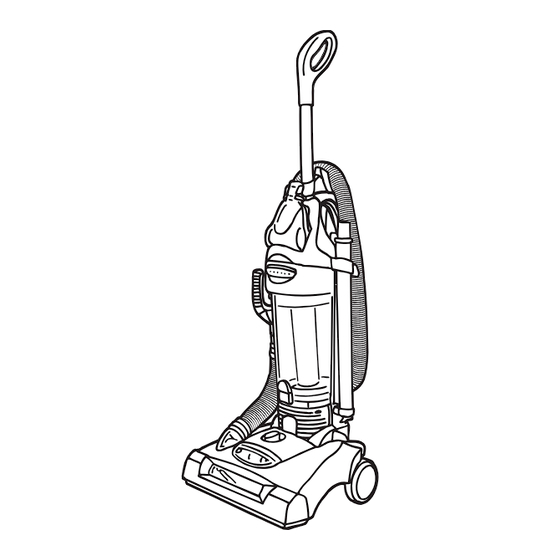
Page 5: Features
FEATURES FRONT VIEW BACK VIEW FRONT VIEW BACK VIEW 1. Handle Grip 18. Hose Caddy 2. Handle 19. Hose 3. Power Brush Tool 20. Dust Brush 4. Crevice Tool (inside 21. Cord Guide extension wand) 22. Cord Wrap with Quick 5. -
Page 6: How To Assemble
HOW TO ASSEMBLE TOOL REQUIRED: PHILLIPS OR FLAT HEAD SCREWDRIVER Remove dirt container Attach back panel of cleaner by pushing Attach lower hose to right side of from back panel. down into place (Diagram 2). Insert the two back panel (Diagram 3). Insert one (2) screws into the front of the back panel (1) screw through the back of the and tighten until secure (Diagram 2a). -
Page 7: How To Operate
HOW TO OPERATE CAUTION: Brush agitator continues to rotate while hose is removed or in use and at all times while cleaner is on. Keep hair, loose clothing, fingers, and all parts of body away from brush area while cleaner is on. Cleaner must be in the upright position to lift the rotation brush off the carpet when cleaning above the floor. -
Page 8: Dirt Container & Filter: Removal & Replacement
HOW TO OPERATE: CONTINUED EXTENSION WAND CARRY HANDLE If additional length is Use the carry handle on needed, use the extension the back of the cleaner wand and crevice tool. to move the cleaner from NOTE: The crevice tool is room to room. -
Page 9: Dirt Container & Filter: Removal & Replacement
DIRT CONTAINER & FILTER REMOVAL & REPLACEMENT: CONTINUED TO REPLACE FOAM FILTER TO REPLACE PLEATED FILTER Return filter to dirt container Hold the dirt container lid by placing on top of screen and grasp the filter tab. inside dirt container. Pull away from lid. -
Page 10: Belt Or Brushroll: Removal & Replacement
BELT OR BRUSHROLL: REMOVAL & REPLACEMENT TOOL REQUIRED: PHILLIPS OR FLATHEAD SCREWDRIVER WARNING: TO REDUCE THE RISK OF INJURY FROM MOVING PARTS - UNPLUG BEFORE SERVICING. BELT STYLE For Belt Style 12 replacements, please call 1-800-321-1134 or visit our website at www.dirtdevil.com to locate a dealer nearest you. -
Page 11: Lightbulb: Removal & Replacement
LIGHTBULB: REMOVAL & REPLACEMENT TOOL REQUIRED: SMALL PHILLIPS HEAD SCREWDRIVER WARNING: TO REDUCE THE RISK OF ELECTRIC SHOCK - UNPLUG CLEANER BEFORE REMOVING OR REPLACING LIGHTBULB. This cleaner uses a common automotive lamp #906, 13.0 volts. For bulb replacement call 1-800-321-1134 or visit our website at www.dirtdevil.com to locate a dealer nearest you. -
Page 12: Troubleshooting Guide
TROUBLESHOOTING GUIDE WARNING: TO REDUCE RISK OF PERSONAL INJURY - UNPLUG CLEANER BEFORE SERVICING PROBLEM POSSIBLE REASON POSSIBLE SOLUTION Cleaner won’t run 1. Power cord not firmly plugged into 1. Plug unit in firmly. outlet. 2. Blown fuse or tripped breaker. 2. - Page 13 GUIA DE SOLUCIÓN DE PROBLEMAS MANUAL DEL PROPIETARIO ADVERTENCIA: PARA REDUCIR EL RIESGO DE LESIONES PERSONALES, DESCONECTE ANTES DE DAR SERVICIO Instrucciones de Funcionamiento PROBLEMA POSIBLE CAUSA SOLUCIÓN POSIBLE y Servicio La aspiradora no 1. El cordón eléctrico no está bien 1.
-
Page 14: Instrucciones De Seguridad Importantes
ESTA ASPIRADORA ESTÁ DISEÑADA PARA USO DOMÉSTICO SOLAMENTE FOCO: RETIRO Y REEMPLAZO INSTRUCCIONES DE SEGURIDAD IMPORTANTES HERRAMIENTA REQUERIDA: DESTORNILLADOR PHILLIPS PEQUEÑO ADVERTENCIA: PARA REDUCIR EL RIESGO DE DESCARGAS ELECTRICAS - DESCONECTE LA ASPIRADORA ANTES DE Cuando use un electrodoméstico se deben seguir precauciones básicas, QUITAR O CAMBIAR EL FOCO. - Page 15 • No coloque objetos en las aberturas. No lo use con una abertura bloqueada; BANDA Y CEPILLO RETIRO Y REEMPLAZO manténgalo libre de polvo, pelusa, pelo y cualquier cosa que pueda reducir el HERRAMIENTA REQUERIDA: DESTORNILLADOR PHILLIOPS flujo de aire. ADVERTENCIA: PARA REDUCIR EL RIESGO DE LESIONES CAUSADAS POR LAS PARTES MÓVILES, •...
- Page 16 RECIPIENTE DE POLVO Y FILTRO RETIRO Y REEMPLAZO: FELICITACIONES CONTINUACIÓN Usted es ahora el orgulloso propietario de una Dirt Devil ® . Confiamos REPOSICIÓN DEL FILTRO DE ESPUMA REPOSICIÓN DEL FILTRO CON PLIEGUES en que su nueva adquisición le ofrecerá muchos años de satisfacción.
- Page 17 CÓMO FUNCIONA: CONTINUACIÓN CARACTERÍSTICAS LANZA DE EXTENSIÓN WAND ASA DE TRANSPORTE PARTE FRONTAL PARTE POSTERIOR Si se necesita mayor longitud, Para llevar la aspiradora use la lanza de extensión y el de una habitación a accesorio para hendiduras. otra, use el asa de Saque la herramienta para transporte ubicada en la hendiduras de la lanza de...
- Page 18 CÓMO ENSAMBLAR CÓMO FUNCIONA HERRAMIENTA NECESARIA: DESTORNILLADOR PHILLIPS O PLANO PRECAUCIÓN: El agitador del cepillo continúa girando cuando usted usa o retira la manguera o si la aspirdora está funcionando. Mantenga lejos del área del cepillo el pelo, la ropa suelta, los dedos y otras partes del cuerpo cuando la aspiradora esté...
Need help?
Do you have a question about the vacuum cleaner and is the answer not in the manual?
Questions and answers