Dirt Devil Vacuum Cleaner Owner's Manual
Vacuum cleaner
Hide thumbs
Also See for Vacuum Cleaner:
- Owner's manual (32 pages) ,
- Owner's manual (24 pages) ,
- Owner's manual (30 pages)
Advertisement
Available languages
Available languages
Quick Links
OWNER'S MANUAL
Operating and Servicing
Instructions
Please read these
instructions carefully
before using your cleaner.
Let us help you put your
vacuum together or
answer any questions, call:
1-800-321 -1 134
(USA & Canada)
www.dirtdevil.com
AWARNING:
'leaner assembly
may
include small parts. Small
parts can present a choking
Espafiol
-
pagina El
For quick reference, please record your
vacuum information below.
Model
Mfg. Code:
hazard.
02004
All rights reserved
# 1-1
13354-000
3/04
(Mfg.
code located on the lower backside of cleaner)
Advertisement

Related Manuals for Dirt Devil Vacuum Cleaner


Summary of Contents for Dirt Devil Vacuum Cleaner
- Page 1 OWNER'S MANUAL Operating and Servicing Instructions Please read these instructions carefully before using your cleaner. Let us help you put your vacuum together or answer any questions, call: 1-800-321 -1 134 (USA & Canada) www.dirtdevil.com AWARNING: For quick reference, please record your 'leaner assembly vacuum information below.
-
Page 2: Important Safety Instructions
[HIS CLEANER IS INTENDED FOR HOUSEHOLD USE ONLY. IMPORTANT SAFETY INSTRUCTIONS Nhen you use an appliance, basic precautions should be followed, ncluding the following: READ ALL INSTRUCTIONS BEFORE USING THE APPLIANCE. ALWAYS FOLLOW THESE SAFETY INSTRUCTIONS. BRING CLEANER TO UPRIGHT POSITION WHEN USING THE HOSE AND ATTACHMENTS. - Page 3 Do not use to pick up flammable or combustible liquids, such as gasoline, or use in areas where they may be present. Keep the vacuum cleaner on the floor. Only the hand-held vacuum cleaners may be set on furniture. Cleaner must be in the upright position to lift the rotating brush off the car- pet when doing above floor cleaning.
-
Page 4: Limited Warranty
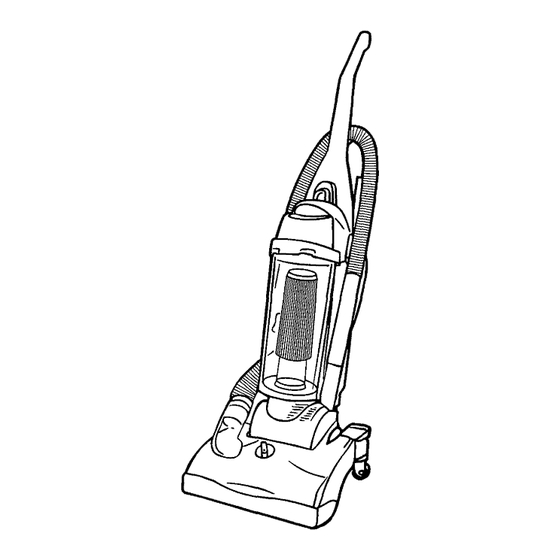
Page 12 LIMITED WARRANTY To the consumer, Royal Appliance Mfg. Co. warrants this vacuum cleaner to be free of defects in materi- al or workmanship commencing upon the date of the original purchase. Refer to your vacuum cleaner carton for the length of warranty and save your original sales receipt to validate start of warranty period. - Page 5 FRONT VlEW BACK VlEW FRONT VlEW BACK VlEW 1. Handle 11. Cord Guide 2. Dirt Container Release Latch 12. Hose 3. Dirt Container Lid 13. Dust Brush 4. See Through Dirt Container 14. Crevice Tool 5. Dirt Container Filter 15. Carrying HandleIUpper Cord Wrap 6.
- Page 6 OOL REQUIRED: PHILLIPS OR FLAT HEAD SCREWDRIVER To secure, insert one (1) Push back dirt window flap. ssernble the body to the screw into the back of the Align tabs on clear dirt pas- ase so that the lower hose on the right side.
- Page 7 Insert the short end of the Insert hose handle into the Assemble dirt container lid hose onto the tool caddy left side of the cleaner. Press to the dirt container. holder on the right side. down firmly. Press hose into top and sides of tool caddy.
- Page 8 AUTION: Brush agitator continues to rotate while hose is removed or in use and at all times while leaner is on. Keep hair, loose clothing, fingers, and all parts of body away from brush area while leaner is on. leaner must be in the upright position to lift the rotation brush off the carpet when cleaning above the floor. \BOVE FLOOR CLEANING Slide the tool hose into the Remove the hose from the...
- Page 9 WARNING: TO REDUCE THE RISK OF INJURY FROM MOVING PARTS UNPLUG BEFORE SERVICING. For filter replacement (Part 1-500280-000) please call 1-800-321-1134 or visit www.dirtdevil.com to locate a dealer nearest you. NOTE: Unplug cleaner before changing filter. NOTE: For best performance, replace filter yearly. EMPTY AND CLEAN DIRT CONTAINER Remove lid by grasping both Depress latch to remove dirt...
- Page 10 ..:HANGING BELT OR BRUSHROLL. 0 REMOVE BELT Be sure belt is off motor Lift nozzle guard off. ay cleaner flat and flip shaft. Lift and remove leaner t o expose nozzle brushroll. Dispose of old belt. ase.
- Page 11 This cleaner uses a common automotive lamp #906,13.0 volts. For bulb replacement call 1-800-321- 1134 or your local auto paris store. TOOL REQUIRED: PHILLIPS OR FLATHEAD SCREWDRIVER Depress latch to remove dirt container Pull bulb out of socket to Replace lens. Secure the from cleaner.
-
Page 12: Customer Service
DUCE RISK OF PERSONAL INJUF WARNING: TO UNPLUG CLEANER BEFORE SERVICING PROBLEM POSSIBLE REASON POSSIBLE SOLUTION Cleaner won't 1. Power cord not firmly 1. Plug unit in firmly. plugged into outlet. 2. Blown fuse or tripped breaker. 2. Check fuse or breaker in home. Replact fuselreset breaker. - Page 13 MANUAL DEL PROPlETARlO lnstrucciones de Funcionamiento y Servicio Por favor lea estas instrucciones con cuidado antes de usar su aspiradora. Permitanos ayudarle a ensamblar su aspiradora o a contestar sus preguntas, llame al: 1-800-321-1134 (EE.UU. y Canada) www.dirtdeviI.com ADVERTENCIA Para tener una referencia rapida, anote por favor la inforrnacion de su aspiradora aqui.
-
Page 14: Instrucciones De Seguridad Importantes
ESTA ASPIRADORA PARA US0 SOLAMENTE ESTA DISENADA DOMESTICO INSTRUCCIONES DE SEGURIDAD IMPORTANTES Cuando use u n electrodomestico se deben seguir precauciones basi- cas, incluyendo siguientes: LEA TODAS LAS INSTRUCCIONES ANTES DE USAR EL APARATO. SIEMPRE SlGA ESTAS INSTRUCCIONES DE SEGURIDAD. PONGA LA ASPIRADORA EN POSICION VERTICAL CUANDO USE LA MANGUERA Y LOS ACCESORIOS. - Page 15 No tome la clavija o el aparato con las manos mojadas. No coloque objetos en las aberturas. No lo use con una abertura bloquea- da; mantengalo libre de polvo, pelusa, pelo y cualquier cosa que pueda reducir el flujo de aire. Mantenga lejos de las aperturas y partes moviles, el pelo, ropa suelta, dedos y todas las partes del cuerpo.
- Page 16 FELICITACIONES Usted es ahora el orgulloso propietario de una Dirt Devil'. Confiamos en que su nueva adquisici6n le ofrecers muchos aiios de satisfacci6n. Nuestra compaiiia disefi6 desarroll6 este product0 teniCndolo a usted en mente. Estamos muy orgullosos de nuestros productos y esperamos que usted estC igualmente satisfecho con su calidad y rendimiento, Gracias por su apoyo a 10s productos Dirt Devila.
- Page 17 VISTA DE LA PARTE VISTA DE LA PARTE FRONTAL POSTERIOR VISTA DE LA PARTE FRONTAL VISTA DE LA PARTE POSTERIOR 1. Asa 11. Guia del Cordon Electrico 2. Seguro de Liberacion del 12. Manguera Recipiente de Polvo 13. Cenillo nara Polvo 3.
- Page 18 4ERRAMIENTA NECESARIA: DESTORNILLADOR PHILLIPS o plano Ernpuje hacia atras la aleta de la nsamble el cuerpo a la base de Asegure insertando un (1) ventana. Alinee las lengijetas de manera que la manguera tornillo en la parte posterior de la ventana transparente en las iferior quede a la derecha.
- Page 19 lnserte el extremo mis pequeiio de lnserte el asa de la manguera en el Coloque la tapa del recipiente de la manguera en el soporte del lado lado izquierdo de la aspiradora. polvo en el recipiente de polvo. derecho de la caia de accesorios. Presione firmemente hacia abajo.
- Page 20 PRECAUCI~N: El agitador del cepillo confinlia girando cuando e d a o relira /a manguera y si la aspiradora esls lun- cionando. Manfenga lejos del drea del cepillo el pelo, la ropa suelta, 10s dedos y otras parles del cuerpo cuando la aspi- radora est6 funcionando.
- Page 21 ADVERTENCIA: PARA REDUCIR EL RIESGO DE LESIONES CAUSADAS POR LAS PARTES MOVILES, DESCONECTE ANTES DE DAR SERVICIO. Para el filtro de reemplazo (No. de Parte 1-J00280-000) por favor llame al 1-800-321-1 134 o visite www.dirtdevil.com aara localizar al distribuidor mas cercano a usted. NOTA: Desconecte la aspiridora antes de cambiar el filtro.
- Page 22 HERRAMIENTA NECESARIA: DESTORNILLADOR PHILLIPS ADVERTENCIA: PARA REDUCIR EL RIESGO DE LESIONES CAUSADAS POR LAS PARTES M~vLEs. DESCONECTE IA ASPIRADORA ANTES DE CAMBIAR LA BANDA 0 EL CEPILLO GIRATORIO. PARA RETIRAR LA BANDA Acueste laaspiradom y volt6ela para Levante la proteccion de la Asegurese de que la correa este ver la base de la boquilla.
- Page 23 ANTES DE RETIRAR 0 REEMPLAZAR EL FOCO. Esta aspiradora utiliza un foco automotor comun No.906, 13.0 voltios. Para focos de reemplazo, llame all-800-321-1134 o a su tienda de partes automotrices. ERRAMIENTA NECESARIA: DESTORNILLADOR PLAN0 ----------I Oprima el seguro para quitar el recipiente Para retirar el foco, saquelo Vuelva a colocar la caratula.
- Page 24 PROBLEMA POSIBLE CAUSA SOLUCION POSIBLE La aspiradora 1. El cordon electric0 no esta Conecte la unidad con firmeza. no funciona bien conectado en la toma de corriente. 2. Revise el fusible o el interruptor de la 2. Fusible quemado o interruptor casa.
-
Page 25: Service A La Clientele
AVERTISSEMENT : AFIN DE REDUIRE LES RISQUES DE BLESSURE CORPORELLE, DEBRANCHEZ L'APPAREIL AVANT DE PROCEDER A SON ENTRETIEN. PROBLEME CAUSES POSSIBLES SOLUTIONS POSSIBLES L'appareil ne 1. La fiche du cordon d'alimen 1. Branchez fermement le cordon fonctionne pas tation n'est pas bien insere~ d'alimentation. - Page 26 AVANT D'ENLEVER ET DE REMPLACER L'AMPOULE. Cet aspirateur utilise une ampoule automobile courante : no 906, 13,O volts. Pour acheter une ampoule composez le 1-800-321-1134 ou contactez votre magasin de p[eces automobiles. OUTlL NECESSAIRE TOURNEVIS A POINTE CRUCIFORME OU A LAME PLATE Appuyez sur le loquet pour retirer le Tirez sur I'ampoule pour la Remettre le verre.
- Page 27 POUR EVITER DE VOUS BLESSER AVEC LES PIECES EN MOUVEMENT, D~BRANCHEZ AVERTISSEMENT L'APPAREIL AVANT DE REMPLACER LA COURROIE OU LE ROULEAU-BROSSE. COURROIE STYLE 4 OU 51 POUR ENLEVER LA COURROIE Posez I'aspirateur a plat Soulevez le dispositif de S'assurer que la courroie est retournez-le pour exposer la protection du suceur.
- Page 28 Pour obtenir un filtre de rechanoe Ioikce no 1-500280-000). veuillez composer le 1-800-321-1134.0~ visiter le site www.dirtdevil.com pour connailre le centre de sewice le plus proche. NOTE: Dtfbranchez I'aspirateur avant de changer le filtre. NOTE: Pour un meilleur rendement, remplacez le filtre chaque annee. VlDEZ ET NETTOYEZ LE GODET A POUSSIERE Appuyezsur le loquet pour retir- Retirez...
- Page 29 ATTENTION L'agilaleur de la brosse continues pivoler lorsque le luyau esl enlev6 ou en marche foul Ie temps lorsque I'aspiraleur fonclionne. Gardez les cheveux, les v6lemenls amples, el loule parfie du corps a I'6ca1i de la zone de la brosse lorsque I'aspiraleur esl en marche. L'aspirateur doit Btre en position verticale pour pouvoir lever la brosse rotative et nettoyer au-dessus du sol.
- Page 30 zaJasul aau61od neAnl 9393 aqane6 '~naleJ!dse,l zafinddy ')uauauJai zaJlseau3 neAnj suep uoddns -same saJ!os lneq zau!laul puol lap06 -snod luawwon Jax!b sa~!ossa33e zayuelg uop~o3 suep aJa!s suep JnaleJ!dse,l zahndde zass!lg m!sods!p suep aS!Jd 'luwno3 zaUayy qdse.1 sJan 'luene,l ap~annoa lanbq aq!s neauued 'ague...
- Page 31 DE L'ASPI- Montez le corps de I'aspirateur Pourfixez I'ensemble, inserez une Poussez vers I'arriere le rabat de l a sur la base de maniere a ce que (1) vis a l'arriere de I'aspirateur fendre du passage de la poussiere. le tuyau inferieur soit du c6te au - d ew s I'interrupteur Alignez les languettes situees sur la...
- Page 32 VUE DE FACE VUE DE FACE VUE ARRIERE 1. Poianee 11. Guide du cordon 2. Loqiet du godet a poussiere. 12. Tuyau 3. Couvercle du godet a pousslere 13. Brosse a epousseter 4. Godet a poussiere transparent 14. Suceur plat 5.
- Page 33 snoN suoae n3uo3 qnpoad snoa 'apt snoN saururos sJag fq!npo~d snou suoqdsa snoa zaJas psne qqs!ps snou g!lenb .ma1 sau6!suo3 ........a6t?d suo!gd!maa (!a~t?ddt?,l a6t?d......... a6t?lqurasst/ ............. a6elquass~ mams sd~oa ~!a~t?dde,l ........a6ed.. a6qqurass~ yoddns a6elqurass~ aauB!od ~ a 1 l!a~t?ddt?,l ..........
- Page 34 Ne tirez pas I'appareil par son cordon, ne vous servez pas du cordon cornrne poignee, ne ferrnez pas de portes sur le cordon et ne tirez pas le cordon sur des coins ou des bords tranchants. ~ v i t e z de passer I'appareil sur le cordon d'alimentation.
-
Page 35: Consignes De Securite Importantes
CET APPAREIL A CONCU EXCLUSIVEMENT POUR UN USAGE DOMESTIQUE. CONSIGNES DE SECURITE IMPORTANTES Lorsque vous utilisez un appareil menager, vous devez prendre certaines precautions de securite, telles que LlSEZ TOUTES LES INSTRUCTIONS AVANT D'UTILISER L'APPAREIL. RESPECTEZ TOUJOURS A LA LETTRE CES CONSIGNES DE SECURITE. METTRE L'ASPIRATEUR EN POSITION VERTICALE QUAND VOUS UTlLlSEZ LE TUYAU ET LES ACCESSOIRES. - Page 36 alaPolu apog uo!iaq~qel apo3 uo!leq~qej aAnoJ1 a!ved amapaju! ala!JJe !dSe,l a &' (Jfl...
Need help?
Do you have a question about the Vacuum Cleaner and is the answer not in the manual?
Questions and answers