Chauvet Legend 330SR Spot User Manual
Hide thumbs
Also See for Legend 330SR Spot:
- Quick reference manual (40 pages) ,
- Quick reference manual (64 pages)
Table of Contents
Advertisement
Quick Links
Download this manual
See also:
Quick Reference Manual
Advertisement
Table of Contents

Related Manuals for Chauvet Legend 330SR Spot


Summary of Contents for Chauvet Legend 330SR Spot
- Page 1 User Manual...
- Page 2 Copyright Notice CHAUVET® owns the content of this User Manual in its entirety, including but not limited to pictures, logos, trademarks, and resources. © Copyright 2014 CHAUVET®. All rights reserved.
-
Page 3: Table Of Contents
Table of Contents Table of Contents 1. Before You Begin ............................1 What Is Included ................................1 Claims ......................................1 Manual Conventions ..................................1 Symbols ....................................... 1 Product At A Glance ..............................2 Safety Notes ................................. 2 Personal Safety .................................... 2 Mounting And Rigging .................................. - Page 4 Table of Contents DMX Values (cont.) ..............................24 DMX Values (cont.) ..............................25 DMX Values (cont.) ..............................26 DMX Values (cont.) ..............................27 5. Technical Information ..........................28 Product Maintenance ..............................28 Error Messages ................................29 6. Technical Specifications ......................... 30 Returns ..................................
-
Page 5: Before You Begin
If the box or the contents (the product and included accessories) appear damaged from shipping or show signs of mishandling, notify the carrier immediately, not CHAUVET®. Failure to report damage to the carrier immediately may invalidate your claim. In addition, keep the box and contents for inspection. -
Page 6: Product At A Glance
This product contains no user-serviceable parts. Any reference to servicing in this User Manual will only apply to properly trained CHAUVET® certified technicians. Do not open the housing or attempt any repairs. -
Page 7: Introduction
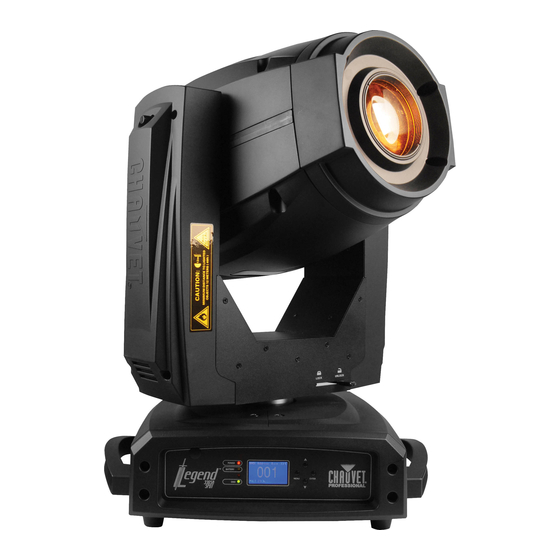
Introduction 2. I NTRODUCTION The Legend™ 330SR Spot is a compact, electronic, moving yoke beam product equipped with a Description 330 watt X8 lamp. It includes a color wheel with 7 colors plus white. It also includes a rotating 3-facet prism, frost, remote focus, and 2 gobo wheels for gobo morphing. ·... -
Page 8: Overview
Introduction Overview Power Switch Fuse Data In DMX In Data Power In Control Panel Front View Rear View Handle Top View Side View Legend™ 330SR Spot User Manual Rev. 1... -
Page 9: Dimensions
Introduction Dimensions 15.12 in 22.01 in 384 mm 428 mm 4.76 in 121 mm 22.01 in 559 mm 17.13 in 435 mm 13.54 in 344 mm 10.63 in 15.12 in 384 mm 270 mm 25.55 in 649 mm 19.80 in 503 mm Legend™... -
Page 10: Setup
The listed current rating indicates the maximum current draw during normal operation. For more information, you may download Sizing Circuit Breakers from the CHAUVET® website: www.chauvetlighting.com/download/pro. Always connect this product to a protected circuit with an appropriate electrical ground to avoid the risk of electrocution or fire. -
Page 11: Gobo Wheel 1
Setup The Legend™ 330SR Spot includes two gobo wheels: 8 rotating gobos plus open on wheel 1 Gobo Wheel and 14 fixed gobos plus open on wheel 2. The diagram shows the gobo number on the wheel, as numbered in the DMX Values tables. -
Page 12: Color Wheel
Setup The Legend™ 330SR Spot includes one color wheel with 7 fixed colors plus open (white), as Color Wheel indicated below. The diagram shows the color number on the wheel, as numbered in the Values tables. Open (White) Legend™ 330SR Spot User Manual Rev. 1... -
Page 13: Lamp Replacement
Setup The Legend™ 330SR Spot is equipped with an Osram Sirius 330W X8 lamp. Follow the Lamp Replacement procedure below to safely change the lamp. Disconnect the product from power before opening. Procedure 1. Turn the product off and disconnect it from power. Wait at least 15 minutes for the lamp to cool down. -
Page 14: Procedure (Cont.)
· DO NOT power cycle the product unless it is necessary. · DO NOT re-strike the lamp immediately after turning it off. CHAUVET® recommends waiting 5 minutes before trying to re-strike the lamp. -
Page 15: Mounting
2 included omega brackets. Make sure the clamps (such as CLP-15 from CHAUVET®) are capable of supporting the weight of this product. Use two mounting points per product. In addition, use a safety cable to link the product to the structure. -
Page 16: Operation
Operation 4. O PERATION Control Panel Button Function Description <MENU> Exits from the current menu or function <ENTER> Enables the currently displayed menu or sets the currently selected value in to the current function <UP> Navigates upward through the menu list or increases the numeric value when in a function <DOWN>... -
Page 17: Menu Map
Operation Menu Map Main Level Programming Levels Description DMX Address 001–512 Selects a starting DMX address Mode1 (21) Selects the 21-channel DMX mode DMX Functions DMX Channel Mode Mode2 (27) Selects the 27-channel DMX mode View DMX Value Shows current DMX values for each channel Pan Inverse Defines the direction of the pan function Tilt Inverse... -
Page 18: Menu Map (Cont.)
Operation Menu Map (Cont.) Main Level Programming Levels Description Auto Test Selects the product’s automatic test sequence Fixture Test Manual Test Selects the product’s manual test function Fixture Use Time Displays total hours of products use Displays the amount of time the lamp has Exit been on Fixture Information... -
Page 19: Dmx Functions
Operation DMX Functions From the Main Menu, highlight DMX Functions and press <ENTER> (a new menu with the DMX functions will open). DMX Address 1. Highlight DMX Address. 2. To change the current address, press <ENTER>. a. Change the starting address (001–512). b. -
Page 20: Lamp Settings
Operation Lamp Settings From the Main Menu, highlight Lamp Settings and press <ENTER>. The lamp will not turn on if the ambient temperature is 104 ºF (40 ºC) or higher. Lamp On/Off 1. Highlight On/Off. 2. To turn the lamp on or off, press <ENTER>. a. -
Page 21: Display Settings
Operation Display Settings From the Main Menu, highlight Display Settings and press <ENTER>. Overturn Display 1. Highlight Display Inverse. 2. To overturn the display, press <ENTER>. a. Select YES to turn the LCD around or NO to keep the normal LCD view. b. -
Page 22: Reset Functions
Operation Reset Functions From the Main Menu, highlight Reset and press <ENTER>. You can leave this sub-menu at any time by pressing <MENU> or selecting NO. Pan/Tilt Reset · Highlight Pan/Tilt and press <ENTER>. a. Select YES to reset the pan and tilt movements to their home positions. b. -
Page 23: Special Functions
Operation Special Functions From the Main Menu, highlight Special Functions and press <ENTER>. Fixture Maintenance Timers 1. Highlight Fixture Maintenance and press <ENTER> (the current maintenance interval and remaining time will show). 2. To change the maintenance interval timer, highlight Interval and press <ENTER>. a. - Page 24 Operation Gobo · Select Gobo and press <ENTER>. a. Select the new value (-128–127). b. Accept the new value. R-Gobo · Select R-Gobo and press <ENTER>. a. Select the new value (-128–127). b. Accept the new value. Gobo 2 · Select Gobo 2 and press <ENTER>.
-
Page 25: Dmx Values
Operation DMX Values Mode1 (21) Channel Function Value Percent/Setting 000 ó 255 0–100% 000 ó 255 0–100% Fine Pan 000 ó 255 0–100% Tilt 000 ó 255 0–100% Fine Tilt 000 ó 255 Fast to slow Pan/Tilt Speed 000 ó 255 0–100% Dimmer 000 ó... -
Page 26: Dmx Values (Cont.)
Operation DMX Values (Cont.) Mode1 (21) Channel Function Value Percent/Setting (cont.) 000 ó 127 Index/split gobo 128 ó 189 Gobo Wheel 1 Clockwise rotation, fast to slow 190 ó 193 Rotate Stop 194 ó 255 Counter-clockwise rotation, slow to fast 000 ó... -
Page 27: Dmx Values (Cont.)
Operation DMX Values (cont.) Mode1 (21) Channel Function Value Percent/Setting (cont.) 000 ó 069 No function 070 ó 079 Pan/tilt blackout mode enabled 080 ó 089 Pan/tilt blackout mode disabled 090 ó 099 Color wheel change blackout mode enabled 100 ó 109 Color wheel change blackout mode disabled 110 ó... -
Page 28: Dmx Values (Cont.)
Operation DMX Values (cont.) Mode2 (27) Channel Function Value Percent/Setting 000 ó 255 0–100% 000 ó 255 0–100% Fine Pan 000 ó 255 0–100% Tilt 000 ó 255 0–100% Fine Tilt 000 ó 255 Fast to slow Pan/Tilt Speed 000 ó 255 0–100% Dimmer 000 ó... -
Page 29: Dmx Values (Cont.)
Operation DMX Values (cont.) Mode2 (27) Channel Function Value Percent/Setting (cont.) 000 ó 007 Open 008 ó 014 Gobo 1 015 ó 021 Gobo 2 022 ó 028 Gobo 3 029 ó 035 Gobo 4 036 ó 042 Gobo 5 043 ó... -
Page 30: Dmx Values (Cont.)
Operation DMX Values (cont.) Mode2 (27) Channel Function Value Percent/Setting (cont.) 000 ó 255 0–100% Frost 000 ó 007 No function 008 ó 015 Macro 1 016 ó 023 Macro 2 024 ó 031 Macro 3 032 ó 039 Macro 4 040 ó... -
Page 31: Dmx Values (Cont.)
Operation DMX Values (cont.) Mode2 (27) Channel Function Value Percent/Setting (cont.) 000 ó 007 No function 008 ó 028 Color Macro 1 029 ó 049 Color Macro 2 050 ó 069 Color Macro 3 070 ó 090 Color Macro 4 091 ó... -
Page 32: Technical Information
Technical Information 5. T ECHNICAL NFORMATION To maintain optimum performance and minimize wear, you should clean this product Product frequently. Usage and environment are contributing factors in determining the cleaning Maintenance frequency. As a rule, clean this product at least twice a month. Dust build-up reduces light output performance and can cause overheating. -
Page 33: Error Messages
Technical Information Error Messages Message Cause(s) Action(s) · Check lamp Lamp Startup Fail The lamp has not started after being · Check lamp socket and wiring struck · Send product for repair · Check sensor wiring Temperature Sense Error No communication with temperature ·... -
Page 34: Technical Specifications
Technical Information 6. T ECHNICAL PECIFICATIONS Dimensions and Length Width Height Weight Weight 13.5 in (344 mm) 17.1 in (435 mm) 25.5 in (649 mm) 47 lb (21.3 kg) Note: Dimensions in inches rounded to the nearest decimal digit. Power Power Supply Type Range Voltage Selection... -
Page 35: Returns
Be prepared to provide the model number, serial number, and a brief description of the cause(s) for the return. Clearly label the package with an RMA number. CHAUVET® will refuse any product returned without an RMA number.
Need help?
Do you have a question about the Legend 330SR Spot and is the answer not in the manual?
Questions and answers