
Related Manuals for Hisense LCD26V88AM


Summary of Contents for Hisense LCD26V88AM
-
Page 1: Service Manual
Liquid Crystal Display Television Service Manual Chassis : MST6E16GS Product Type : LCD26V88AM LCD32V88AM Ver 1.0 Hisense Electric Co. , Ltd. April, 2009... -
Page 2: Table Of Contents
7.4 Troubleshooting for Audio ......................... 35 7.5 Troubleshooting for TV/VGA/HDMI input ..................36 7.6 Troubleshooting for YPbPr input ....................... 37 7.7 Troubleshooting for Video/S-Video input ..................38 8. Explode View ............................... 39 9. Schematic circuit diagram ..........................39 Hisense Confidential... -
Page 3: Service Manual
WHEN REPLACEMENT PARTS ARE REQUIRED, BE SURE TO USE REPLACEMENT PARTS SPECIFIED BY THE MANUFACTURER. Proper service and repair is important to the safe, reliable operation of all Hisense Electric Co., Ltd Equipment. The service procedures recommended by Hisense and described in this Service Guide are effective methods of performing service operations. - Page 4 (4) If a foreign substance (such as water, metal, or liquid) gets inside the panel module, immediately turn off the power. Continuing to use the product may cause fire or electric shock. (5) If the product emits smoke, and abnormal smell, or makes an abnormal sound, Hisense Confidential...
-
Page 5: Notes
Failure to observe this precaution may result in, the surface of the panel being scratched by foreign matter. Hisense Confidential... -
Page 6: Product Function Specifications
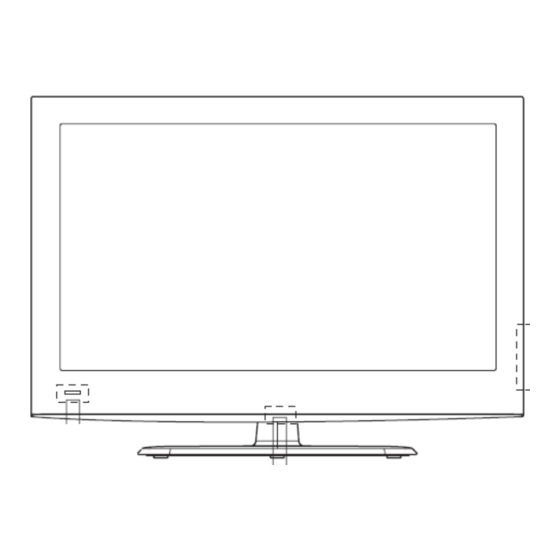
The exclamation point within an equilateral triangle is intended to alert the user to the presence of important operating and maintenance (servicing) instructions in the literature accompanying the set. 2. Product Function Specifications 2.1 Product Function TV Front Hisense Confidential... - Page 7 LCD TV Service Manual TV Rear Hisense Confidential...
-
Page 8: Specifications
LCD TV Service Manual 2.2 Specifications Hisense Confidential... - Page 9 LCD TV Service Manual 3. LCD Panel Spec 3.1 LCD26V88AM Model : V260B2-L03\JK\ROH SN : 1056993 3.1.1 General Description 3.1.2 General Features 3.2 、 LCD32V88AM Model : T315XW02VS\JK\ROH SN : 1057962 3.2.1 General Description Hisense Confidential...
-
Page 10: Chassis Layout And Overall Wiring Diagrams
LCD TV Service Manual 3.2.2 General Features 4. Chassis Layout and Overall Wiring Diagrams Chassis Layout LCD26V88AM Description Part No. Type/Model PCB/ Model Hisense Confidential... -
Page 11: Factory/Service Osd Menu And Adjustment
2. Press “Menu” button and enter factory OSD menu. 3 . Press “CH+”/“CH-” button select the function menu, press “VOL+”/“VOL-” enter the selected function menu. Press “VOL+”/“VOL-” button adjust values in the menu. 4. Press “M” button exit factory mode in the factory OSD menu. Hisense Confidential... -
Page 12: Factory Osd Menu
The Factory OSD Menu comprises Factory Menu and Design Menu . 5.2.1 、 Factory Menu Factory Menu White Balance White Balance Col Temp standard ADC Adjust R DRV LOGO G DRV OSD Language B DRV Country R CUT Options G CUT Factory Init B CUT Test Pattern Version: Hisense Confidential... - Page 13 Only in component and VGA HISENSE 揂 WELCOME SOURCE ,The � CUSTOMER Adjust Can be chosen. Option Factory Init SOURCE QingDao TOFAC HuangDao AGC TOP Hungary AGC CURVE France Australia Star TUP Menu 1 CLEAR PROTECTLY MACHINE TYPE 0 CLEAR UNPROTECTLY HIDEF Hisense Confidential...
- Page 14 LCD TV Service Manual Test Pattern Version Test pattern NULL Version: Panel Type: FLASH : 5.2.2 、 Design Menu Design Menu Picture Mode Sound Mode Picture Curve Audio Curve SSC Setting Saving MODE Hisense Confidential...
- Page 15 Curve 100 Curve 100 SSC Setting Saving MODE DDR SSC DDR MCM 60 LVDS SSC 2 LVDS PCM 60 Not e : The above “ Factory/Service OSD Menu ” are reference only, please refer to the actual units to Hisense Confidential...
-
Page 16: Software Upgrading
LCD TV Service Manual determine the appearances. 6. Software Upgrading The software is upgraded by a burning tool- ISP_TOOL4.0.9, which can burn the program file “ * . bin ” to the main board of the unit Hisense Confidential... -
Page 17: Get Ready For Upgrading
LCD TV Service Manual 6.1 Get ready for upgrading 6.1.1 Install the ISP_TOOL4.0.9-------only for the first time update. 1 、 Port Setting : Choose “system”option from the “control panel” Click the “system” icon as the following Hisense Confidential... - Page 18 LCD TV Service Manual Choose the “hardware” option from the dialog window Click“device management” icon as the following Hisense Confidential...
- Page 19 LCD TV Service Manual Choose the port (COM and LPT1) Choose the ECP print port (LPT1 ) Hisense Confidential...
- Page 20 LCD TV Service Manual Click the port of print ( LPT1 ) as the following Choose “port setting”option as the following Hisense Confidential...
- Page 21 Find the folder where the ISP_TOOL4.0.9 lies in. There are three folders/files in this folder together. DLPORTIO.dll and FTD2XX.DLL must be in the same folder Double click the ISP_TOOL4.0.9 icon, and then a dialog window will show as below. Hisense Confidential...
- Page 22 Base Addr setting is 0x378 Draw on the front of “pin 1 switch UART/I2c” Speed setting is 99 As following Choose“SDA in”and setting “PIN” is “PIN10” 。 Notes: on the front of “Reverse High” 。 Do not draw As following Hisense Confidential...
- Page 23 Choose “SCL in”and setting “PIN” is “PIN11” 。 Notes: on the front of “Reverse High” 。 Do not draw As following Choose “SDA out”and setting “PIN” is “PIN4” Notes: on the front of “Reverse High” 。 Draw As following 。 Hisense Confidential...
- Page 24 Notes: Draw on the front of “Reverse High” As following After having finished all above, clicking the “Apply ”button to complete the configuration 。 6.1.2 Hardware connecting You can update the software through a special tool (as following) Hisense Confidential...
- Page 25 LCD TV Service Manual Connect the Debug board to the TV use VGA interface, the other parallel port to the computer, just as the following 。 Hisense Confidential...
-
Page 26: Upgrading With The Isp_Tool4.0.9
LCD TV Service Manual 6.2 Upgrading with the ISP_TOOL4.0.9 6.2.1 Double click the ISP_TOOL4.0.9 icon and a dialog window will show as following 。 Hisense Confidential... - Page 27 LCD TV Service Manual Click the“Read ”button 。 Choose the update file from the folder 。 Hisense Confidential...
- Page 28 LCD TV Service Manual The update file has been chosen successfully 。 Click the“Auto”button and choose parameters as following 。 Hisense Confidential...
- Page 29 LCD TV Service Manual Click the“Run”button Click the“connect”button,then show a dialog box as following 。 Hisense Confidential...
- Page 30 LCD TV Service Manual If show above then click the“Run”button again and again , till show the following dialog window 。 Hisense Confidential...
- Page 31 If the update is successful, enter Factory Init Menu and select “Clear Unprotectly” a. Press VOL+ button to clear the EEPROM data. When the “Clear Unprotectly ” button becomes white, turn off the power. c. Restart the TV. Hisense Confidential...
-
Page 32: Troubleshooting
Remote control does not work Replace battery batteries Replace RC Replace remote control Check IR receiver Change Led & IR Replace Led & IR BD board Change Led & IR cable Replace Led & IR cable Replace main board Hisense Confidential... -
Page 33: Troubleshooting For Function Key
LCD TV Service Manual 7.2 Troubleshooting for Function Key Buttons does work Check Replace tact switch switches Replace Key BD Check key board Check Key BD cable Change Key BD cable Replace main board Hisense Confidential... -
Page 34: Tv Won't Power On
BLUE Cord Cord Only Check/replace IR one works BD or Keypad PCA Try Power on by RC and Button Check OSD? signal Source Neither Both works Work Replace Main Replace Main BD Power Replace Panel Replace Power BD Hisense Confidential... -
Page 35: Troubleshooting For Audio
LCD TV Service Manual 7.4 Troubleshooting for Audio No sound Check connecter Reconnect Replace speaker wire Check speaker wire Check speaker set Replace speaker set Replace main board Hisense Confidential... -
Page 36: Troubleshooting For Tv/Vga/Hdmi Input
LCD TV Service Manual 7.5 Troubleshooting for TV/VGA/HDMI input No picture on the screen Check Signal Make sure signal Source source is available Reconnect Check connect Check cable Replace cable Replace main board Hisense Confidential... -
Page 37: Troubleshooting For Ypbpr Input
LCD TV Service Manual 7.6 Troubleshooting for YPbPr input No picture on the screen Check Source work or not Check Source Device Reconnect Check connect Check Wires (Green Blue, Red) Replace wires Replace main board Hisense Confidential... -
Page 38: Troubleshooting For Video/S-Video Input
LCD TV Service Manual 7.7 Troubleshooting for Video/S-Video input No picture on the screen Check Source work or Check Signal Source Reconnect Check connect Check Cable/ Wires Replace Cable/Wires Hisense Confidential... -
Page 39: Explode View
LCD TV Service Manual Replace main board 8. Explode View 9. Schematic circuit diagram Hisense Confidential... - Page 40 R116 R116 BAV99 BAV99 NC/47 NC/47 MARK MARK MARK MARK R115 R115 BAV99 BAV99 C410 C410 TJC10-8A TJC10-8A R105 R105 4.7uF 4.7uF R106 R106 NC/47 NC/47 ARROW ARROW ARROW ARROW Rext C412 C412 C413 C413 ISL29101 ISL29101 R117 R117 R114 R114 220K 220K...
- Page 41 +24V +24V W823 R861 XP809 XP810 R895 W830 W825 +24V L808 R890 24.3 VD826 24.2 24.1 W834 C852 W828 380v W829 471/1kV W808 VD817 L807 W822 MURF1620CTG C854 XP802 C855 C809 2200u/35V R934 V806 R889 R896 470u/35V XP811 150u/450V V806 VD807 MURF1620CTG VD806...
- Page 42 5Vstb Power_Main Power_Main 5VAIN TO Inverter Board HIGH NORMAL STANDBY BL-ON/OFF 5Vstb BL-ADJUST 4.7K 4.7K STANDBY HIGH STANDBY +12V NORMAL PW_CTL R203 R203 5Vstb PW_CTL 3904 3904 STANDBY 0R/NC 0R/NC R183 R183 100R 100R BL-ON/OFF R178 R178 4.7K 4.7K 0/NC 0/NC BL-ADJUST ON_PBACK...
- Page 43 MST6E16GS L48=FB,U6=NC MST6E16JS L48=NC,U6=1117 1084-3.3 1084-3.3 NC/AMS1117-3.3 NC/AMS1117-3.3 AMS1117-ADJ AMS1117-ADJ 2.6V for MST6M16 and DDRAM +3.3Vstb for VDDP_PM +3.3AVDD +3.3Vstb +2.6VM +3.3Vstb VDDP_PM NC/FB NC/FB 5VAIN 5VAIN 5Vstb C385 C385 C386 C386 C384 C384 C374 C374 CA94 CA94 C360 C360 0.1uF 0.1uF 2.2uF...
- Page 44 5Vstb R224 0R R224 0R +3.3Vstb +3.3Vstb 5Vstb R102 R102 NC/4.7K NC/4.7K EEP_Vcc EEP_Vcc EEP_Vcc EEP_Vcc +5V_USB BAV99 BAV99 R707 R707 R220 0R/NC R220 0R/NC USB1_OC_DET R104 R104 4.7K 4.7K C306 C306 100K 100K C207 C207 0.1uF 0.1uF R170 R170 10uF 10uF R701...
- Page 45 XS33 XS33 HDMI_1 HDMI_1 HDMI2-RX2+ INPAQ_VPORT INPAQ_VPORT HDMI2-RX2+ R182 R182 HDMIA-RX2+ DATA2+ HDMIA-RX2+ 3 HDMI2-RX2- R184 R184 HDMIA-RX2- DATA2 SHIELD HDMIA-RX2- 3 HDMI2-RX2- INPAQ_VPORT INPAQ_VPORT HDMI2-RX1+ R190 R190 HDMIA-RX1+ HDMIA-RX1+ 3 DATA2- HDMI2-RX1+ INPAQ_VPORT INPAQ_VPORT HDMI2-RX1- R206 R206 HDMIA-RX1- 24C02=>EDID code must DATA1+ HDMIA-RX1- 3 GND1...
- Page 46 5VAIN SCART1 RGB Input 5VAIN SC1_R VD129 VD129 SC1_R SC1_G R285 R285 R286 R286 R287 R287 BAV99 BAV99 SC1_G SC1_B SC1_B SC1_Gin SC1_G C354 2.2uF C354 2.2uF SC1_Gin VD130 VD130 SC1_B C355 2.2uF C355 2.2uF SC1_Bin BAV99 BAV99 SC1_R C357 2.2uF C357 2.2uF SC1_Rin SC1_Bin...
- Page 47 5VPI VGA/5V 5VPI XS36 XS36 HDTV1 Input R113 R113 RXD0 RXD0 R156 R156 R157 R157 R219 R219 HDTV1 HDTV1 R111 R111 TXD0 TXD0 左 左 R143 R143 R144 R144 R145 R145 HD1_Y 绿 绿 VGA-B C361 2.2uF C361 2.2uF VGA-Bin HD1_Y C344 2.2uF C344 2.2uF...
- Page 48 5VAIN AV1 Input R229 R229 SV1-in R291 R291 C359 C359 C375 C375 SV1-in 10uF 10uF 10uF 10uF R299 R299 XP5B XP5B AV6-W-2-HX AV6-W-2-HX VD125 VD125 C221 C221 左 左 NC/330pF NC/330pF R422 R422 5VAIN SIGNAL 黄 黄 RP36 RP36 RP35 RP35 中...
- Page 49 5V-IF R289 R289 C300 C300 +12V 2.2uF 2.2uF R233 R233 5V and 12V for Tuner R236 R236 R237 R237 R238 R238 R317 R317 4.7K 4.7K 4.7K 4.7K 4.7K 4.7K R340 R340 R357 R357 C219 C219 4.7K 4.7K 4.7K 4.7K 10nF 10nF R297 R297...
- Page 50 Z705 Z705 10V/NC 10V/NC CA95 CA95 R713 R713 100uF/16V 100uF/16V R716 R716 NC/0R NC/0R +12V +12V R714 R714 VD111 VD111 R752 R752 NC/0R NC/0R VCC-AU VCC-AU Z704 Z704 BAV99 BAV99 R702 R702 R704 R704 VD110 VD110 R718 R718 R708 R708 10V/NC 10V/NC 5Vstb...
- Page 51 5Vstb CONN RECT 1 CONN RECT 1 CON1 CON1 5Vstb NC/HOLE-V8 NC/HOLE-V8 4.7k 4.7k CONN RECT 1 CONN RECT 1 3904 3904 3904 3904 4.7k 4.7k 4.7k 4.7k 3906 3906 TJC10-3A TJC10-3A CONN RECT 1 CONN RECT 1 R11 NC/0R R11 NC/0R R12 NC/0R R12 NC/0R...
- Page 52 3.3V XPA1 TEST 3.3V PIN4 XPA2 AD_1 LED1 LED2 LED3 LED4 LED5 LED6 LED7 AD_2 3.3V MARK PIN4 LED_CON BC847BW 3.3K 接口部分: LED 封装为 0603 ,位于按键下方, 1 、 XPA2 、 XPA3 接口为为 2.0 间距卧式直插插座; MARK MARK MARK MARK MARK 抠孔透光; 2 、...
Need help?
Do you have a question about the LCD26V88AM and is the answer not in the manual?
Questions and answers