Table of Contents
Advertisement
Quick Links
Download this manual
See also:
Instruction Manual
Advertisement
Table of Contents

Related Manuals for Lorex LNC216 Series


Summary of Contents for Lorex LNC216 Series
- Page 1 USER’S GUIDE LNC216 / LNC226X Series...
- Page 3 USER’S GUIDE LNC216 / LNC226X Series #LX400003; r. 2.0/14027/14265; en-US...
- Page 4 Thank you for purchasing this product. Lorex is committed to providing our customers with a high quality, reliable security solution. This manual refers to the following models: LNC216 LNC226X For the latest online manual, downloads and product updates, and to learn about our complete line of accessory products, please visit our website at: www.lorextechnology.com...
-
Page 5: Table Of Contents
Table of contents Important Safeguards ................1 Safety Instructions ..............1 If using this product as a baby monitor: ..........1 LNC216 Features.................2 LNC226X Features................3 LNC216 Camera Overview ..............4 LNC226X Camera Overview ..............6 Getting Started (LNC216) ..............7 WiFi Setup ................7 Ethernet Setup ................ - Page 6 17.6.4 Camera Info Tab ............86 17.6.5 Configuring Night Mode Settings ........86 iPhone® App ..................88 18.1 Live Viewing with Lorex Ping for iPhone®........88 18.1.1 Using 2-Way-Audio (Intercom) .......... 88 18.1.2 Taking Snapshots............89 18.1.3 Recording Video to iPhone® ..........89 18.2...
- Page 7 18.5 Using Local Search to Add Cameras ........... 107 iPad® App ..................109 19.1 Live Viewing with Lorex Ping HD ..........109 19.1.1 Using 2-Way Audio (Intercom)......... 109 19.1.2 Taking Snapshots............110 19.1.3 Recording Video to iPad ..........110 19.2 Playing Back Video Recorded to iPad®...
- Page 8 Using Local Search to Add Cameras ........... 128 Android™ App ................130 20.1 Live Viewing with Lorex Ping for Android™ ........130 20.1.1 Using 2-way Audio (Intercom) ......... 130 20.1.2 Saving Snapshots ............131 20.1.3 Recording Video to Android™......... 131 20.2...
- Page 9 Table of contents 21.6.5 Reboot............... 166 Technical Specifications (LNC216) ............ 167 Technical Specifications (LNC226X) ..........169 Cleaning and Disposal ..............171 24.1 Disposal of the Device ............. 171 Notices................... 172 Troubleshooting ................173 #LX400003; r. 2.0/14027/14265; en-US...
-
Page 11: Important Safeguards
Important Safeguards 1.1 Safety Instructions • Read this guide carefully and keep it for future reference. • Camera is rated for indoor use only. • Do not use in wet or humid areas. • Use the camera within given temperature, humidity, and voltage levels noted in the Technical Specifications. -
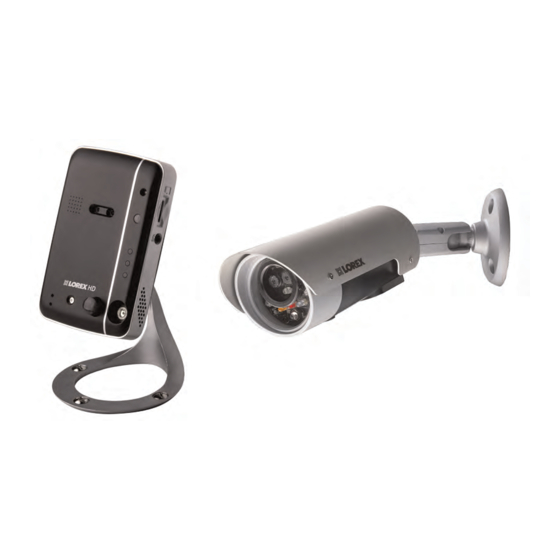
Page 12: Lnc216 Features
• Expandable up to 16 cameras • Watchdog function to prevent system failure As our product is subject to continuous improvement, Lorex Technology & subsidiaries re- serve the right to modify product design, specifications & prices without notice and without incurring any obligation. -
Page 13: Lnc226X Features
LNC226X Features • View, record & playback in real-time HD • Weatherproof indoor / outdoor camera (IP66 rated) • Simultaneous microSD card, PC, Mac, NAS and mobile recording • Wi-Fi & wired Internet connectivity. Easy connection to Wi-Fi networks with WPS •... -
Page 14: Lnc216 Camera Overview
3. Temperature Sensor: Detects the room’s ambient temperature. The temperature is displayed on the camera’s video display. You may enable temperature alerts using the Lorex Ping app. 4. Microphone 5. WPS Button: Used during Quick Scan WiFi setup or to connect the camera to a wire- less router (not included) with a WPS button. -
Page 15: Lnc216 Camera Overview
LNC216 Camera Overview 12. microSD Card Slot: Insert a microSD card (not included) to enable recording on the camera. Camera supports microSD or microSDHC cards up to a maximum size of 32GB. 13. Audio Out: Connect to an external speaker (not included) using a 3.5mm headphone jack. -
Page 16: Lnc226X Camera Overview
LNC226X Camera Overview 1. microSD Card Slot: Insert a microSD card (not included) to enable recording on the camera. Camera supports microSD or microSDHC cards up to a maximum size of 32GB. 2. Reset Button: While the camera is powered on, press with a pin or small object for at least 4 seconds to reset the camera to factory defaults. -
Page 17: Getting Started (Lnc216)
Getting Started (LNC216) Complete the following steps to setup the camera to use your wireless network. 6.1 WiFi Setup Use this setup if the camera is within range of your wireless network. This setup does not require a wired connection to your router. Note Camera requires a wired connection to power. - Page 18 Getting Started (LNC216) 2. Connect the camera to your local network: 2.1. Connect an Ethernet cable (included) to the NET port on the camera and con- nect the other end to an available LAN port (usually numbered 1~4) on your router (not included).
-
Page 19: Getting Started (Lnc226X)
Getting Started (LNC226X) Follow the steps below to get up and running on an iPhone®, using WiFi or Ethernet. 7.1 WiFi Setup 1. Connect the camera’s Ethernet cable to the Ethernet splitter. 2. Connect the other end of the Ethernet splitter to the Ethernet extension cable. Note You can use up to 164ft (50m) of Ethernet extension cable (not included). - Page 20 Getting Started (LNC226X) 3. Connect the other end of the Ethernet extension cable to the 2–in-1 adapter. 4. Connect one end of the included power adapter to the 2–in-1 adapter, and connect the other end to a power outlet. Note Power outlet must be sheltered from the elements.
-
Page 21: Ethernet Setup
Getting Started (LNC226X) 7.2 Ethernet Setup 1. Connect the camera’s Ethernet cable to the Ethernet splitter. 2. Connect the other end of the Ethernet splitter to the Ethernet extension cable. Note You can use up to 164ft (50m) of Ethernet extension cable (not included). #LX400003;... - Page 22 Getting Started (LNC226X) 3. Connect the other end of the Ethernet extension cable to the 2–in-1 adapter. 4. Connect one end of the included power adapter to the 2–in-1 adapter, and connect the other end to a power outlet. Note Power outlet must be sheltered from the elements.
- Page 23 Getting Started (LNC226X) 5. Connect the camera to your local network: 5.1. Connect the Ethernet cable from the 2–in-1 adapter to a LAN port on your router (not included). 5.2. OPTIONAL — PC and Mac only: If your router supports WPS, open the com- partment on the bottom of the camera using a Phillips screwdriver to find the WPS button.
-
Page 24: Wall Or Ceiling Mounting (Lnc216)
Wall or Ceiling Mounting (LNC216) 8.1 Installation Tips and Warnings • Camera is rated for indoor use only. Do not install in wet or humid areas. • MAKE SURE to run all power adapter and network cables at least 3ft / 1m away from cribs, bassinets, play yards, and other safe sleep environments for infants. - Page 25 Wall or Ceiling Mounting (LNC216) 4. Secure the stand position by using a Phillips screwdriver to tighten the screw connect- ing the camera to the stand (see diagram below). 5. Connect the power adapter cable and Ethernet cable (if connecting the camera using Ethernet) to the camera.
-
Page 26: Wall Or Ceiling Mounting (Lnc226X)
Wall or Ceiling Mounting (LNC226X) 9.1 Installation Tips and Warnings • Camera is rated for indoor and outdoor applications. For outdoor applications, in- stallation under shelter is recommended. • Before installing the camera, carefully plan where and how it will be positioned, and where you will route the cabling that connects the camera to the power adapter. - Page 27 Wall or Ceiling Mounting (LNC226X) 2. Adjust the camera so it captures the desired viewing area. 3. Remove the protective film from the front of the camera. If the film is not removed, it will affect picture quality. Wall Mount Ceiling Mount #LX400003;...
-
Page 28: Connecting To Your Camera On Iphone
2. Download the free Lorex Ping app from the App Store. Note Lorex Ping is a free application, but it requires a valid iTunes account to download. See www.lorex- technology.com for the latest device compatibility list. 3. Tap the Lorex Ping icon ( ) from the home screen to open Lorex Ping. - Page 29 Connecting to Your Camera on iPhone® 7. Press the WPS button on the camera. The LEDs will start flashing. Note For LNC226X, use a Phillips screwdriver to open the compartment on the bottom of the camera. Then, use a thin object such as a paper clip to press the WPS button. #LX400003;...
- Page 30 Connecting to Your Camera on iPhone® 8. Place your device about 1ft (30cm) away from the camera. The camera scans the QR code on your iPhone® to connect to the WiFi network. When the connection is successful, the camera beeps, and the “Camera Found” mes- sage below appears on your device after a few seconds.
-
Page 31: Ethernet Setup
12. Under New password, enter a new password for the camera and repeat the password under Confirm password. Tap OK. 13. Tap the camera again to connect to the camera. Lorex Ping streams live video from your camera. 14. LNC226X only: Replace the cover on the bottom of the camera. - Page 32 Under Password, enter the camera password. If this is the first time connecting to the camera, enter lorex. Press Done. 6. Tap the name of the camera in the Camera List to connect to the camera. Lorex Ping connects to the camera.
- Page 33 8. Under New password, enter a new password for the camera and repeat the password under Confirm password. Tap OK. 9. Tap the camera again to connect to the camera. Lorex Ping streams live video from your camera. #LX400003; r. 2.0/14027/14265; en-US...
-
Page 34: Connecting To Your Camera On Ipad
2. Download the free Lorex Ping HD app from the App Store. Note Lorex Ping HD is a free application, but it requires a valid iTunes account to download. See www.lor- extechnology.com for the latest device compatibility list. 3. Tap the Lorex Ping HD icon ( ) from the home screen to open Lorex Ping. - Page 35 Connecting to Your Camera on iPad® 7. Press the WPS button on the camera. The LEDs will start flashing. Note For LNC226X, use a Phillips screwdriver to open the compartment on the bottom of the camera. Then, use a thin object such as a paper clip to press the WPS button. #LX400003;...
- Page 36 Connecting to Your Camera on iPad® 8. Place your device about 1ft (30cm) away from the camera. The camera scans the QR code on your iPad® to connect to the WiFi network. When the connection is successful, the camera beeps, and the “Camera Found” message below appears on your device after a few seconds.
-
Page 37: Ethernet Setup
1. Download the Lorex Ping HD app from the App Store. Note Lorex Ping HD is a free application, but it requires a valid iTunes account to download. See www.lor- extechnology.com for the latest device compatibility list. 2. Tap the Lorex Ping icon ( ) from the home screen to open Lorex Ping. - Page 38 Under Password, enter the camera password. If this is the first time connecting to the camera, enter lorex. Press Done. 6. Tap the name of the camera in the Camera List to connect to the camera. Lorex Ping connects to the camera.
- Page 39 Connecting to Your Camera on iPad® 7. If this is the first time connecting to the camera, you will be prompted to create your own password. Tap OK. 8. Under New password, enter a new password for the camera and repeat the password under Confirm password.
-
Page 40: Connecting To Your Camera On Android
12.1 WiFi Setup 1. Download the free Lorex Ping app from the Google Play Store. Note Lorex Ping is a free application. See www.lorextechnology.com for the latest device compatibility list. 2. Tap the Lorex Ping icon ( ) to open Lorex Ping. - Page 41 Connecting to Your Camera on Android™ 6. Press the WPS button on the camera. The LEDs will start flashing. Note For LNC226X, use a Phillips screwdriver to open the compartment on the bottom of the camera. Then, use a thin object such as a paper clip to press the WPS button. #LX400003;...
- Page 42 Connecting to Your Camera on Android™ 7. Place your device about 1ft (30cm) away from the camera. The camera scans the QR code on your Android™ to connect to the WiFi network. When the connection is successful, the camera beeps, and the “Camera Found” mes- sage below appears on your device after a few seconds.
-
Page 43: Ethernet Setup
11. Under New password, enter a new password for the camera and repeat the password under Confirm password. Tap OK. Tap the name of the camera in Camera List again to connect to the camera. Lorex Ping streams live video from your camera. - Page 44 Under Password, enter the camera password. If this is the first time connecting to the camera, enter lorex. Press OK. 5. Tap the name of the camera in the Camera List to connect to the camera. Lorex Ping connects to the camera.
- Page 45 Connecting to Your Camera on Android™ 7. Under New password, enter a new password for the camera and repeat the password under Confirm password. Tap OK. 8. Tap the name of the camera in Camera List again to connect to the camera. For details on using the Android™...
-
Page 46: Connecting To Your Camera On Pc
3. Enter the camera password. If this is the first time connecting to the camera, the pass- word is lorex. Click OK. 4. If you have connected to this camera before, L-View connects to the camera. If this is the first time connecting to the camera, L-View will prompt you to create your own password for the camera. - Page 47 Under CamID, enter the Cam ID number printed on the camera. 3.3. Under Password, enter the camera password. If this is the first time connecting to the camera, the password is lorex. 3.4. Click OK. 4. Double-click the camera or drag the camera to a display screen to connect to the camera.
-
Page 48: Pc Wifi Setup
Connecting to Your Camera on PC 5. If you have connected to this camera before, L-View connects to the camera. If this is the first time connecting to the camera, L-View will prompt you to create your own password for the camera. Click OK. 6. - Page 49 Connecting to Your Camera on PC 5. Click WiFi Scan and select your WiFi network from the list. 6. Under WPA-PSK Key or WEP Key, enter the WiFi password. Click Save & Apply. #LX400003; r. 2.0/14027/14265; en-US...
- Page 50 Connecting to Your Camera on PC 7. Click WiFi Security again and click WiFi Test (this may take up to 60 seconds) 8. When successful, Status will say Test Success. If unsuccessful, double check your wireless password and make sure your camera is close enough to the wireless router to get a good signal.
-
Page 51: Connecting To Your Camera On Mac
Connecting to Your Camera on Follow the steps below to get up and running on a Mac computer. Ensure you have com- pleted the appropriate physical setup detailed in 6 Getting Started (LNC216), page 7 or 7 Getting Started (LNC226X), page 9 before you start. •... - Page 52 Connecting to Your Camera on Mac 3. Enter the password (default: lorex) and then click OK to connect. L-View connects to your camera and streams live video. 4. If this is the first time connecting to the camera, you are prompted to change your pass- word.
- Page 53 2.2. Under Camera ID, enter the CamID number printed on the label on the back of your camera. 2.3. Under Password, enter the camera password (default: lorex). 2.4. Click OK. 3. Double-click the camera to open it in L-View. 4. If this is the first time connecting to the camera, you are prompted to change your pass- word.
-
Page 54: Mac Wifi Setup
Connecting to Your Camera on Mac Note To connect to multiple cameras, click to select a display area. The area becomes highlighted. Then, dou- ble-click the camera to open it in the selected area. 14.2 Mac WiFi Setup The camera must be connected to your router using an Ethernet cable before you can set it up to use WiFi. - Page 55 Connecting to Your Camera on Mac 4. Click on Network and then WiFi Security. 5. Click WiFi Scan and select your WiFi network from the list 6. Under WPA-PSK Key or WEP Key, enter the WiFi password. Click Save & Apply. #LX400003;...
- Page 56 Connecting to Your Camera on Mac 7. Click WiFi Security again and click WiFi Test (this may take up to 60 seconds). 8. When successful, Status will say Test Success. If unsuccessful, double check your wireless password and make sure your camera is close enough to the wireless router to get a good signal.
-
Page 57: View For Pc
L-View for PC L-View is a PC client software that supports up to 16 cameras. L-View is provided on the CD or available as a free download from www.lorextechnology.com. For instructions on installing and connecting to your camera using L-View, see 13 Con- necting to Your Camera on PC, page 36. - Page 58 L-View for PC 1. Display: Shows live or recorded video from your camera(s). • Click to select a camera and scroll up/down to zoom in/out. When the camera is zoomed in, click and drag the camera image to pan the camera. •...
-
Page 59: Display Sub-Menu
L-View for PC 11. Volume Controls: • Click to activate 2-way-audio (intercom) feature and click again to deactivate 2- way-audio. Note that turning on 2-way-audio will mute audio from the camera. Note The camera requires a speaker in order to use 2–way-audio. LNC226X does not have a speaker. •... -
Page 60: All Camera Action
L-View for PC The Display sub-menu contains the following controls: • Full window: Open the camera in single camera view. • Auto reconnect: L-View will attempt to reconnect to the camera if it becomes disconnected. • Stop: Disconnect from the camera. •... -
Page 61: Adding Cameras To Camera List
L-View for PC 15.3.1 Adding Cameras to Camera List • If the camera is on the local network, click and drag a camera from the Auto Search list to Camera List to add it. • If the camera is not on the local network (i.e. you are connecting to it over the Internet), see 13 Connecting to Your Camera on PC, page 36 to add the camera to the Camera List. -
Page 62: Deleting Cameras
L-View for PC To save the camera password: 1. Right-click on the camera in Camera List and click ID/Password settings. 2. Under Name, enter a name for the camera that will appear in Camera List. This can be anything of your choice. 3. -
Page 63: Configuring Night Mode Control
L-View for PC 2. Ensure Allow 3GPP connections is checked. If this setting is unchecked you will not be able to connect to the camera with a smartphone or tablet. 3. Under Bandwidth, select your available mobile bandwidth. If you are primarily con- necting using WiFi, you may set this setting higher. -
Page 64: Recording To Your Pc's Hard Drive
L-View for PC 2. Select one of the following: • Automatic day and night mode switch: Camera will automatically switch between day mode or night mode, based on the amount of light in the room. • Scheduled time of night mode: Camera will switch between day mode and night mode at a scheduled times each day. -
Page 65: Enabling Motion Triggered Recording
L-View for PC 15.4.1 Enabling Motion Triggered Recording L-View can automatically record the camera to your computer hard drive when motion is detected. This is useful if you don’t want to miss any events that occur, but want to avoid recording and using up hard drive space when nothing is happening. -
Page 66: Configuring A Continuous Recording Or Play Only Schedule
L-View for PC • Periodic recording: Display a camera on the selected display screen and record on a repeating schedule. Schedules are managed by screens. Each screen can support 1 schedule, which records or displays 1 camera. There are a maximum of 16 possible screens that can be configured for recordings. -
Page 67: Configuring A Periodic (Repeating) Recording Schedule
L-View for PC 1. Click to open the Scheduling menu. 2. Under Window #, select the screen you would like the schedule to run on. The ar- rangement of screens in L-View is shown above. 3. Double-click a camera from the Camera List to select it for this schedule. The camera connection information automatically populates. - Page 68 L-View for PC Note Your computer must be on, and L-View must be running to enable scheduled recording to your computer hard drive. If your computer is off or on Sleep or Hibernate mode, scheduled recording to your computer hard drive will not work. 1.
-
Page 69: Playing Back Recordings On The Microsd Card With L-View
L-View for PC 7. Select Everyday to have the schedule apply to every day, or select Weekday to only have the schedule apply on certain days of the week. • If you select Weekday, click to select which days the schedule will apply to below. Selected days are shown in blue and un-selected days are shown in white. -
Page 70: Configuring Camera Video Settings
L-View for PC 5. Click a recording from the list and then click Playback to view it. 6. The recording plays back in the camera display area. • To return to a live view of your camera, wait for the recording to finish, then right- click and select Play. -
Page 71: Video Tab (Configure General Video Settings)
L-View for PC To configure image quality settings: 1. Under Bandwidth, select the upload speed of your Internet connection. If your Internet connection is faster than 1.5Mbps, select 1.5Mbps. 2. Check Select the best resolution and frame rate automatically to have the camera automatically adjust the resolution and frame rate based on bandwidth. -
Page 72: Control Tab (Configure Status Led's And Motion Detection Sensitivity)
L-View for PC To configure general video settings: 1. Under Video Color, select Color or Black & White. 2. Under Sharpness, select the sharpness of the image between 10 (highest) and 1 (lowest). 3. Under Place, select Outdoor video if the area with the camera is brightly lit. Select In- door Video if you notice strip lines in the image or if the picture is too dark on the Out- door video setting. -
Page 73: Camera Info Tab
L-View for PC 2. Click Update to save changes. Enter the camera admin user name (default: admin) and password (default: left blank) and click OK. The camera will disconnect. Wait about 15 seconds and then double-click the camera in Camera List or Auto Search to reconnect to the camera. -
Page 74: Configuring L-View
L-View for PC 1. In the Camera List, right-click the camera you would like to playback from, and then click NAS Playback. 2. Click + next to the day you would like to play back video from. 3. Click a video file in the list then click Playback to start playback. 4. -
Page 75: Startup Options
L-View for PC To open the Snapshot folder: • Click Open. To change the Snapshot folder: 1. Click Change. 2. Select a new Snapshot folder and click OK to save changes. 15.9.2 Startup Options The Startup options menu allows you to configure startup options for L-View. To configure startup options: 1. -
Page 76: Login (Enabling A Password To Access L-View)
L-View for PC To configure your camera to use a fixed IP address: 1. Check Connect to the camera with a fixed IP address to enable cameras to use fixed IP addresses. 2. Click OK to save changes. 3. In the camera list, right-click the camera you would like to configure and select Assign IP Address. -
Page 77: Image Ratio
L-View for PC 2. Under User Name and Password, enter the desired user name and password that must be used when you open L-View. 3. Click OK to save changes. The next time you exit L-View and re-open it, it will ask you for a password to log in. - Page 78 L-View for PC 2. Click OK. L-View will check online for an software updates when it opens. If an update is available, follow the on-screen instructions to install the update. • It will also check for camera updates when a new firmware is available. If a new camera firmware is available, click OK and enter the admin user name (default: ad- min) and password (default: left blank).
-
Page 79: L-Play: Playing Recorded Video On Your Pc
L-Play: Playing Recorded Video on Your PC L-Play is an advanced playback software that allows you to play back recorded video or snapshots from your computer hard drive or NAS. 16.1 Running L-Play • Double-click the L-Play icon ( ) on your desktop. •... - Page 80 L-Play: Playing Recorded Video on Your PC 9. Split-Screen Selectors: Click for different split-screen configurations. Click for full-screen. Press ESC to exit full-screen. 10. Video Status: Shows the time the currently playing video was recorded at. 11. Volume Controls: Click to adjust the volume of video being played back. Click mute / un-mute audio.
-
Page 81: Playing Back Video From Computer Hard Drive In L-Play
L-Play: Playing Recorded Video on Your PC 18. View Recording/Snapshot Folders : Click to open or select folders for storing Re- cordings or Snapshots. 18.1. Current recording folder 18.2. Open recording folder 18.3. Change recording folder 18.4. Current snapshot folder 18.5. - Page 82 L-Play: Playing Recorded Video on Your PC 1. Click Open Record. 2. L-Play opens recordings from your recording folder. Note If no recordings appear, check to see if the recording folder selected is the same as the one selected in L-View. If the folder is different, click Browse, select the recording folder used in L-View, and then click OK.
-
Page 83: Playing Back Video From Nas In L-Play
L-Play: Playing Recorded Video on Your PC 5. Click the camera or cameras you would like to playback from and then click Play. 5.1. Double-click the day you wold like to play back video from. 5.2. Click the camera you would like to play back video from. 5.3. - Page 84 L-Play: Playing Recorded Video on Your PC 1. Click Open NAS. 2. Click Browse. 3. Click Scan Neighborhood to scan your local network for connected NAS devices. 4. Browse to your NAS device, double-click the folder you selected as the Shared public folder when you set up NAS recording, and then select IPCamRecordFiles.
-
Page 85: Viewing Snapshots In L-Play
L-Play: Playing Recorded Video on Your PC 6.1. Double-click a day to select video recorded on that day. L-Play shows times that have video recorded for each camera. 6.2. Click the camera or cameras you would like to play back video from. 6.3. -
Page 86: Converting Video Files To Avi
L-Play: Playing Recorded Video on Your PC 2.1. Click + next to the camera you would like to open snapshots from, or click + next to L-Play to open snapshots taken in L-Play. 2.2. Click + to open snapshots from the selected day. 2.3. - Page 87 L-Play: Playing Recorded Video on Your PC 4.1. (Optional) If you want to select a custom folder to save the .avi file, click Browse, or use the default folder. 4.2. (Optional) If you want to use a custom file name for the .avi file, enter it under File name.
-
Page 88: View For Mac
L-View for Mac L-View for Mac allows you to view your camera on a Mac computer. L-View for Mac is available as a free download from www.lorextechnology.com. For instructions on connecting to your camera using Mac, see 14 Connecting to Your Cam- era on Mac, page 41. - Page 89 L-View for Mac 3. Auto Search List: Auto Search shows cameras located on your local network (LAN). • Double-click the camera ID to view the camera. • Drag the camera to the Camera List to save the camera. • Right-click the camera ID and select Web configure to configure the camera set- tings using a browser.
-
Page 90: Camera List (Managing Cameras)
L-View for Mac 8. Split-screen Controls: • : Click to open single camera view. • : Click to open 4-camera view. • : Click to open 6-camera view. • : Click to open the current display in full-screen. Press ESC to exit full-screen. 17.3 Camera List (Managing Cameras) The Camera List is used to save connection information for your cameras, so you don’t have to re-enter the ID or password each time you connect. -
Page 91: Playing Back Video From Your Mac's Hard Drive
L-View for Mac To record video to your Mac’s hard drive: 1. Press the recording button ( ) to start recording. The recording button will turn green during recording. 2. Press the recording button again ( ) to stop recording. 17.4.1 Playing Back Video from Your Mac’s Hard Drive You can playback video files you have saved to your Mac’s hard drive in L-View. -
Page 92: Playing Back Recordings On The Microsd Card With L-View
L-View for Mac 4. Use the on-screen playback controls. 4.1. Return to live video 4.2. Play 4.3. Pause 4.4. Stop 4.5. Full-screen 4.6. Select playback time 17.5 Playing Back Recordings on the microSD card with L-View You can use L-View to play back recordings on the camera’s microSD card (not included). To set up microSD recording, you must use the camera’s web configuration tool. -
Page 93: Using Camera List To Modify Camera Settings
L-View for Mac 3. Click the arrow beside a date to view video recorded on that date. Double-click the file you would like to play back. Note Video timestamps are shown using hhmmss format (e.g. 103045 is 10:30:45am). 4. To return to live video, close the microSD window and double-click the camera in Cam- era List. - Page 94 L-View for Mac To configure image quality settings: 1. Right-click on the camera in Camera List and select Video settings. Select the Qual- ity tab. 2. Under Bandwidth, select the speed of your Internet connection. If your Internet con- nection is faster than 3Mbps, select 3Mbps. 3.
-
Page 95: Video Tab (Configure General Video Settings)
L-View for Mac 17.6.2 Video Tab (Configure General Video Settings) The Video tab allows you to configure general video settings, such as color and brightness settings. To configure general video settings: 1. Right-click the camera in Camera List and click Video settings. Then, select the Vid- eo tab. -
Page 96: Control Tab (Configure Status Led's And Motion Detection Sensitivity)
L-View for Mac 17.6.3 Control Tab (Configure Status LED’s and Motion Detection Sensitivity) The Control tab allows you to configure the camera status LED’s to make the camera hard- er to spot at night. It also allows you to configure the motion detection sensitivity when us- ing video motion detection. -
Page 97: Camera Info Tab
L-View for Mac 17.6.4 Camera Info Tab The camera info tab shows system information about the camera. To access the camera info tab: • Right-click on the camera in Camera List and select Video Settings. Then select the Camera Info tab. 17.6.5 Configuring Night Mode Settings Configure when the camera uses day or night mode. - Page 98 L-View for Mac 2. Select one of the following: • Auto: Camera will automatically switch between day mode or night mode, based on the amount of light in the room. • Scheduled time of night mode: Camera will switch between day mode and night mode at a scheduled time each day.
-
Page 99: Iphone® App
Your Camera on iPhone®, page 18. 18.1 Live Viewing with Lorex Ping for iPhone® You can use Lorex Ping in portrait or landscape mode. Tilt the phone to switch between portrait or landscape. 1. Disconnect button (only shown in portrait mode) 2. -
Page 100: Taking Snapshots
iPhone® App 1. While viewing, touch to activate 2-way-audio (intercom) using the phone microphone. • A volume slider appears that allows you to adjust the speaker volume. • Touch again to turn off 2-way audio. 1.1. Turn off 2–way-audio 1.2. Adjust speaker volume 18.1.2 Taking Snapshots •... -
Page 101: Using Playback
iPhone® App 18.2.1 Using Playback 1. From the Camera List, tap Playback ( Note If you are still connected to the camera, tap Disconnect to return to the Camera List. Disconnect on- ly appears when holding the phone in portrait mode. 2. -
Page 102: Using Camera List To Edit Camera Settings
iPhone® App 4. The camera scans for recorded video files and shows a list of days with recorded vid- eo. Tap a day to view recordings created on that day. 5. Tap a recording to play it. 6. Tap Disconnect to return to the recordings list. 18.4 Using Camera List to Edit Camera Settings You can use the Camera List to adjust the connections settings or other settings for your camera. -
Page 103: Deleting Cameras From Camera List
OFF to keep the icon as is. 4. Under Save admin password, select ON to have Lorex Ping save the admin user name and password the next time you enter it, or OFF to require the admin user name and password whenever settings changes are made. -
Page 104: Editing Motion/Sound Notification Settings (Push Notifications)
iPhone® App 3. Tap Done. 18.4.3 Editing Motion/Sound Notification Settings (Push Notifications) Push Notifications can be set up to create a notification straight to your iPhone® when mo- tion or sound is detected by the camera. Push Alarm Notifications go directly to the notifi- cations area on your device. -
Page 105: Configuring Temperature Push Notifications And Temperature Units (Fahrenheit Or Celsius)
iPhone® App 18.4.4 Configuring Temperature Push Notifications and Temperature Units (Fahrenheit or Celsius) Temperature Push Notifications can be set up to send you alerts if the temperature near the camera goes higher or lower than the specified values. You can also select the temper- ature unit that will be used by the system. -
Page 106: Editing Camera Video Settings
iPhone® App 2. Tap Stream Settings. 3. Under Bandwidth, select the bandwidth for your mobile connection. If you are mainly connecting using WiFi, you may set this setting higher. 4. Under Auto, select ON to have the camera automatically select the resolution and frame rate based on available bandwidth. - Page 107 iPhone® App 3. Tap Video. 4. Configure the following: 4.1. Video color: Select Colored to view the camera in color or select Black & white. Tap Video to return to Video settings. 4.2. Brightness: Manually adjust the brightness of the image between 10 (highest) and 1 (lowest).
-
Page 108: Configuring Led Control And Motion Detection Sensitivity
iPhone® App 18.4.7 Configuring LED Control and Motion Detection Sensitivity Configure the behavior of the camera status LED's. This is useful if you want the camera to be harder to spot at night. You can also configure the sensitivity for video motion detection. - Page 109 iPhone® App 2. Tap Video Settings. Then tap Night Mode Control. 3. Select one of the following: • Auto: Camera will automatically switch between day mode or night mode, based on the amount of light in the room. • Schedule: Camera will switch between day mode and night mode at a scheduled times each day.
-
Page 110: Editing Camera Wired Network Settings
iPhone® App 4. Tap Update to save your changes. 18.4.9 Editing Camera Wired Network Settings Configure the camera IP address when connected using Ethernet. Select DHCP or Fixed To edit camera wired network settings: 1. In Camera List, tap next to the camera you would like to edit. 2. -
Page 111: Enabling Email Notifications
iPhone® App 5. Tap a WiFi network and enter the password to connect. • To connect to a hidden WiFi network, tap Other. Enter the SSID and select the se- curity type and tap Add. Tap the network name from the list and enter the password. 6. -
Page 112: Enabling Speaker Alarms
iPhone® App 4. Under Email trigger, select ON to enable email notifications or OFF to disable. Then under Send Email, select ON to enable email notifications. 5. Under Motion sensitivity, select the motion detection sensitivity between 1 (High) and 10 (Low). If Motion Detection Sensitivity is set to 1, motion detection will be trig- gered if a moving object is larger than 1% of the video area. -
Page 113: Configuring Microsd Recording
iPhone® App To configure speaker alarms: 1. In Camera List, tap next to the camera you would like to edit. 2. Tap Camera Settings. 3. Tap Schedule then Speaker Alarm. 4. Under Speaker Alarm Trigger, check the triggers that will cause speaker alarms: •... -
Page 114: Configuring The Camera Recording And Alarm Schedule
iPhone® App 3. Tap Camera Settings. 4. Tap Schedule then SD-Card. 5. Under Record, select ON to enable microSD recording or OFF to disable. 6. Check one of the following recording options: • Always Recording: Camera will record continuously at all times. •... - Page 115 iPhone® App 5. Tap Add Schedule. 6. Under Email Alarm, check Motion trigger to send an email alarm based on video motion, select PIR trigger to use the PIR motion sensor, or select both Motion trigger and PIR trigger. Note The camera requires a PIR sensor to use this feature.
- Page 116 iPhone® App 8. Under SD card record, check Continuous for the camera to record to microSD con- tinuously during the scheduled time. Check Motion trigger to record when video mo- tion is trigger during the scheduled time, select PIR trigger to record when the PIR motion sensor is triggered during the scheduled time, or select both.
-
Page 117: Configuring The Camera Date And Time
iPhone® App To delete a Schedule: 1. From the Scheduling menu, swipe the schedule you would like to delete from left to right. 2. Tap Delete. 3. Tap Update to save your changes. 18.4.15 Configuring the Camera Date and Time Configure the camera date and time. -
Page 118: Rebooting The Camera
You can use the Local Search Menu to automatically add the ID's for cameras on your lo- cal network. To add cameras using local search: 1. Tap the Local Search button ( 2. Lorex Ping automatically scans for cameras on your local network. Tap Search to re- scan. #LX400003; r. 2.0/14027/14265; en-US... - Page 119 4. Enter a Name of your choice and enter the camera Password. If you have not con- nected to your camera before, the password is lorex. 5. Tap Done. The camera is now added to camera list. Tap the camera name in Camera List to connect to the camera.
-
Page 120: Ipad® App
App The app for iPad® is called Lorex Ping HD. For instructions on connecting to your camera using iPad®, see 11 Connecting to Your Camera on iPad®, page 24. 19.1 Live Viewing with Lorex Ping HD 1. Disconnect from / connect to camera 2. -
Page 121: Taking Snapshots
iPad® App 2. Tap again to deactivate 2-way-audio. 19.1.2 Taking Snapshots • While viewing, tap to take a snapshot from the camera. You can view snapshots using the Camera app or save photos to your computer by connecting your iPad® to your computer using a USB cable. -
Page 122: Playing Back Video Recorded To Microsd On Ipad
iPad® App 4. Tap a recording to start playback. 5. During playback, tap in the display area to bring up playback controls. 19.3 Playing Back Video Recorded to microSD on iPad® You can playback video recorded on the camera microSD card (not included) on your iPad®. -
Page 123: Editing Camera Connection Settings
iPad® App 2. For certain menus, you will need to enter the camera admin user name and password before you may change settings. By default, the admin user name is admin and the password is left blank. 19.4.1 Editing Camera Connection Settings You can edit your camera connection information. -
Page 124: Deleting Cameras From Camera List
OFF to keep the icon as is. 4. Under Save admin password, select ON to have Lorex Ping save the admin user name and password the next time you enter it, or OFF to require the admin user name and password whenever settings changes are made. -
Page 125: Editing Motion/ Sound Notification Settings (Push Notifications)
iPad® App 19.4.3 Editing Motion/ Sound Notification Settings (Push Notifications) Push Alarm Notifications can be set up to create a notification straight to your iPad® when motion or sound is detected by the camera. Push Alarm Notifications go directly to the no- tifications area on your device. -
Page 126: Configuring Temperature Push Notifications And Temperature Units (Fahrenheit Or Celsius)
iPad® App 19.4.4 Configuring Temperature Push Notifications and temperature Units (Fahrenheit or Celsius) Temperature Push Notifications can be set up to send you alerts if the temperature near the camera goes higher or lower than the specified values. You can also select the temper- ature unit that will be used by the system. -
Page 127: Editing Camera Mobile Streaming Settings
iPad® App 19.4.5 Editing Camera Mobile Streaming Settings Configure the camera image quality settings for streaming to mobile devices (i.e. smart- phones and tablets). Please note that less bandwidth is generally available over mobile networks than over WiFi or Ethernet. To edit mobile streaming settings: 1. - Page 128 iPad® App 3. Tap Video. 4. Configure the following: 4.1. Video color: Select Colored to view the camera in color or select Black & white. Tap Done to return to Video settings. 4.2. Brightness: Manually adjust the brightness of the image between 10 (highest) and 1 (lowest).
-
Page 129: Configuring Led Control And Motion Detection Sensitivity
iPad® App 19.4.7 Configuring LED Control and Motion Detection Sensitivity Configure the behavior of the camera status LED's. This is useful if you want the camera to be harder to spot at night. You can also configure the sensitivity for video motion detection. -
Page 130: Configuring Night Mode Settings
iPad® App 19.4.8 Configuring Night Mode Settings Configure when the camera uses day or night mode. When day mode is on, the camera sees in color. When night mode is on, the camera sees in black and white, and the Infrared LED turns on to enable night vision. -
Page 131: Editing Camera Wifi Network Settings
iPad® App 3. Tap Network then Wired Network. 4. Select DHCP (recommended) to allow the camera to automatically obtain an IP ad- dress from the router or Static to use fixed IP address settings. If you select Static, configure your IP Address, Subnet mask, Default gateway, DNS1, and DNS2. 5. -
Page 132: Enabling Email Notifications
iPad® App 5. Tap a WiFi network and enter the password to connect. • To connect to a hidden WiFi network, tap Other. Enter the SSID and select the se- curity type and tap Done. Tap the network name from the list and enter the password. -
Page 133: Enabling Speaker Alarms
iPad® App 5. Under Motion sensitivity, select the motion detection sensitivity between 1 (High) and 10 (Low). If Motion Detection Sensitivity is set to 1, motion detection will be trig- gered if a moving object is larger than 1% of the video area. If it is set to 10, a moving object must be larger than 10% of the video area to trigger motion detection. -
Page 134: Configuring Microsd Recording
iPad® App 3. Tap Schedule then Speaker Alarm. 4. Under Speaker Alarm Trigger, check the triggers that will cause speaker alarms: • Motion: Use Video motion detection to trigger audio alarms. Video motion detection looks for movement in the image to determine if there is motion. This means that there may be false alarms caused by changes in lighting, trees moving in the wind, etc. -
Page 135: Configuring The Camera Recording And Alarm Schedule
iPad® App 4. Tap Schedule then SD-Card. 5. Under Recording, select ON to enable microSD recording or OFF to disable. 6. Check one of the following recording options: • Always Recording: Camera will record continuously at all times. • Schedule Recording: Camera will record according to settings set in the recording schedule. - Page 136 iPad® App 5. Tap Add Schedule. 6. Under Email Alarm, check Motion trigger to send an email alarm based on video motion, check PIR trigger to use the PIR motion sensor, or select both. Note The camera requires a PIR sensor to use this feature. LNC226X does not have a PIR sensor. 7.
- Page 137 iPad® App 8. Under SD card record, check Continuous for the camera to record to microSD con- tinuously during the scheduled time. Check Motion trigger to record when video mo- tion is triggered during the scheduled time, select PIR trigger to record when the PIR motion sensor is triggered during the scheduled time, or select both.
-
Page 138: Configuring The Camera Date And Time
iPad® App To delete a Schedule: 1. From the Scheduling menu, swipe the schedule you would like to delete from left to right. 2. Tap Delete. 3. Tap Update to save your changes. 19.4.15 Configuring the Camera Date and Time Configure the camera date and time. -
Page 139: Rebooting The Camera
iPad® App 5. Use the slider to select your time zone. • If your region observes Daylight Savings Time, check Daylight Savings Time. Tap Start Time and End Time, use the sliders to configure the start and end time for Daylight Savings Time and then tap Done. - Page 140 App 2. Lorex Ping automatically scans for cameras on your local network. Tap Search to re- scan. 3. Tap a camera from the list. The Add camera screen comes on with the camera ID al- ready entered. 4. Enter a Name of your choice and enter the camera Password. If you have not con- nected to your camera before, the password is lorex.
-
Page 141: Android™ App
Android™, see 12 Connecting to Your Camera on Android™, page 30. 20.1 Live Viewing with Lorex Ping for Android™ You can use Lorex Ping in portrait or landscape mode. Tilt the phone to switch between portrait or landscape. 1. Disconnect button (only shown in portrait mode) 2. -
Page 142: Saving Snapshots
Snapshots are saved in .png format to the DCIM/Lorex Ping folder on your device. To view or copy Snapshots to your com- puter, connect your device to your computer using a USB cable. See your Android™... -
Page 143: Playing Back Video Recorded On Microsd On Android
Android™ App 4. Use the on-screen controls to control playback. Tap Disconnect to close the file. 20.3 Playing Back Video Recorded on microSD on Android™ You can playback video recorded on the camera microSD card (not included) on your An- droid™... -
Page 144: Using Camera List To Edit Camera Settings
Android™ App 3. The camera scans for available video files. Files are shown in a list according to the date they were recorded. 4. Tap a day to view recordings for that day. Tap a recording to view it. 5. Tap Disconnect to return to the recording list. 20.4 Using Camera List to Edit Camera Settings You can use the Camera List to adjust the connection or other settings for your camera. -
Page 145: Editing Camera Connection Settings
Android™ App Note For certain menus, you will need to enter the camera admin user name and password before you may change settings. By default, the admin user name is admin and the password is left blank. 20.4.1 Editing Camera Connection Settings You can edit your camera connection information. -
Page 146: Deleting Cameras From Camera List
Android™ App 20.4.2 Deleting Cameras from Camera List 1. In Camera List, tap next to the camera you would like to delete. 2. Tap Delete. 20.4.3 Editing Camera Mobile Streaming Settings Configure the camera image quality settings for streaming to mobile devices (i.e. smart phones and tablets). -
Page 147: Configuring Led Control And Motion Detection Sensitivity
Android™ App 2. Tap Video Settings. Then tap Video. 3. Configure the following: 3.1. Video color: Select Color to view the camera in color or select Black & white. 3.2. Brightness: Manually adjust the brightness of the image between 10 (highest) and 1 (lowest). -
Page 148: Configuring Night Mode Settings
Android™ App To configure LED’s and motion detection sensitivity: 1. In Camera List, tap next to the camera you would like to edit. 2. Tap Video Settings. Then tap Control. 3. Under Status LED, select one of the following: • Normal: LED’s will function as normal. For details on LED functions, see 4 LNC216 Camera Overview, page 4 or 16.2 L-Play Overview, page 69. -
Page 149: Enabling Motion/Sound Push Alarm Notifications
Android™ App 3. Select one of the following: • Auto: Camera will automatically switch between day mode or night mode, based on the amount of light in the room. • Schedule: Camera will switch between day mode and night mode at scheduled times each day. -
Page 150: Configuring Temperature Push Notifications And Temperature Units (Fahrenheit Or Celsius)
Android™ App 2. Tap Alarm Notification. 3. Under Motion, tap to select ON to enable Push Alarm Notifications when motion is de- tected using video motion detection or OFF to disable. 4. Under PIR, tap to select ON to enable Push Alarm Notifications when motion is de- tected using the PIR motion sensor or OFF to disable. -
Page 151: Editing Camera Wired Network Settings
Android™ App 5. Under Higher bound, select the high temperature value. You will receive a notification if the temperature near the camera goes above this value. 6. Under Lower bound, select the low temperature value. You will receive a notification if the temperature near the camera goes above this value. -
Page 152: Enabling Email Notifications
Android™ App 5. Tap a WiFi network and enter the password to connect. • To connect to a hidden WiFi network, tap Other. Enter the SSID, select the security type, and tap Add. Tap the network name from the list and enter the password. 6. -
Page 153: Enabling Speaker Alarms
Android™ App 6. Select from the following trigger options for email alarms: • Motion: Use Video motion detection to trigger email alarms. Video motion detection looks for movement in the image to determine if there is motion. This means that there may be false alarms caused by changes in lighting, trees moving in the wind, etc. -
Page 154: Enabling Microsd Recording
Android™ App 6. Select from the following speaker alarm triggers: • Motion: Use Video motion detection to trigger audio alarms. Video motion detection looks for movement in the image to determine if there is motion. This means that there may be false alarms caused by changes in lighting, trees moving in the wind, etc. -
Page 155: Configuring The Recording And Alarm Schedule
Android™ App 6. Select one of the following recording options: • Always Recording: Camera will record continuously at all times. • Schedule Recording: Camera will record according to settings set in the recording schedule. Note To enable Motion detection recording using Android™, you must use Schedule recording. Then, create a schedule in the Scheduling menu with Motion trigger, PIR trigger, or both Motion trig- ger and PIR trigger selected. - Page 156 Android™ App 9. Under Time period, select one of the following: • Every week: Create a weekly recording schedule. Tap and check the days you would like the schedule to apply to. Tap Start and End and use the sliders to config- ure the start and end time for the schedule.
-
Page 157: Configuring The Camera Date And Time
Android™ App 20.4.15 Configuring the Camera Date and Time Configure the camera date and time. The camera syncs with an Internet NTP time server to automatically provide the correct time, once you have configured your time zone and daylight savings time settings. To set the camera date and time: 1. - Page 158 To add cameras using local search: 1. Tap the Local Search button ( 2. Lorex Ping automatically scans for cameras on your local network. Tap Search to re- scan. 3. Tap a camera from the list. The Add camera screen comes on with the camera ID al- ready entered.
-
Page 159: Configuring Camera Settings Using A Browser
Configuring Camera Settings Using a Browser Web Configure lets you modify camera settings using a web browser. To access Web Configure: 1. Open L-View, right-click on the camera ID under Auto Search, and click Web configure. Note Your computer must be on the same network as the camera to use Web Configure. You may change camera settings over the Internet using the iPhone®, iPad®, or Android™... -
Page 160: Network
Configuring Camera Settings Using a Browser 2. Network: Configure wired/wireless network settings. Connect to a wireless network. 3. Video: Configure camera video and streaming settings. 4. Schedule: Configure recording settings and schedules. Configure email and audio alarms. 5. Admin: Configure the camera date and time, passwords, and LED’s. Restart the cam- era. -
Page 161: Wifi Security (Configuring Wifi Settings)
Configuring Camera Settings Using a Browser 21.2.2 WiFi Security (Configuring WiFi settings) Configure the camera to connect to a WiFi network and configure WiFi settings. To configure WiFi Settings: Note For instructions on connecting your camera to a WiFi network, see 13.2 PC WiFi Setup, page 38 or 14.2 Mac WiFi Setup, page 44. - Page 162 Configuring Camera Settings Using a Browser To configure camera video quality settings: TIP: Change only one camera image quality setting at a time before clicking Save & Apply so you can judge the effects. 1. Configure the following, as needed: •...
-
Page 163: Mobile Video
Configuring Camera Settings Using a Browser 21.3.2 Mobile Video Set streaming settings for connecting using a smartphone or tablet. Note that less band- width is generally available when connecting to the camera over a mobile cellular network than when connecting using broadband Internet. To configure mobile streaming settings: 1. -
Page 164: Schedule
Configuring Camera Settings Using a Browser To configure Day/Night mode: 1. Select one of the following: • Automatic day and night mode switch: Camera will automatically switch between day mode or night mode, based on the amount of light in the room. •... - Page 165 Configuring Camera Settings Using a Browser To configure Email Alarms: 1. Under Email/FTP Trigger, select one of the following alarm triggers: • Motion: Use Video motion detection to trigger email alarms. Video motion detection looks for movement in the image to determine if there is motion. This means that there may be false alarms caused by changes in lighting, trees moving in the wind, etc.
-
Page 166: Speaker Alarm (Configuring Audio Alarms)
Configuring Camera Settings Using a Browser 5. Click Save & Apply to save email alarm settings. Note If you want to use a custom SMTP server to send Email messages, click Advanced, enter your SMTP server information, and click Save & Apply. 21.4.2 Speaker Alarm (Configuring Audio Alarms) A siren can be set up to go off when the camera detects motion. -
Page 167: Sd Card (Configuring Microsd Recording)
Configuring Camera Settings Using a Browser 21.4.3 SD Card (Configuring microSD Recording) Configure video recording to the microSD card (required; not included). To playback re- cordings saved on the microSD card, use L-View or the iPhone®, iPad®, or Android™ apps. To configure microSD card recording: 1. - Page 168 Configuring Camera Settings Using a Browser 4. Your NAS must have an available folder in the main (root) folder for recordings to be stored. This folder must be available before you begin NAS recording and it must allow read/write access. An example of an acceptable recording folder would be public. To configure NAS recording settings: 1.
- Page 169 Configuring Camera Settings Using a Browser 3. Under Use NAS IP Address, enter the local IP address of the NAS device. OR, click NAS Scan to scan your network for connected NAS devices. Then, click the name of your NAS device from the list to add the NAS name. Note NAS Scan only works with certain models of NAS devices.
-
Page 170: Scheduling (Configuring Recording And Alarm Schedules)
Configuring Camera Settings Using a Browser 8. To check to see if NAS recording options are correct, click NAS Settings again and then click NAS Info. This will allow you to see the recording and hard drive status of your NAS device. Note Recordings will not appear on your NAS device until at least 5 minutes after you configure NAS re- cording. -
Page 171: Thermometer
Note Temperature push notifications are only available on smartphones or tablets. You must enable tempera- ture push notifications through the Alarm Notification menu in the Lorex Ping app to receive them on your device. Note The camera requires a temperature sensor in order to use this feature. -
Page 172: Admin
Configuring Camera Settings Using a Browser To configure thermometer settings: 1. Under Temperature Scale, select Celsius or Fahrenheit. 2. Under Temperature Range: High, select the high temperature value that will trigger push notifications on phones and tablets. 3. Under Temperature Range: Low, select the low temperature value that will trigger push notifications on phones and tablets. -
Page 173: Led Control
Configuring Camera Settings Using a Browser To configure the admin user name and password used to login to Web Configure: 1. Under Username, enter the desired admin user name for the camera. The default is admin. 2. Under Password, enter the desired admin password for the camera. By default, the password field is left blank when logging in. -
Page 174: Date/Time
Configuring Camera Settings Using a Browser To configure the LED’s: 1. Select one of the following: • Normal LED display: LED’s will function as normal. For details on LED functions, see 4 LNC216 Camera Overview, page 4 or 5 LNC226X Camera Overview, page 6. •... -
Page 175: Upgrade
Configuring Camera Settings Using a Browser WARNING It is highly recommended to set the date and time when first setting up your system. Inaccurate time stamps may render your footage unusable for court evidence To set the camera date and time: 1. - Page 176 Configuring Camera Settings Using a Browser 2. In L-View, right-click on the camera in Auto Search and click Web Configure. 3. Type the camera admin user name (default: admin) and password (default: left blank) and click Ok to log into the camera. 4.
-
Page 177: Reboot
Configuring Camera Settings Using a Browser 21.6.5 Reboot Restart the camera from your Internet browser. This is useful if you need to restart the camera to apply settings changes or if the camera encounters an error. To restart the camera: 1. -
Page 178: Technical Specifications (Lnc216)
Video management L-View software for viewing and recording up to 16 cameras (PC / Mac) software: Lorex Ping app for viewing cameras on mobile (iOS / Android™) Security: Web management username / password protection Video display ID / password protection... - Page 179 0–50°C conditions: Humditiy 20–80% RH (non-condensing) As our product is subject to continuous improvement, Lorex Corporation & subsidiaries re- serve the right to modify product design, specifications & prices without notice and without incurring any obligation. #LX400003; r. 2.0/14027/14265; en-US...
-
Page 180: Technical Specifications (Lnc226X)
Video management L-View software for viewing and archiving up to 16 cameras (PC / Mac) software: Lorex Ping app for viewing cameras on mobile (iOS / Android™) Security: Web management username / password protection Video display ID / password protection... - Page 181 ** Not intended for submersion in water. Installation in a sheltered location recommended. As our product is subject to continuous improvement, Lorex Corporation & subsidiaries re- serve the right to modify product design, specifications & prices without notice and without incurring any obligation.
-
Page 182: Cleaning And Disposal
Cleaning and Disposal Clean camera with a slightly damp cloth or an anti-static cloth. Never use cleaning agents or abrasive solvents. • Do not clean any part of the product with cleaners with thinners or other solvents and chemicals. This may cause permanent damage to the product which is not covered by the warranty. -
Page 183: Notices
Notices WARNING Any changes or modifications not expressly approved by the grantee of this device could void the user's authority to operate the device. FCC Notice This device complies with Part 15, subpart C, of the FCC Rules. Operation is subject to the following two conditions: (1) this device may not cause harmful interference, and (2) this device must accept any interference received, including interference that may cause undesired operation. -
Page 184: Troubleshooting
• If using a smartphone or tablet, connect your device to your WiFi network and press the WiFi setup button in Lorex Ping. Follow the on-screen instructions to setup WiFi. • If using a PC or Mac, connect the camera to the router using Ethernet and manually set- up the camera to use WiFi. - Page 186 Legal disclaimer As our product is subject to continuous improvement, Lorex Corporation & subsidiaries reserve the right to modify product design, specifications & prices without notice and without incurring any obligation.E&OE.
Need help?
Do you have a question about the LNC216 Series and is the answer not in the manual?
Questions and answers