Advertisement
Heating & Cooling
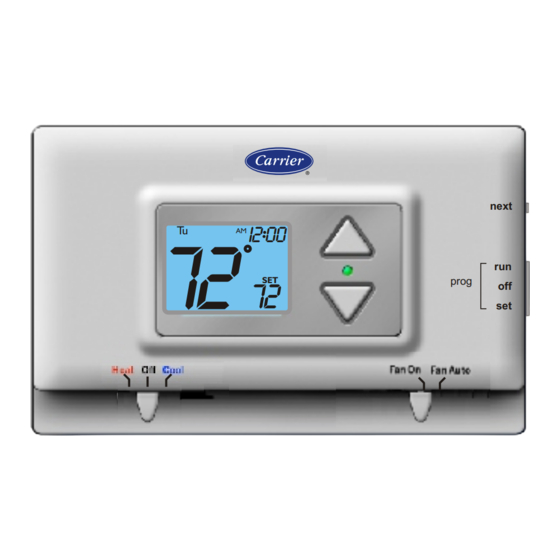
SINGLE STAGE HEAT & COOL
THERMOSTAT
72
I2:00
Tu
AM
72
SET
5+2 DAY PROGRAMMABLE
NOTE TO INSTALLER: THIS MANUAL MUST BE LEFT WITH THE EQUIPMENT USER.
TSTATCCPQ501
PROGRAMMABLE
D I G I T A L T H E R M O S T A T
USER INFORMATION MANUAL FOR THE OPERATION AND
MAINTENANCE OF YOUR NEW THERMOSTAT
next
run
prog
off
set
5+2 DAY PROGRAMMABLE
DIGITAL THERMOSTAT
Separate programs for
weekdays & weekends
Large, easy to read,
backlit digital display
Installation Flexibility
Batteries required for
4-wire operation
No batteries needed
for 5-wire operation
Meets California Title 24 Residential
Advertisement
Table of Contents

Related Manuals for Carrier 5+2 DAY PROGRAMMABLEDIGITAL THERMOSTAT


Summary of Contents for Carrier 5+2 DAY PROGRAMMABLEDIGITAL THERMOSTAT
- Page 1 TSTATCCPQ501 PROGRAMMABLE D I G I T A L T H E R M O S T A T USER INFORMATION MANUAL FOR THE OPERATION AND MAINTENANCE OF YOUR NEW THERMOSTAT Heating & Cooling 5+2 DAY PROGRAMMABLE SINGLE STAGE HEAT & COOL DIGITAL THERMOSTAT THERMOSTAT Separate programs for...
-
Page 2: Table Of Contents
Table Of Contents SAFETY WARNINGS LOCATION OF CONTROLS DISPLAY NORMAL OPERATION Manual Thermostat Operation Time Period Operation CLOCK SET PROGRAMMING Setup Overview Program Setup ADVANCED SETUP BATTERY REPLACEMENT WARRANTY Carrier Corporation Residential Light Commercial Systems Patents Pending 4/03 Page 1... -
Page 3: Safety Warnings
Safety Warnings TSTATCCPQ501 Follow Installation Instructions carefully. CAUTION DISCONNECT POWER TO THE HEATER - AIR CONDITIONER BEFORE REMOVING THE OLD THERMOSTAT AND INSTALLING WARNING THE NEW THERMOSTAT. CAUTION The 2 Alkaline “AA” batteries must be replaced at least every 12 months to assure proper operation. The thermostat will display the Low Battery code (fig. -
Page 4: Location Of Controls
Location of Controls HEAT/COOL INDICATOR next I2:00 UP & DOWN BUTTONS prog The Heat/Cool indicator will only energize if the thermostat is system powered. FAN SWITCH MODE SWITCH Heat, Cool or Off On or Auto NEXT BUTTON For programming For programming How to Use: The Next button is used to advance from one step to the next in the programming and advanced setup screens of the thermostat (pages 8-16). -
Page 5: Display
Display I2:00 MTuWThF SaSuHeatCool Morning Night Evening Day of the week. When programming, MTuWThF represents the 5 weekdays, SaSu represent the 2 weekend days. Heat and Cool indicators. In normal operation, Heat or Cool appears, reflecting the mode switch position. Clock Display. -
Page 6: Normal Operation
Normal Operation PROGRAM SWITCH I2:00 next UP & DOWN Heat BUTTONS prog Program Switch MODE SWITCH FAN SWITCH Heat, Cool or Off On or Auto Manual Operation (program switch OFF) Select heat or cool with the mode switch. Normally leave the fan switched to auto. In fan auto, the fan will turn on only with a heat or cool demand. -
Page 7: Time Period Operation
Normal Operation PROGRAM SWITCH I2:00 next UP & DOWN Heat BUTTONS prog Program Switch MODE SWITCH FAN SWITCH Heat, Cool or Off On or Auto Programmed Operation (program switch RUN) Select heat or cool with the mode switch. Normally leave the fan switched to auto. In fan auto, the fan will turn on only with a heat or cool demand. -
Page 8: Clock Set
Clock Set Program Slide the program switch to the SET position. Setting the time & day are the first 2 steps after sliding the program switch to SET. 6:00 6:00 Use these buttons to adjust the current time. Pushing and holding the Up or Down buttons will slew the time by 10s of minutes. -
Page 9: Overview
Programming Time Period Overview PROGRAM SWITCH Slide the program switch to the SET position. The blinking icon(s) on the display may be Program Switch changed by pressing the Up or Down buttons. After the blinking icon is changed how you want it, press the Next button. -
Page 10: Program Setup
Programming Time Period Programming Weekday Slide the program switch to the SET position. The Program 1st 2 steps are clock and day set, see page 7. 6:00 MTuWThF Use these buttons to Morning adjust the start time for the morning time period. NEXT 6:00 MTuWThF... - Page 11 Time Period Programming Programming Weekday 8:00 MTuWThF Cool Use these buttons to adjust the cool setpoint for NEXT the day time period. 8:00 MTuWThF Heat Use these buttons to adjust the heat setpoint for NEXT the day time period. 6:00 MTuWThF Use these buttons to adjust the start time for...
- Page 12 Time Period Programming Programming Weekday 6:00 MTuWThF Heat Use these buttons to adjust the heat setpoint for Evening NEXT the evening time period. I0:00 MTuWThF Use these buttons to Night adjust the start time for NEXT the night time period. I0:00 MTuWThF Cool...
- Page 13 Time Period Programming Programming Weekend 6:00 SaSu Use these buttons to Morning adjust the start time for NEXT the morning time period. 6:00 SaSu Cool Use these buttons to Morning adjust the cool setpoint for NEXT the morning time period. 6:00 SaSu Heat Use these buttons to...
- Page 14 Time Period Programming Programming Weekend 8:00 SaSu Cool Use these buttons to adjust the cool setpoint for NEXT the day time period. 8:00 SaSu Heat Use these buttons to adjust the heat setpoint for NEXT the day time period. 6:00 SaSu Use these buttons to adjust the start time for...
- Page 15 Time Period Programming Programming Weekend 6:00 SaSu Heat Use these buttons to adjust the heat setpoint for Evening NEXT the evening time period. I0:00 SaSu Use these buttons to Night adjust the start time for NEXT the night time period. I0:00 SaSu Cool...
- Page 16 Time Period Programming After completion of setting the time period programming, you have 2 options: 1) Run the time period program by sliding the Program Switch to the RUN position. Program Switch 2) Do not run the time period program. The thermostat will operate as a manual heat/cool thermostat.
-
Page 17: Advanced Setup
Advanced Setup This is normally done by the installer at initial installation. Enter advanced setup by adjusting the program switch to SET. When the clock is flashing, press NEXT for 5 seconds. Do not release the button until this screen appears. Use these buttons to adjust the deadband from 1 to 6 degrees. - Page 18 Battery Replacement To Open The Thermostat The top of the thermostat housing has two (2) screw- driver slots to assist when seperating. SCREWDRIVER SLOTS To pull the housing apart, insert a small blade screw- driver into the slot and rotate 90 . This will release the top housing snaps.
-
Page 19: Battery Replacement
Battery Replacement REPLACE WITH ALKALINE BATTERIES AT LEAST ONCE EVERY YEAR, OR WHEN THE “LOW BATTERY” ICON APPEARS (pages 2,17). POSITION BATTERIES AS SHOWN USE “AA” SIZE USE “AA” SIZE ALKALINE BATTERIES ALKALINE BATTERIES IF THE THERMOSTAT IS CONNECTED TO 24V POWER, THE BATTERIES MAY STILL BE INSTALLED. -
Page 20: Warranty
Warranty 5-Year Warranty - This Product is warranted to be free from defects in material and workmanship. If it appears within five years from the date of original installation, whether or not actual use begins on that date, that the product does not meet this warranty, a new or remanufactured part, at the manufacturer’s sole option, to replace any defective part will be provided without charge for the part itself;... - Page 21 Programming Worksheet see page 8 PERIOD START TIME COOL HEAT Morning Monday Tuesday Wednesday Evening Thursday Friday Night Morning Saturday Sunday Evening Night Please be certain to program each time period in chronological order to ensure proper programmed operation of the thermostat. For example, if the Morning Start Time is 6:30am, then the Day Start Time MUST be programmed for any time AFTER the 6:30am Morning Start Time.
Need help?
Do you have a question about the 5+2 DAY PROGRAMMABLEDIGITAL THERMOSTAT and is the answer not in the manual?
Questions and answers