
Related Manuals for Life Span VISION

Summary of Contents for Life Span VISION
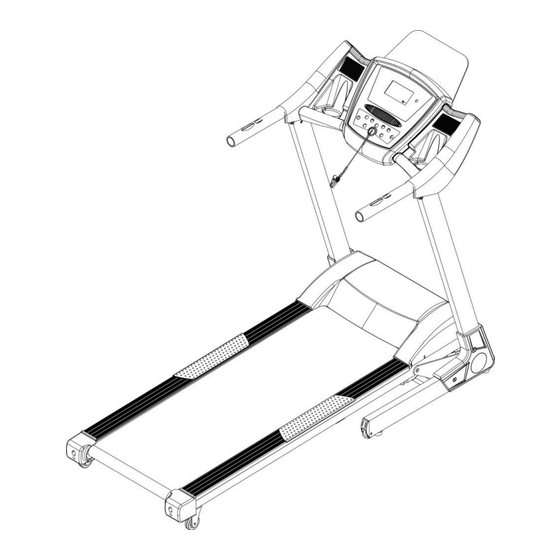
- Page 1 VISION OWNER’S MANUAL Product may vary slightly from the item pictured due to model upgrades Read all instructions carefully before using this product. Retain this owner’s manual for future reference.
-
Page 2: Table Of Contents
TABLE OF CONTENTS IMPORTANT SAFETY INSTRUCTIONS IMPORTANT ELECTRICAL INFORMATION IMPORTANT OPERATING INSTRUCTIONS ASSEMBLY INSTRUCTIONS FOLDING INSTRUCTIONS GROUNDING METHODS OPERATION GUIDE EXERCISE GUIDE MAINTENANCE INSTRUCTIONS EXPLODED DIAGRAM PARTS LIST TROUBLE SHOOTING GUIDE WARRANTY REGISTRATION PROGRAM CHART VISION... -
Page 3: Important Safety Instructions
Do not operate where aerosol spray products are being used or where oxygen is being administered. Sparks from the motor may ignite a highly gaseous environment. Never drop or insert any object into any openings. The treadmill is intended for in-home use only and not suitable for long time running. VISION... -
Page 4: Important Electrical Information
NEVER remove any cover without first disconnecting AC power. NEVER expose this treadmill to rain or moisture. This treadmill is not designed for use outdoors, near a pool, or in any other high humidity environment. VISION... -
Page 5: Important Operating Instructions
A safety key is provided with this machine. Remove the safety key will stop the walking belt immediately; the treadmill will shut off automatically. Inserting the safety key will reset the display. Do not use excessive pressure on console control keys. They are precision set to function properly with little finger pressure. VISION... -
Page 6: Assembly Instructions
4. ASSEMBLY INSTRUCTIONS PART LIST DES. SPEC. DES. SPEC. Main Bolt M8*20 Frame Allen S=13\14\15 Bolt M8*45 Wrench 5#Allen Screw ST4.2*19 Wrench 6#Allen Lock Wrench washer Right base Safety cover lock Left base cover VISION... - Page 7 M8*45 (#70) and Lock Washer (#64) to the base frame through the base and right upright tube 2. Repeat for the left upright tube Note: Support the Uprights with your hands to prevent them falling down and causing injury. VISION...
- Page 8 2. Using the #5 Allen wrench (13) and ST4.2*19 Screw (77), fix the base left cover (31) onto the left upright and base. STEP 6: 1. Place the safety key (49) into position on the computer and start your exercise. VISION...
-
Page 9: Folding Instructions
(B) is locked into the round tube. Unfolding: Whilst supporting position A with our hand, gently push the marked area on the air pressure bar with your foot. The base frame will descend automatically. (Please keep people and any pets away the machine during descent) VISION... -
Page 10: Grounding Methods
This product is for use on a nominal 240-volt circuit and has a grounding plug that looks like the plug illustrated in sketch A in following figure. Ensure the product is connected to an outlet having the same configuration as the plug. No adapter should be used with this product. VISION... -
Page 11: Operation Guide
5. PUL/CAL window: shows the heart rate and calories burnt. When displaying calorie value the range is from 0-999. When it reaches 999 the treadmill will slow down until a stop and show ―End‖. Countdown is from the setting value to zero. Upon reaching ―0‖, the computer will display ―End‖ and will slow down VISION... - Page 12 5. SPEED+\SPEED-: Increase or decrease speed when excising. Sets parameter when stopped. 6. ―INCLINE+‖, ―INCLINE-‖: increase or decreases incline. Adjust the incline gradient during excising. Sets parameter when stopped. 7. ―SPEED: 5, 8, 12‖ Speed adjustment shortcut key 8. ―INCL: 5, 8, 12‖ Incline adjustment shortcut key. VISION...
- Page 13 After finishing the 10 time setting the data will be stored in memory. 2. Start Press ―PROGRAM‖ continuously during standby to select user defined program (U1-U3). When time setting is ready, press START to begin workout. VISION...
- Page 14 When holding the hand pulse with two hands, the pulse window will show your heart rate after 5 seconds. To increase accuracy please check heart rate with the machine stopped and after keeping your hands on the sensors for more than 30 seconds. The heart rate data is for reference purposes ONLY. VISION...
- Page 15 20—150 KGS FA(BMI) RESULT ≤19 UNDER WEIGHT 20--25 NORMAL WEIGHT 25--29 OVER WEIGHT ≥30 OBESITY 7. SLEEP FUNCTION: The treadmill automatically enters sleep mode after 10 minutes of inactivity. Press any key on the display to wake the treadmill. VISION...
-
Page 16: Exercise Guide
So as you can see, the fitter you are, the healthier and greater you will feel. Warm-up Start each workout with 5 to 10 minutes of stretching and some light exercises. A proper warm-up increases your body temperature, heart rate and circulation in preparation for exercise. Ease into your exercise. VISION... -
Page 17: Workout Guidelines
The most important factor here is the amount of effort you put in. The harder and longer you work, the more calories you will burn. Effectively this is the same as if you were training to improve your fitness, the difference is the goal. VISION... -
Page 18: Maintenance Instructions
General Care Check parts for wear before use. Pay particular attention to the fixing knobs and make sure they are tight. Always replace the mat if worn and any other defective parts. VISION... -
Page 19: How To Check The Running Mat For Proper Lubrication
If the surface is dry to the touch, apply a suitable silicone lubricant. We recommend that you use a silicone based spray to lubricate your Lifespan treadmill. This can be purchased from your local sports retailer or hardware store. VISION... -
Page 20: Belt Tension Adjustment
DO NOT OVER TIGHTEN - Over tightening will cause belt damage and premature bearing failure. This may also cause reduced motor performance and excessive roller wear. NOTE: When properly tightened, the sides of the belt can be raised approximately 2-3 inches off the board. VISION... -
Page 21: Belt Tracking Adjustment
When adjusting the belt using the 6 mm Allen Key, it is important to adjust the belt in half turn increments. Over adjusting the belt can cause damage to the mat. If belt drifts to the RIGHT If belt drifts to the LEFT VISION... -
Page 22: Exploded Diagram
10. EXPLODED DIAGRAM VISION... -
Page 23: Parts List
Air Pressure Bar with incline button Hand pulse Front Roller with speed button Computer up Back Roller wire Computer Cross Wrench S=13、14、15 bottom wire 5#inner wrench Safety key 6#inner wrench Light sensor casing pipe Magnet ring Running board Switch VISION... - Page 24 Computer up cover Screw M6*27 Computer bottom Screw M6*16 cover Adjust wheel Screw M6*35 Tapered Cushion Bolt M8*55 computer Bolt M8*12 Right Bottom Cover Bolt M8*20 Left Bottom Cover Bolt M8*32 Ring wire plug Bolt M8*25 Circle Plug Bolt M8*45 VISION...
- Page 25 I-type hexagon Screw ST4.2*19 nuts Screw ST2.9*6.5 Screw ST4.2*12 Screw ST4.2*13 Screw ST4.2*28 Screw ST4.2*19 Screw ST4.2*12 Screw ST4.2*30 Lock washer Book shelf Right Sound Flat washer C Left sound net Right hand bar I-type hexagon Screw ST4.2*19 nuts VISION...
-
Page 26: Trouble Shooting Guide
No sensor signal 1. The sensor signal was not detected within 10 seconds. Check the sensor plug connection 2. See if the magnetic sensor is broken or damaged, re-connect the plug well or change the sensor. VISION... - Page 27 2. Ensure wires of control board are properly connected, replace any broken parts on the board 3. Replace transformer Control board problem 1. Replace controller Machine is folded 1. Ensure that the machine is correctly unfolded, restart. 2. Replace transformer VISION...
-
Page 28: Warranty Registration
Please visit the following link to complete the product warranty form online. Please visit: http://www.warrantyform.lifespanfitness.com.au PLEASE NOTE: YOUR WARRANTY IS ONLY VALID IF YOU CAN PROVE YOU ARE THE ORGINIAL PURCHASER OF THIS ITEM (i.e. a copy of the receipt, invoice, delivery date or internet confirmation) VISION... -
Page 29: Program Chart
SECTION SPEED INCLINE SPEED INCLINE SPEED INCLINE SPEED INCLINE SPEED INCLINE SPEED INCLINE SPEED INCLINE SPEED INCLINE SPEED INCLINE SPEED INCLINE SPEED INCLINE SPEED INCLINE SPEED INCLINE SPEED INCLINE SPEED INCLINE SPEED INCLINE SPEED INCLINE SPEED INCLINE SPEED INCLINE VISION... - Page 30 INCLINE SPEED INCLINE SPEED INCLINE SPEED INCLINE SPEED INCLINE SPEED INCLINE SPEED INCLINE SPEED INCLINE SPEED INCLINE SPEED INCLINE SPEED INCLINE SPEED INCLINE SPEED INCLINE SPEED INCLINE SPEED INCLINE SPEED INCLINE SPEED INCLINE SPEED INCLINE SPEED INCLINE SPEED INCLINE VISION...
- Page 31 INCLINE SPEED INCLINE SPEED INCLINE SPEED INCLINE SPEED INCLINE SPEED INCLINE SPEED INCLINE SPEED INCLINE SPEED INCLINE SPEED INCLINE SPEED INCLINE SPEED INCLINE SPEED INCLINE SPEED INCLINE SPEED INCLINE SPEED INCLINE SPEED INCLINE SPEED INCLINE SPEED INCLINE SPEED INCLINE VISION...
- Page 32 INCLINE SPEED INCLINE SPEED INCLINE SPEED INCLINE SPEED INCLINE SPEED INCLINE SPEED INCLINE SPEED INCLINE SPEED INCLINE SPEED INCLINE SPEED INCLINE SPEED INCLINE SPEED INCLINE SPEED INCLINE SPEED INCLINE SPEED INCLINE SPEED INCLINE SPEED INCLINE SPEED INCLINE SPEED INCLINE VISION...
- Page 33 SPEED INCLINE SPEED INCLINE SPEED INCLINE SPEED INCLINE SPEED INCLINE SPEED INCLINE SPEED INCLINE SPEED INCLINE SPEED INCLINE SPEED INCLINE SPEED INCLINE VISION...
Need help?
Do you have a question about the VISION and is the answer not in the manual?
Questions and answers