Table of Contents
Advertisement
Advertisement
Table of Contents

Related Manuals for Mamas & Papas pliko pramette


Summary of Contents for Mamas & Papas pliko pramette
- Page 1 Instructions for use...
-
Page 2: Table Of Contents
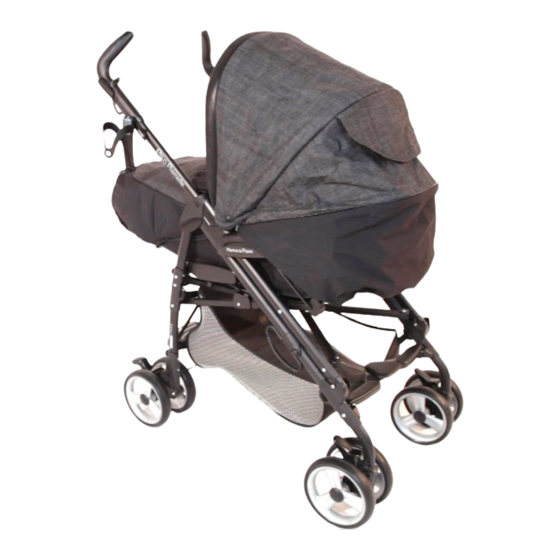
Pliko Pramette PushChair Dear Customer, Thank you for choosing the Mamas & Papas Pramette Pushchair. The stylish, lightweight and compact folding Pramette Pushchair is easily converted from a pram into a pushchair so as your child grows and develops so does your pushchair. - Page 3 ProduCt information This pushchair has been designed and tested to comply with the latest British and European safety standards. Important: Read these instructions carefully and keep them for future reference. Your child’s safety may be affected if you do not follow the instructions. •...
- Page 4 instruCtions for safe use • WaRnIng: a ChIlD’s safeTY Is YouR ResPonsIbIlITY. • WaRnIng: IT MaY be DangeRous To leave YouR ChIlD unaTTenDeD. • ThIs PRoDuCT Is noT suITable foR RunnIng oR skaTIng. • WaRnIng: anY loaD aTTaCheD To The hanDles affeCTs The sTabIlITY of The PRaM/PushChaIR.
-
Page 5: Opening The Pushchair
oPening the PushChair Remove the protective caps from the ends of the handle frame. Never attempt to use the pushchair with the covers fitted as the locks will not engage. Release the finger catches located under both of the handles by pulling them upwards. -
Page 6: Attaching The Wheels
attaChing the wheels attaching the front wheels: Slot the two front wheels onto the ends of the pushchairs front legs. Push the wheel housing onto the end of the leg until it locks into position. Always check that the wheels are correctly fitted by attempting to pull them off again. -
Page 7: Attaching Rear Wheels To The Frame
attaChing rear wheels to the frame Align the insert on the back wheels with the bottom of the back frame on the pushchair (1). Align the end of the insert with the moulding on the back frame (2). Slide the insert into the moulding (3). -
Page 8: Fitting Extending & Removing The Bumper Bar
fitting extending & removing the bumPer bar Push the catches on the under side of the armrests upwards and slide the covers out of the armrests. fitting the bumper bar: Slide the ends of the bumper bar into the holes in the ends of the armrests. -
Page 9: Fitting & Removing The Basket
fitting & removing the basket The back section of the basket has four webbing loops that fit over the four hooks attached to the back legs of the pushchair. The two front webbing loops fit over the hooks on the font legs of the pushchair. -
Page 10: Adjusting The Handle Length
adjusting the handle length To lengthen the handle: Push the top of the button in just below the hand-grip and pull towards you. Once the handle has been adjusted it will automatically lock into place. The height of the two handlebars can be adjusted to 3 positions. -
Page 11: Operating The Adjustable Leg Rest
oPerating the adjustable leg rest The leg rest on the front of the pushchair can be adjusted for the comfort of your child and so that the Mypod / Navetta Carrycot can be attached. note: The leg rest must be in the most vertical (down) position when the pushchair is being used by a child that can... -
Page 12: Operating The Swivel Wheels
oPerating the swivel wheels The front wheels on the pushchair can be used in either the fixed or swivel mode. fixed mode: Push the catches between the front wheels upwards. The wheels will now be fixed and will not swivel. swivel mode: Push the catches between the front wheels downwards. -
Page 13: Operating The Brakes
oPerating the brakes To engage the brakes: Press down on both ends of the brake bar with your toes. Check the brakes are correctly engaged by rocking the pushchair backwards and forwards. To release the brakes: Push upwards on both ends of the brake bar with your toes until the pushchair’s wheels move freely. -
Page 14: Attaching The Hood
attaChing the hood To fit the hood to the pushchair: Slot the tabs on the sides of the hood into the slots in the sides of the pushchairs armrests. Fasten the press studs on the side flaps of the hood onto the insides of the armrests. -
Page 15: Attaching The Apron
attaChing the aPron To attach the apron, first push the bottom part of the apron under the bumper bar. Fasten the zip on the bottom edge of the apron to the zip on the front edge of the footrest cover. Important: Always ensure that the apron is fully zipped to the footrest cover. -
Page 16: Using The Harness
using the harness assembling the harness: Slot the tabs on the ends of the shoulder straps onto the tongues on the ends of the waist straps (A) . locking the harness: Lock the harness by pushing the tongues on the ends of the waist straps into the buckle on the crotch strap (B). -
Page 17: Folding The Pushchair
folding the PushChair Engage the brakes before closing the pushchair. Pull the left finger catch upwards (1) until it locks into position, then repeat for the other finger catch (2). Grip the handle in the centre of the backrest and pull it upwards (3) as shown in the diagram. -
Page 18: Using The Pushchair As A Pram
using the PushChair as a Pram The pushchair can be converted into a pram for children from birth until the child can sit up by itself or until it reaches a weight of 9kgs. Remove the hood and apron if they are fitted. - Page 19 Lower the backrest into the lowest position, see page 10. Lift the foot end of the pram upwards from the seats backrest. To fit the hood: Attach the hood to the frame on the opposite side to the handles by pushing the hood brackets into the arm rest slots until they lock in place.
-
Page 20: Fitting The Primo Viaggio Car Seat
fitting the Primo viaggio Car seat Apply the brakes on the pushchair before operating the attachment brackets. Lower the backrest to its lowest position by pulling the lever at the top of the backrest upwards, then lower the backrest as far down as it will go. - Page 21 apply the brakes on the pushchair before removing the car seat. Pull the lever located on the back of the car seat upwards and hold in the fully pulled out position. Lift the car seat clear of the pushchair. Pull the locks on the sides of the frame outwards and hold.
-
Page 22: Attaching The Raincover To The Pushchair
sPeCial feature not all models of the Pramette are supplied with or use this special feature. for more information consult your retailer Never leave your child unattended in the pushchair with the raincover fitted. This product is designed for outdoor use only. Take care when fitting or adjusting the raincover as undue force may damage the raincover. -
Page 23: Attaching The Raincover To The Pram
sPeCial feature not all models of the Pramette are supplied with or use this special feature. for more information consult your retailer Never leave your child unattended in the pushchair with the raincover fitted. This product is designed for outdoor use only. Take care when fitting or adjusting the raincover as undue force may damage the raincover. -
Page 24: Removing The Fabric Cover
removing the fabriC Cover Slide the ends of the armrest covers towards the bumper bar, then pull away from the armrest to release the attachment studs. Repeat the same process to remove the rear attachment studs from the armrests. Unfasten the press studs at the bottom of the wings of the backrest. - Page 25 unfasten one side of the harness by removing the screw as shown in the diagram, you will need to hold on the other side of the frame with your fingers. Unfasten the two press studs holding the seat fabric to the frame.
-
Page 26: Care And Maintenance
• Your pushchair is a valuable piece of equipment and deserves careful handling. • Regularly check that the safety harness is correctly fitted and that the webbing has not become frayed or damaged. If the harness is damaged, we recommend that a new one is fitted. - Page 28 Pliko Pramette fiuk1101i138 www.mamasandpapas.com 20/06/2011 Mamas & Papas Colne Bridge Road Huddersield, HD5 0RH customer care helpline: customer.care@mamasandpapas.com...
Need help?
Do you have a question about the pliko pramette and is the answer not in the manual?
Questions and answers
Is it possible to obtain new straps for the pilko pramette