Table of Contents
Advertisement
Live-FSH16T Live-FSH16T Live-FSH16T Live-FSH16T Live-FSH16T
Live-FSH16T Live-FSH16T Live-FSH16T Live-FSH16T Live-FSH16T Live-FSH16T
Live-FSH16T Live-FSH16T Live-FSH16T Live-FSH16T Live-FSH16T
Live-FSH16T Live-FSH16T Live-FSH16T Live-FSH16T Live-FSH16T Live-FSH16T
Live-FSH16T Live-FSH16T Live-FSH16T Live-FSH16T Live-FSH16T
Live-FSH16T Live-FSH16T Live-FSH16T Live-FSH16T Live-FSH16T Live-FSH16T
Live-FSH16T
Fast Ethernet Switch
User's Manual
16 × 10/100Mbps + 1 × Uplink port
NWay 10/100BASE-TX
Fast Ethernet Switch
with Priority Function
Rev. Live-FSH16T V.1.0
Published: July 18, 2001
Copyright © OvisLink Corp.
1
Advertisement
Table of Contents

Related Manuals for Ovislink Live-FSH16T


Summary of Contents for Ovislink Live-FSH16T
- Page 1 Live-FSH16T Live-FSH16T Live-FSH16T Live-FSH16T Live-FSH16T Live-FSH16T Live-FSH16T Live-FSH16T Live-FSH16T Live-FSH16T Live-FSH16T Live-FSH16T Live-FSH16T Live-FSH16T Live-FSH16T Live-FSH16T Live-FSH16T Live-FSH16T Live-FSH16T Live-FSH16T Live-FSH16T Live-FSH16T Live-FSH16T Live-FSH16T Live-FSH16T Live-FSH16T Live-FSH16T Live-FSH16T Live-FSH16T Live-FSH16T Live-FSH16T Live-FSH16T Live-FSH16T Live-FSH16T Fast Ethernet Switch 16 × 10/100Mbps + 1 × Uplink port...
-
Page 2: Fcc Warning
Trademarks All rights reserved. OvisLink and OvisLink Logo are registered trademarks of OvisLink Corp. Other product and company names trademarks or registered trademarks of their respective companies. Contents in this manual are subject to changes without prior notice. FCC Warning This equipment has been tested and found to comply with the requirements for a Class A digital device, pursuant to Part 15 of the FCC Rules. - Page 3 Manual About About User User s Manual s Manual This User’s Manual aims at helping users to know the key features of Live-FSH16T Fast Ethernet Switch and to install it in a 10/100BASE-TX Fast Ethernet Local Area Network (LAN).
-
Page 4: Table Of Contents
Table of Contents PRODUCT OVERVIEW ................ 8 Introduction ........................8 16-port 10/100 Mbps Fast Ethernet Switch..............8 Easy Plug-and-Play ......................8 Cost-effective for LAN Users ..................8 Store-and-Forward Architecture against Packet Loss............. 9 Active Flow Control......................9 Port Status Information at a Glance ................9 What is 10/100 Mbps Dual-Speed Switching? .............. - Page 5 INSTALLATION OF THE SWITCH..........15 Quick Installation......................15 3 Steps to Quick Installation ..................15 Installation Site Preparation ..................16 Desktop Installation ......................16 Installation on Wall......................17 Cabling Requirements ....................17 RJ-45 station port cable requirements................18 Other 10/100BASE-T/TX twisted-pair cable requirement ........... 18 Connecting to power .......................
- Page 6 Priority Queuing......................27 LED INDICATORS................28 Power LED........................28 Station-port LEDs ......................28 Link/Rx LED......................... 28 FDX/Col LEDs......................29 100 M LED........................29 APPENDIX A ..................... 30 Product Specifications..................... 30 APPENDIX B ..................... 32 Troubleshooting....................... 32 Tables Table 3-1: Using straight-through and crossover cables..........18 Table 5-1: LED signals ....................
- Page 7 Fig. 4-1 Connection through Uplink Port using straight-through cable ..... 22 Fig. 4-2 Connection through Station Port using crossover cable........ 23 Fig. 4-3 Pin assignments for crossover cabling............. 24 Fig. 4-4 Wire schematics for straight-through and crossover cable......24 Fig. 4-5 Microsegmentation in a LAN group..............26 Fig.
-
Page 8: Product Overview
Simply plug in the power and connect devices to its ports and you just complete its installation. With its easy Plug-and-Play installation procedure, Live-FSH16T Fast Ethernet Switch costs you virtually no effort to install and run. Cost-effective for LAN Users... -
Page 9: Store-And-Forward Architecture Against Packet Loss
This drawback in transmission can happen either when data being transmitted in IEEE802.3x Full Duplex or Back Pressure Flow Control mode. To amend this problem, Live-FSH16T Fast Ethernet Switch utilizes a fixed memory buffer allocation with Store-and-forward transmission to ensure an effective buffer allocation for each port. -
Page 10: What Is Priority Queuing
If you have any plans to implement network telephony or any sort of video conferencing, streaming video/audio or any real-time applications on your network you will need Live-FSH16T for priority queuing. The benefit of priority queuing is that it can dramatically improve the quality of priority services on the network. If priority queuing is not implemented then the quality of these services will depend entirely on the load on your network. -
Page 11: Product Features
Product Features The main features of Live-FSH16T Fast Ethernet Switch are as follows: Ideal for workgroup environment in Fast Ethernet network Easy migration from existing 10 Mbps Ethernet network to 100 Mbps Fast Ethernet network Cost-effective to connect and expand your existing 10 Mbps Ethernet network to 100 Mbps... -
Page 12: Preparation Before Installation
Preparation before Installation Unpack the Package Before you begin the installation of Live-FSH16T Fast Ethernet Switch, make sure that you have all the necessary components that come with your package. Follow the steps below to unpack your package contents: Step 1. Clear out the surrounding area for an adequate space to unpack the package carton. -
Page 13: The Front Panel
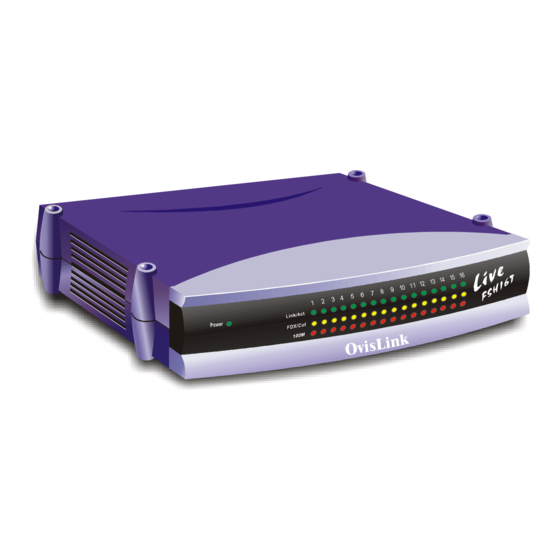
Priority ports: port 5, 6, 7 and 8 Fig. 2-3 Front Panel Station Ports (Port #1 to #16) Live-FSH16T Fast Ethernet Switch is equipped with 16 10/100Mbps auto-sensing and auto-negotiating ports. You can use these ports to connect to end stations, servers or other networking devices. -
Page 14: Uplink Port
Uplink Port The Uplink port allows connection to another hub, switch or other network device using a straight-through cable. DC Power Jack The DC Power Jack is where you should connect the DC power adapter chord. -
Page 15: Installation Of The Switch
Installation of the Switch Quick Installation Live-FSH16T Fast Ethernet Switch is compliant to both 10BASE-T Ethernet and 100BASE-TX Fast Ethernet standards. It also provides an Uplink port to extend your switch-to-switch cabling distance to 100 meters. Live-FSH16T Fast Ethernet Switch is primarily targeted as an ideal solution to enhance your workgroup performance in an Ethernet/Fast Ethernet network. -
Page 16: Installation Site Preparation
Installation Site Preparation You can mount Live-FSH16T Fast Ethernet Switch either on a table or on wall. If you plan to mount the switch on the table, please choose a steady, level surface in a well-ventilated area that is free from excessive dust. In any case, the installation site chosen for your switch has to comply with the following requirements: The surface to mount the switch must be able to sustain the weight of the switch. -
Page 17: Installation On Wall
Cabling requirements Connecting to power Installation on Wall Live-FSH16T Fast Ethernet Switch can be mounted on a wall with wall anchors and screws. To mount the Switch on wall, please follow the steps below: Drill two holes, the distance between both of which should be 9 cm (such as the illustration below). -
Page 18: Rj-45 Station Port Cable Requirements
RJ-45 station port cable requirements 10BASE-T 100 ohm Category 3,4 or 5 unshielded or shielded (UTP/STP) twisted-pair cables. 100BASE-TX 100 ohm Category 5 unshielded or unshielded twisted-pair (UTP/STP) cables. Other 10/100BASE-T/TX twisted-pair cable requirement Under most conditions, the 16 station ports on the Switch may accept normal, straight-through cables, i.e., standard UTP cables, which are the only ones that can be used with a RJ-45 pin layout. -
Page 19: Connecting To Power
Fig. 3-5 Pin assignments for straight-through cabling Connecting to power Live-FSH16T is accompanied with an external power adapter unit, which is specifically designed for the line voltage and the type of AC outlet used in your location. This power adapter provides the voltage, amperage, and polarity required by the Switch (7.5V... -
Page 20: Fig. 3-6 Connecting The Switch To Power Outlet
Fig. 3-6 Connecting the Switch to power outlet... -
Page 21: Expanding Your Network
Expanding Your Network Live-FSH16T Fast Ethernet Switch is primarily targeted not only as a concentrator to converge workgroup traffic within Ethernet/Fast Ethernet; but also as a central switching device to send incoming data to its destination LAN segment. With your existing Ethernet/Fast Ethernet infrastructure, you can very easily connect, expand or migrate to workgroup computing in an Ethernet/Fast Ethernet environment. -
Page 22: Hub-To-Switch Connection
Switch-to-switch Connection Live-FSH16T Fast Ethernet Switch can be connected to another switch or other device such as a router or bridge by a two-pair UTP / STP Straight or Crossover cable (Category 3, 4, 5). -
Page 23: Using A Crossover Cable
Using a Crossover Cable When connecting any 10/100 Mbps station port (MDI-X) of other switch or device with any station port (MDI-X) of Live-FSH16T Fast Ethernet Switch, it is required that you use a crossover cable. Fig. 4-2 Connection through Station Port using crossover cable... -
Page 24: Summary
When connecting a computer to a switch, use a straight UTP cable. When connecting Live-FSH16T to any station port (MDI-X) of another hub via its Uplink port (MDI-II), use a straight-through UTP cable. Please note that the cabling distance is 100 meters maximum. -
Page 25: Using Priority Ports
If you regularly use video/multimedia application on your LAN, you can maximize on the Priority Queuing function the Live-FSH16T. Specifically, the priority ports are port 5, 6, 7 and 8 and they are built-in and without the need of any configuration. Using these priority ports can ensure high priority traffic gets delivered efficiently, even when during bursts of high traffic load. -
Page 26: Easy Migration To Workgroup Computing
Often challenged with a heavy traffic load generated by workgroup applications, you need a device such as Live-FSH16T to act as a concentrator and central switching device to take care of the traffic flow. With its 16-port capacity, it can adopt as many end stations and servers or even connect to other network devices. -
Page 27: Priority Queuing
Priority Queuing Live-FSH16T is equipped with the Priority Queuing function for port 5, 6, 7 and 8. Priority port can ensure high priority traffic to be delivered efficiently, even when during bursts of high traffic load. Traffic such as voice data and video (services which are streaming) are thus prioritized, helping steady picture and sound quality. -
Page 28: Led Indicators
LED Indicators The front-panel LED indicators enable users of Live-FSH16T Fast Ethernet Switch to monitor the Power On/Off status of the Switch and the port status of each of its sixteen 10/100 Mbps station ports. For the layout of LED indicators, please refer to Fig. 5-1 below. -
Page 29: Fdx/Col Leds
While the port is transmitting or receiving data, you will see a blinking green light. If you’ve made a connection but the Link/Rx LED does not light up as expected, you should check whether the RJ-45 connectors are damaged, or the cable type or pin-out is not correct, or the cable length exceeds the 100 meter limit. -
Page 30: Appendix A
Appendix A Product Specifications Standard Compliance IEEE 802.3 10BASE-T Ethernet IEEE 802.3u 100BASE-TX Fast Ethernet IEEE 802.1p Class of Service (Priority queuing) ANSI/IEEE Std 802.3 Nway auto-Negotiation IEEE 802.3 Frame Type Topology Star Protocol CSMA/CD Port Configuration 16 × 100 BASE-TX Ports 1 ×... - Page 31 MAC Address Learning Automatic update Cabling Type 100BASE-TX 4-pair 100 ohm Category 5 UTP or STP (100 m) cable 10BASE-T 4-pair 100 ohm Category 3,4,5 UTP(100 m) cable Cabling distance 100 meters for switch-to-repeater connection 100 meters for switch-to-station LED layout System Status LEDs Power LED Station port LEDs...
-
Page 32: Appendix B
Appendix B Troubleshooting This appendix contains information to help you identify and solve problems. If your switch does not function properly, please make sure it is set up according to the instructions on the manual. If you suspect your switch is not connected correctly to your network, check the following points before you contact your local dealer for support.
Need help?
Do you have a question about the Live-FSH16T and is the answer not in the manual?
Questions and answers