Table of Contents
Advertisement
Advertisement
Table of Contents

Related Manuals for Hitachi TAW-270NH2A


Summary of Contents for Hitachi TAW-270NH2A
-
Page 1: Operation Manual
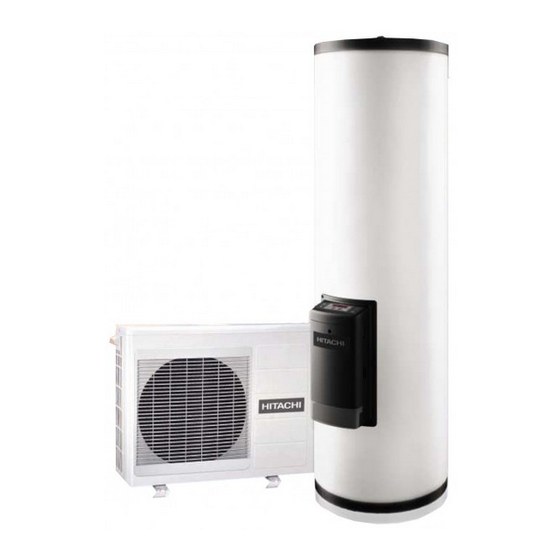
SANITARY HOT WATER HEAT PUMP OPERATION MANUAL MODEL TANK UNIT OUTDOOR UNIT TAW-270NH2A / RAW-25NH2A TANK UNIT OUTDOOR UNIT RAW-25NH2A TAW-270NH2A Instruction manual Page 1~26 To obtain the best performance, please read this instruction manual completely. – 1 –... -
Page 2: Table Of Contents
Thank you for choosing a sanitary hot water heat pump from Hitachi. To obtain the optimum performance and ensure years of trouble-free operation, please read through this instruction manual. After reading, be sure to keep this manual conveniently available for future reference. - Page 3 SAFETY PRECAUTION To learn how to used the sanitary hot water heat pump correctly and prevent personal injury and damage to property, the user must read through the “Safety Precautions” before operating the sanitary hot water heat pump. Pay special attention to instructions preceded by the WARNING and CAUTION symbols.
- Page 4 PRECAUTIONS DURING INSTALLATION Check that the tank is securely installed Otherwise, it could tip over in an earthquake causing personal injury. Contact your sales agent if it is not securely installed. Check that the Å oor where the unit is installed is waterproof and has proper drainage Otherwise Å...
- Page 5 Handling and Maintenance Be sure to stop the unit and turn the breaker off before cleaning it During operation, the internal fan rotates at high speed and coming into contact with it will result in injury or damage. Fill up the tank before starting operation Failure to Ä...
-
Page 6: Name Of Each Part
PREPARATION NAME OF EACH PART TANK UNIT Hot water outlet (G 3/4"B) Control panel Mg-Anode Cold water inlet (G 3/4") Leak water receiver Note: – Mg-Anode should be changed yearly, it may loose its function for corrosive protection if exceeds the time frame. –... -
Page 7: Name And Function Of Control Panel
NAME AND FUNCTION OF CONTROL PANEL Heating operation LED indicator: 7-segment LED indicator: Lights during heating operation. Indicates water temperature, time and other information Blinks during boost operation. (Refer to page 9-19) (Refer to page 11, 18) Timer LED indicator: START/STOP button: Lights while timer is set Turns the unit on and off... -
Page 8: Preparing For Operation
PREPARING FOR OPERATION USE THE FOLLOWING STEPS TO START UP THE UNIT THE FIRST TIME OR WHEN IT HAS NOT BEEN USED FOR EXTENDED PERIOD OF TIME. FILLING UP THE TANK Turn on the water tap and close the drain valve. Turn on all connected mixer tap (hot water side). -
Page 9: Setting The Current Time
SETTING THE CURRENT TIME (ONLY WHEN CONNECTED TO A FULL-TIME POWER SUPPLY) Note: Timer operation is possible only when you set the current time and day of the week. An extended power outage (30 minutes or longer) will cancel the time setting. If this happens, reset it. Press the button to display the time. -
Page 10: O Setting Hot Water Temperature
SETTING HOT WATER TEMPERATURE Hot water temperature can be set between 40 to 65°C. Set the temperature depending on hot water volume that you require. The recommended temperature range is 40 to 55°C. (The factory default setting is 55°C.) A low water temperature setting will mean more efÄ cient operation. A higher temperature setting will make more scale. -
Page 11: Standard Operation
OPERATION STANDARD OPERATION Time required to reach the set water temperature depends on water temperature, outside temperature and other factors. When the water temperature and outside temperature are low and heating the water takes time, the electric, heater is automatically set to auxiliary operation to heat the water within eight hours. (*1) Depending on the operating conditions, it may take longer than eight hours. -
Page 12: Timer Function - Sets The Same Mode Every Day
INSTRUCTION OF EACH FUNCTION TIMER FUNCTION (SETS THE SAME MODE EVERY DAY) This function is available only when the unit is connected to a full-time power supply. Two timer settings can be made per day. A setting made for Monday (d.1) will also be used on Tuesday (d.2) through Sunday (d.7) in the same way as on Monday. - Page 13 Setting the operation mode and time for the 1st setting Press the button. “d.1” is now set and “ – – ” blinks. Press the buttons to set the operation mode. ON : Standard operation EC : ECO mode operation OF : OFF –...
-
Page 14: Sets A Different Mode For Each Day
TIMER FUNCTION (SETS A DIFFERENT MODE FOR EACH DAY) This function is available only when the unit is connected to a full-time power supply. Two timer settings can be made per day. A setting make for Monday (d.1) will also be used on Tuesday (d.2) through Sunday (d.7) in the same way as on Monday. - Page 15 Setting the operation mode and time for the 1st setting Press the button. The day of the week is now set and the operation mode starts to blink. Press the buttons to set the operation mode. ON : Standard operation EC : ECO mode operation OF : OFF –...
-
Page 16: Eco Mode Function
ECO MODE FUNCTION The ECO mode uses the heater pump for heating without engaging the electric heater. In ECO mode, you can use a lower temperature for hot water temperature setting than is otherwise possible. It is a convenient feature for reducing power consumption when less water is available. -
Page 17: Anti-Bacteria Function
ANTI-BACTERIA FUNCTION When anti-bacteria mode is set, the unit will raise the temperature of the tank to 65°C once a week to sterilize the water. (1) In a full-time power supply system, anti-bacteria mode starts at 22:00 on Sunday every week. (2) In an off-peak power supply system, anti-bacteria mode is performed in one out of every seven operating sessions. -
Page 18: Boost Function
BOOST FUNCTION The boost function operates the electric heater and uses the full power of the heater pump to reduce heating time. Note: The boost function is not available during anti-bacteria mode. Press the button when the indicator is on. indicator blinks to indicate the boost function has been engaged. -
Page 19: Emergency Function
EMERGENCY FUNCTION When the outdoor unit has failed (and error code E1 ** blinks) and heater pump operation is not available, emergency operation using the electric heater is possible for a limited time period. However, emergency operation is not available when a tank unit failure (and error code E0 ** blinks) has occurred. -
Page 20: Precautions During Maintenance
MAINTENANCE PRECAUTIONS DURING MAINTENANCE CAUTION Stop operation and turn the breaker off, before starting maintenance. Failure to heed this instruction may result in electrical shock. Do not expose the unit to water. Failure to follow this instruction may result in electrical shock. Do not stand on an unstable mounting support during maintenance. -
Page 21: Yearly Inspection And Maintenance
YEARLY INSPECTION AND MAINTENANCE WATER SOFTENER INSPECTION WARNING Set water hardness (Th) to a value in the range 15 – 20°F. Make sure the unit is properly connected to ground SCALING REMOVAL (ONLY AUTHORIZED A disconnected or broken ground cable cause PERSONNEL CAN DO THIS.) malfunctions and electrical... -
Page 22: Power Failure
POWER FAILURE Heating operation interrupted by a power outage will resume as soon as the power comes back on. Power failure that last 30 minutes or longer and turn off the indicators will require to reset the current time of controller. Timer operation is not possible without setting the current time. -
Page 23: Installation
INSTALLATION WARNING Installation work and electrical work require expert knowledge and must be handled by your sales agent. For information on installation costs and other details, consult your sales agent. Determine the location of where the unit should be installed in consultation with your sales agent. The unit must be properly connected to ground. -
Page 24: Installation
Ground connection WARNING ● Connect the unit to ground to prevent electrical shock in the event of leakage electricity. A ground connection must be performed according to technical speciÀ cations for electrical appliances. A ground connection will prevent electrical shock and interference caused by discharges of static electricity when touching the unit and thereby eliminate interference with TV and radio reception. -
Page 25: Sounds
TROUBLESHOOTING Before calling for service, check whether the list below can solve the problem you are dealing with. SOUNDS The unit generates a number of different sounds during operation. The following sounds are not abnormal for the operation. Sound generated Type of operation Clackety-clack At startup... -
Page 26: Call Your Sales Agent Immediately If Any Of The
Heating operation start, particularly when the room light is dimmed, a sight brightness Á uctuation may occur. This is of no consequence. The conditions of the local power supply companies are to be observed. SPECIFICATIONS TANK UNIT OUTDOOR UNIT MODEL NAME TAW-270NH2A RAW-25NH2A – 1ø 230V 50Hz POWER SOURCE MAXIMUM CURRENT TANK NOMINAL VOLUME (Vn) –...
Need help?
Do you have a question about the TAW-270NH2A and is the answer not in the manual?
Questions and answers