
Related Manuals for LG LW332-F


Summary of Contents for LG LW332-F
- Page 1 OWNER'S MANUAL High Definition Network Camera Please read this manual carefully before operating your set and retain it for future reference. MODEL LW332-F LW335-F LW332 Series LW335 Series P/NO : MFL67164907 1106 (V1.0)
- Page 2 FCC WARNING: This equipment may generate or use CAUTION radio frequency energy. Changes or modifications to this equipment may cause harmful interference unless the modifications are expressly approved in the instruction RISK OF ELECTRIC SHOCK manual. The user could lose the authority to operate this DO NOT OPEN equipment if an unauthorized change or modification is made.
- Page 3 Caution: This installation should be made by a qualified • Caution: Danger of explosion if battery is incorrectly replaced. Replaced only with the same or equivalent service person and should conform to all local codes. type recommended by the manufacturer. Dispose Caution: To avoid electrical shock, do not open the of used batteries according to the manufacturer’s cabinet.
- Page 4 LG Electronics hereby declares that this/ Disposal of your old appliance these product(s) is/are in compliance with the essential requirements and other relevant When this crossed-out wheeled bin provisions of Directive 2004/108/EC, symbol is attached to a product it means 2006/95/EC, and 2009/125/EC.
-
Page 5: Important Safety Instructions
Important Safety Instructions Read these instructions. and the point where they exit from the apparatus. Keep these instructions. 11. Only use attachments/accessories specified by the manufacturer. Heed all warnings. 12. Use only with the cart, stand, tripod, bracket, or Follow all instructions. table specified by the manufacturer, or sold with the Do not use this apparatus near water. - Page 6 Cautions for Safe Operation Handling of the unit Operating and storage location Be careful not to spill water or other liquids on the unit. Be Avoid viewing a very bright object (such as light fittings) cautious not to get combustible or metallic material inside during an extended period.
-
Page 7: Table Of Contents
Features ..............8 Before using the system ..........22 Recommended PC Requirements ......23 Part Names and Functions ........9 Accessing the LG IP device ........23 LG Smart Web Viewer Overview ......25 Connections ............12 Configuring the LG Network Camera Device..28 OSD Menu Setup............56 Precautions ..............12... -
Page 8: Features
Features The LG Network Camera is designed to use on an Ethernet • Day & Night function network and must be assigned an IP address to make it • WDR (Wide Dynamic Range) is available accessible. • ABF Auto Back Focus function... -
Page 9: Part Names And Functions
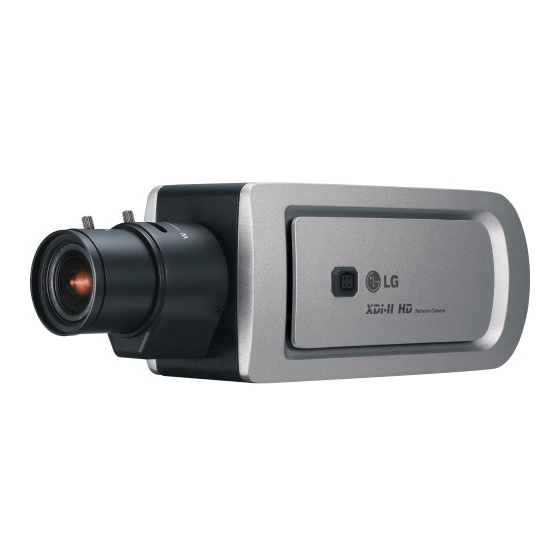
Part Names and Functions a Lens mount cap The lens mount of the camera is covered using a cap to protect it. Remove the lens cap covering the lens. b Camera installation hole Use this hole to install the camera on the wall. c Lens iris output connector (LENS) This 4- pin connector is used to send the Iris control signal and power supply to an auto-iris type lens. - Page 10 Part Names and Functions d VIDEO OUT Supplies analog video signal (composite) to the connected device. e ABF Auto Back Focus button ABF Auto Back Focus is an adjustable function for the back focus automatically. Before you use it, you should set the zoom and focus of the lens approximately.
- Page 11 Part Names and Functions h AUDIO OUT (Line Level Output) k RESET button Connect to an active speaker with a built-in amplifier. Push the button more than 3 seconds, this would restore the factory default network related settings. i Power input terminal l Power indicator Connects to a DC 12 V power supply using proper cables.
-
Page 12: Connections
Connections Precautions • Be sure to switch off the unit before installation and connection. • The installation should be made by qualified service personnel or system installers. • Do not expose the power and connection cables to moisture, which may cause damage to the unit. Connection Overview PoE Device AUDIO... -
Page 13: Connecting Display Device
Connections Connecting Display Device Connect the IP camera to your network using a standard RJ-45 network cable as shown below. Connect the video signal between the IP camera and the PoE Device monitor. (IEEE802.3af ) Broadband Service AUDIO Broadband Router Service Connecting Network AUDIO... -
Page 14: Connecting Power Source
Connections Connecting Power Source Connect power, using one of the methods listed below: To use the power adapter Connect to the DC 12 V UL Listed, Class 2 Power Supply only on the unit. (Recommended power adapter is DC 12 V/1.5 A or above) AUDIO Connect a power source to the power input terminal with 2 and 3 aligned correctly as shown below. -
Page 15: Connecting Alarm Device
Connections Connecting Alarm Device To use the PoE (Power over Ethernet) device Connect the PoE cable to the LAN port on the unit. Alarm terminals are used to connect the alarm (relay) You must use the “IEEE802.3af” standard PoE device. devices such as sensors, door switches, etc. -
Page 16: Connecting Microphone And Speaker Device
Connections Connecting Microphone and A OUT(R) / A OUT (Relay Output) Connect the alarm (relay) device to the relay output Speaker Device terminal. Alarm signal is outputted at an event occurrence. Optionally connect an active speaker and/or external microphone with a built-in amplifier. Alarm (Relay) Device AUDIO... -
Page 17: Using The Micro Sd Card
Connections Using the micro SD card You can record your surveillance environment with the micro SD card even if the network is disconnected condition. To insert the micro SD card Open the micro SD Card Slot Cover. Notes: AUDIO AUDIO •... - Page 18 It may cause a malfunction of the micro SD card or the • LG Electronics is not responsible for deleted data micro SD card slot if you use the power too much at caused by user mishandling when you insert or lock status.
-
Page 19: Mounting The Lens
Connections Mounting the Lens Connect the lens plug to the lens iris output connector (LENS) on the side of the camera. Remove the lens mount cap from the camera. When using lenses from other makers, the plug shape may not correspond to the terminal on the camera. In such a case, remove the original plug and using a soldering iron, connect a lens iris plug according to the diagram. - Page 20 Connections Lens iris output connector Rewire the lens iris plug Pin layout for the lens iris output connector. Cut off the plug of the lens cable, cut off approxi- mately 8 mm of the insulation, and then strip approximately 2 mm of the ends of the cable sheaths.
-
Page 21: Focus Adjustment
Connections Focus adjustment Camera Installation After installing the lens, you should adjust the focus as Select a location that is strong enough to bear the full shown below steps. weight and install the camera securely. Keep pressing the ABF button about 4 seconds to initialize the focus. -
Page 22: Operation And Settings
Once the connections are made you need to install the may cause memory shortage. LG client program to the PC from which you want to access the device. The LG Smart Web Viewer program is automatically installed when you connect the LG IP device. -
Page 23: Recommended Pc Requirements
Operation and settings Recommended PC Requirements Accessing the LG IP device The LG IP device can be used with most standard operating You can access the LG IP device by following the below systems and browsers. steps. Install LG Smart Station Program... - Page 24 Operation and settings web browsers. The recommended browser is Internet 3.2 Enter the IP address of the LG IP device in Explorer with Windows. the address bar of the browse. 3.3 Enter the user name and password set by the 3.1 Run the IP Utility and find the LG IP devices.
-
Page 25: Lg Smart Web Viewer Overview
Operation and settings LG Smart Web Viewer Overview... - Page 26 Operation and settings Item Description Select the video image size from the drop-down list. (1 280 x 1 024 (4:3 mode), 1 280 x 720 (16:9 mode), D1 or CIF) The initial view size is set to D1. Displays the current video codec of the selected video stream (Master or Slave). Check this option as the network connection type (TCP or UDP).
- Page 27 Displays the current surveillance live screen. You can monitor the camera image on the live view window of the LG Smart Web Viewer. Click this button to connect or disconnect the audio communication between the LG IP device and the connected PC.
-
Page 28: Configuring The Lg Network Camera Device
(Color icon: On, Gray scale icon: Off.) Configuring the LG Network Camera Device The features and options of the LG IP camera are configured through the Configuration menu. Only administrator-level users have permission to access the Configuration menu. Accessing the Configuration menu Click the [Configuration] button to display the LG Smart Web Viewer configuration window. -
Page 29: Configuration Menu Overview
Operation and settings Configuration menu overview SD Card Basic The following table shows the list of menu items. Event schedule Main Menu Sub Menu Event Event server Version Sensor & Relay Date & Time System Maintenance Log & Report Language Camera Stream Audio &... -
Page 30: System Settings
Operation and settings System settings Date & Time Version Displays the current version of Firmware, Hardware, Software and Web Client. Time zone Set the time difference from GMT in the area where the IP device is installed. Select the time zone in the area where the IP device is installed from the drop down list. - Page 31 Operation and settings Time mode • Refer to NTP configuration as operation system of the Recording Server when the > Synchronize with NTP Server: Select if you Recording Server use recording function and want to synchronize the IP device’s date and NTP server.
- Page 32 Operation and settings Maintenance Backup and Restore > Backup: To take a backup all of the settings. If necessary, it make possible to return to a backuped configuration. Click this button and follow the instructions on the browser to specify the folder and save the setting data of the IP device.
- Page 33 Operation and settings • The [Backup] function is allowed in HTTP Log & Report protocol but not in HTTPS protocol. Firmware > Upgrade Click the [Browse] button. Log & Report status Find and open the firmware file. The System log provides a summary of the status of Click the [Upgrade] button to update the IP device.
- Page 34 Operation and settings Audio & Video settings Language Camera Language list Select a language for the LG Smart Web Viewer configuration menu and information display. • Save: Click this button to confirm the settings. Preview You can preview the camera image on the preview...
- Page 35 Operation and settings General Stream > Contrast: Edit the contrast value from 0 to 100. Selecting 100 provides the image with the highest contrast. > Standard: Displays the video standard of the camera. > CaptureMode: Select the capture mode. Maximum resolution of the camera is 1 280 x 1 024 on 4:3 or 5:4 mode, 1 280 x 720 on 16:9 mode.
- Page 36 Operation and settings > Maximum Frame rate: Set the frame rate of Note: If the ‘Bit rate’ is configured too low with the image. high resolution, the actual frame rate will > GOP size: It means “Group of Pictures”. The decrease because of narrow bandwidth.
- Page 37 Operation and settings > Audio type: Select the codec when you Motion detect send the audio from the microphone input connector. Audio Out > Enable: Click the check box to output the audio from the speaker. • Save: Click this button to confirm the settings. Preview You can preview the motion detection window on the preview window.
-
Page 38: Network Settings
Operation and settings Network settings General > Sensitivity: Enter the sensitivity to detect an Basic object in motion. > Save: Click this button to confirm the settings. How to set the motion detect window Click the [Add] button. The motion detect win- dow is displayed. - Page 39 Operation and settings > RTSP port: Check RTSP port. The default port RTP stream is 554. Other ports can be selected within RTP (Real-time Transport Protocol) is an internet protocol the range 1025 to 65 535. that allows programs to manage the real-time transmission >...
- Page 40 Operation and settings Master / Slave Data RTP port: Specify the VA data port number used for the multicast > RTP unicast: When enabled the transmission streaming. It is initially set to 6 666 and of the data to the specified equipment you can edit this between 1 025 and happens on a network specifying a single 65 534.
- Page 41 Operation and settings TCP/IP Note: You should register the SMTP server on the Event server setting to set this function. > Statically set: Select this option when you set a fixed IP address, with this setting, specify the IP address, Subnet mask and default gateway manually.
- Page 42 Operation and settings DDNS IP filtering This free service is very useful when combined with the LG The access of the IP addresses in the list are allowed or DDNS Server. It allows the user to connect the IP device denied according to the choice made in the drop-down list using the URL, rather than an IP Address.
- Page 43 Operation and settings IP list Note: If you want to deny or to allow a range of > Basic policy: Select the basic policy type. IP addresses, enter the start IP address to Allow all: Allow all the IP address "From"...
- Page 44 Operation and settings User settings User list > Add the User Basic You can register a new user with various The IP device is shipped with the login rights of access rights. administrator only. If others need to access the IP device Click the [Add] button.
- Page 45 Operation and settings Power user: Use of the limited > Edit the registered user functions of the system (The You can change the password or authority. Configuration menu is not allowed. Choose the user ID and then click the A power user can use the Live [Edit] button.
- Page 46 Operation and settings Max RTP stream connection Note: Preview window of the IP device setting and > Maximum number of simultaneous stream preset setting are affected by this setting. connection: Set this number to limit the number of • Save: Click this button to confirm the settings. simultaneous stream connections.
- Page 47 Operation and settings SD Card settings SD Card Recording > Always: Start the recording at once. Basic > Recurrence Pattern: The recording is started according to the setting time of the selected day. Note: You can not set the time for a day. It will start the recording for the selected day of the time.
- Page 48 Operation and settings > Network Failure Recording: Select the Disk Management checkbox to activate the micro SD card > Using the micro SD card recording function. If the system does not Insert the micro SD card carefully to the work with recording server, the system will micro SD card slot of the camera.
- Page 49 Operation and settings > Remove the micro SD card File Management Click the [Unmount] button. If the micro Displays the recorded file of the micro SD card on the SD card is unmounted from the system list. Click the [Search] button to display the recorded correctly, the [Unmount] button will be file.
-
Page 50: Event Settings
SD card has insufficient space. • The downloaded file can be played by using the LG Smart Station player. > Remove: Delete file from the SD card. Event schedule list >... - Page 51 Operation and settings • Trigger: Displays the selected Notes: trigger event. • You should register the SMTP and FTP • Time: Sets the Day, Start, Finish, server on the Event server setting to set Pre alarm, Post alarm and Ignore this function.
- Page 52 Operation and settings Event Server FTP server list Image files can be transferred to the FTP server within Event Servers are used to receive the recorded video clip the scheduled time. Image file that has been recorded and/or notification messages. linked to an external event is sent to the FTP server periodically.
- Page 53 Operation and settings Test: Select [Test] to test the FTP SMTP server list server. By selecting the e-mail option, a still image of the Click the [Save] button to confirm the event is captured and an e-mail with the attached settings.
- Page 54 Operation and settings Enable SSL: Check when use the > To edit the SMTP server SSL (Secure Socket Layer) protocol. Choose the SMTP server in the SMTP SSL protocol is cryptographic server list. protocols that provide secure Click the [Edit] button. communication on a network.
- Page 55 Operation and settings Sensor & Relay Stop: Click to stop the relay. • Save: Click this button to confirm the settings. Sensor > Enable: Marks up when you want to activate the sensor. > Alias: Displays the sensor name. > Type: Select the sensor type.
-
Page 56: Osd Menu Setup
Operation and settings OSD Menu Setup Main Menu Sub Menu Contents The following table shows the list of menu items and AUTO options. You can adapt the camera to your requirements by AWC / PUSH setting up the respective items in these menus. INDOOR, COLOR TEMP WHITE BAL... - Page 57 Operation and settings AREA1 to MASK NUMBER Main Menu Sub Menu Contents AREA2 PRIVACY POLY. DISPLAY ON/OFF 0 to 255 POLYGON POLYGON DRAW GREEN 0 to 255 POLYGON MOVE COLOR BLUE 0 to 255 RET/TOP/ EXIT RET/TOP/ EXIT EXIT RET/TOP/END TRANSPARENCY 0 to 16 MANUAL...
- Page 58 Operation and settings Main Menu Sub Menu Contents Main Menu Sub Menu Contents ZOOM BKLT D-ZOOM LOWLIT TILT SCENE MODE OUTDOOR EXIT INDOOR D-EFFECT OFF/ MIRROR/ ROTATE/ V-FLIP TRAFFIC SHARPNESS 0 to 68 USER COLOR OFF/ ON CAMERA REBOOT SPECIAL RESET FACTORY RESET WINDOW MOVE...
-
Page 59: General Operation
Select [EXIT] option then click button to exit the setup menu. In the submenu, use button to Click the [OSD control] button on the LG Smart Web select the [EXIT] then use button to select a Viewer. mode and click button to exit the setup menu. -
Page 60: Exposure Settings
Operation and settings Exposure settings WDR/BLC Use WDR/BLC option to view the object clearly in backlight conditions. Select [WDR/BLC] option on the [EXPOSURE] menu. button to select a mode then click button. • WDR: WDR (Wide dynamic range) feature can be very helpful to cope with very challenging You can set the exposure options using the EXPOSURE lighting conditions. - Page 61 Operation and settings • HSBLC: Use for masking brightness of the specific BRIGHTNESS area to view the subject more clearly. The HSBLC You can increase the brightness of the darkened video. mode is automatically activated only in low If you set the brightness to lower value, the image gets luminance scene.
-
Page 62: White Balance Settings
Operation and settings White Balance settings SENS-UP If pictures are not clear due to darkness, this SENS-UP Select the method by which the camera shifts its output operation would increase the sensitivity of picture. colors to compensate for the color of a light source. Select [SENS-UP] option on the [EXPOSURE] menu. - Page 63 Operation and settings Day/Night settings > When the scene is dim. • AUTO: You can set the white balance options automatically. • AWC / PUSH: If you select the AWC / PUSH mode, you will be able to set up the White Balance automatically using button.
- Page 64 Operation and settings 3D-DNR setting > LEVEL: Use button to select a level. > DWELL TIME: Use button to select a dwell time. • DAY: Color mode enabled. • NIGHT: Black-and-white mode enabled. Select [3D-DNR] option. If pictures are not clear due to noise, this option would reduce the noise of picture.
-
Page 65: Privacy Setting
Operation and settings • RECTANGLE : Privacy Setting > button to select a mask on the This function is aiming at the protection of personal [MASK NUMBER]. privacy. The selected part is not displayed on the screen. > button to set up the [ON] or [OFF] on the RECT. - Page 66 Operation and settings • POLYGON : > to select an option then use > button to select a mask on the button to adjust the option. [MASK NUMBER]. HEIGHT: Increase or decrease the vertical size of the mask. > button to set up the [ON] or [OFF] on the POLY.
-
Page 67: Back Focus Setting
Operation and settings ABF ADJUST Back Focus Setting You can adjust the back focus automatically. The back focus function is activated automatically Select the [ABF ADJUST] option on the [BACK FOCUS] according to your setting. And also, when the Day&Night menu and then click button. -
Page 68: Special Menu Settings
Operation and settings Special menu settings D/N ABF You can set the Day&Night function with ABF function. button to select a option. • ON: If you set to On, the ABF function will be activated automatically when the D/N function is activated. •... - Page 69 Operation and settings SHARPNESS • TILT: Use button to move the screen. (up The degree to which the boundary of the two portions is or down) clearly distinguished. D-EFFECT (Digital effect) Select the [SHARPNESS] option on the [SPECIAL] You can select the digital effect. menu.
- Page 70 Operation and settings STABILIZER You can view an image in PIP(picture in picture) mode. The image stabilizer function minimizes the appearance of Select the [PIP] option on the [SPECIAL] menu. shaky images caused by low-frequency vibration. button to select [ON] then click This function is useful for outdoor surveillance.
- Page 71 Operation and settings Select the [LANGUAGE] option on the [SPECIAL] screen. button to select the language. SCENE mode setting You can set value installed camera environment properly using this function. Several configuration value is set automatically to select option. button to select a character or number then click button.
- Page 72 Operation and settings • LOWLIT: Increase the Gain and set SENS-UP function to Notes: see the subject cleary under the low light condition. • Set each value of option as selected option on the • OUTDOOR: Change to the ELC mode not to decrease [SCENE MODE] like as below table.
-
Page 73: Reset Setting
Operation and settings Reset setting OPTION INDOOR TRAFFIC USER Shutter speed AUTO Manual(1/120) MIDDLE HIGH Manual White Balance (Indoor) WDR/BLC 3D-DNR MIDDLE MIDDLE Select the [RESET] option. DAY/NIGHT AUTO AUTO Click button and the RESET menu appears. SHARPNESS button to select option. BRIGHTNESS •... -
Page 74: Troubleshooting
• IP Conflicts: If the LG network device is set with a static IP address and if the DHCP option is set then there IP Setting problems may be IP’s same as the network device and other •... - Page 75 If the video streaming does not start on the Web the system administrator, either he has to do port browser, install the LG Web Client ActiveX program on forwarding or modify the DMZ function on the router. your computer following the instructions on the Web browser.
- Page 76 Troubleshooting • Video images if appear white and black adjust the Audio condition settings in the OSD to get back the colorful image. • The client computer that is interacting with the camera needs to have a sound card that is functional •...
-
Page 77: Open Source Software Notice
LGPL LIBRARIES: Glibc, libelf, libesmtp, live.media LG Electronics offers to provide source code to you on CD-ROM for a charge covering the cost of performing such distribution, such as the cost of media, shipping and handling upon e-mail request to LG Electronics at: opensource@lge.com... - Page 78 Open source software notice This product includes • ntpdate : Copyright © David L. Mills 1992-2006 • dhcp client : • OpenSSL : Copyright © 2004-2008 by Internet Systems > cryptographic software written by Eric Young Consortium, Inc. (“ISC”) (eay@cryptsoft.com). >...
- Page 79 Open source software notice > Copyright 1992-1994 Jutta Degener, Carsten OF CONTRACT, TORT OR OTHERWISE, ARISING FROM, OUT Bormann OF OR IN CONNECTION WITH THE SOFTWARE OR THE USE OR OTHER DEALINGS IN THE SOFTWARE. • Zlib : Copyright © 1995-2002 Jean-loup Gailly and Mark Adler.
-
Page 80: Specification
Specification ITEM LW332-F LW335-F Camera Image Sensor 6.08 mm Progressive Scan CMOS (1.3 Mega Pixels) Lens DC-Iris, CS Mountable Color 0.3 lx (F1.2, Gain : High) Illumination 0.005 lx (F1.2, Gain : High) Resolution Up to 1 280 x 1 024... - Page 81 Not support Support Object Removal Not support Support Object Counting Not support Support Tampering Not support Support Network Ethernet 10/100 Ethernet Security Password Protection, HTTPS(SSL, TLS) Protocol TCP/IP(IPv4), HTTP, HTTPS, RTP, RTSP, UDP, DHCP, FTP, SMTP, NTP, ARP, ICMP, DDNS(LG)
- Page 82 Specification Management Integrated Client LG Smart Station (64 channels recording and monitoring feature) Simple Web Client Live monitoring and system management for a device System Update LG Smart Station or Web Client Connections Up to 10 Misc. Power Source PoE (IEEE 802.3af ), DC 12 V (±20 %) Power consumption 6.2 W...
Need help?
Do you have a question about the LW332-F and is the answer not in the manual?
Questions and answers