Table of Contents
Advertisement
Quick Links
USER'S gUidE
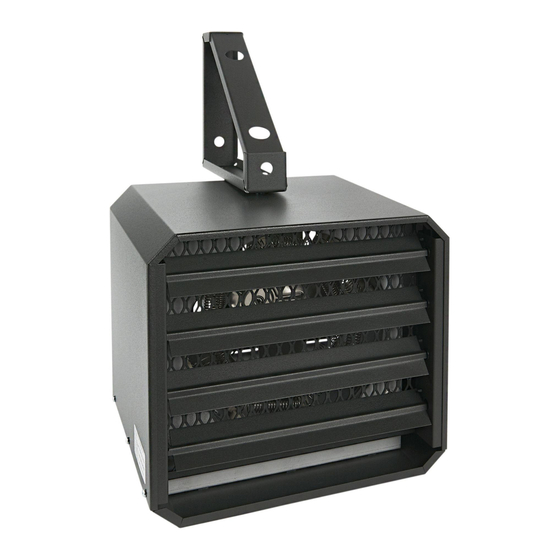
FUHgX SERiES
AGRICULTURAL UNIT HEATER
wARNING
Before installing and operating this product, the user and/or installer must read, understand and follow these instructions and keep them handy for future
reference. If these instructions are not followed, the warranty will be considered null and void and the manufacturer deems no further responsibility for this
product.
This product must be installed by a qualified person and connected by a certified electrician, according to the electrical and building codes effective
in your region.
The following instructions must be adhered to in order to avoid personal injuries or property damages, serious injuries and potentially fatal electric shocks.
Make sure that all screws and electrical terminal connections are tightly secured before operating the unit in case they would have loosened during transportation.
Protect the heating unit with the appropriate circuit breaker or fuse, in accordance with the nameplate.
Make sure the line voltage (volt) is consistent with that indicated on the unit's nameplate.
This unit must be grounded.
Switch off the power at the circuit breaker/fuse before installing, repairing and cleaning the unit.
Make sure the unit is appropriate for the intended use (if needed, refer to the product catalog or a representative). Use this heater only as described in this
manual. Any other use not recommended by the manufacturer may cause fire, electric shock, or injury to persons. Do not use outdoors.
Recommended heating capacity:
1,25 W/cubic foot (0.03 m³).
It corresponds to 10 W/square foot (0.09 m²) based on a standard ceiling height of 8 feet (2.44 m). The recommended capacity is usually sufficient for
normal heating needs. Please note that the insulation quality of walls and windows are some of the factors that influence heat losses, which modify the required
capacity to heat a room. If needed, refer to a specialist (industrial and commercial buildings) who will be able to calculate these heat losses and optimize the
required capacity or consult the "Online heating calculation" section of the Stelpro Design Web site (residential buildings).
Do not install the unit where objects or pieces of furniture could be heat damaged.
If the unit capacity is insufficient for the size of the room, it will be in operation continuously, and may become defective earlier and turn yellow.
Respect distances and positions indicated in the installation section
For further information or to consult this guide online, please visit our website at www.stelpro.com
REpLACEmENT CompoNENT LIsT INCLUdEd
ImpoRTANT INsTRUCTIoNs
This unit
complies with
the CsA and
UL standards
INSFUHGX1213
Advertisement
Table of Contents

Subscribe to Our Youtube Channel
Related Manuals for Stelpro FUHGX Series


Summary of Contents for Stelpro FUHGX Series
-
Page 1: Important Instructions
If needed, refer to a specialist (industrial and commercial buildings) who will be able to calculate these heat losses and optimize the required capacity or consult the “Online heating calculation” section of the Stelpro Design Web site (residential buildings). -
Page 2: Save These Instructions
SpEciFicationS wARNING If the installer or the user modifies the unit, he will be held responsible for any damage resulting from this modification, and the CSA certification could be void. This unit must not come into contact with a water source and must be protected from splashes. Do not use it if any part has been immersed. When mounting the unit, make sure that the anchorage used can support the total weight of the unit with the mounting brackets. - Page 3 tEcHnical dRawingS and inStallation TECHNICAL dRAwINGs 20 1/4" 514mm 20 1/4" 5 7/8" 514mm 149mm 12" 305mm 15/16" LOUVERS 7 5/8" 23mm 194mm ELEMENT 4 5/16" 110mm 10" 254mm 12 3/16" 309mm 7/8" Ø 22mm FAN BLADE 18" 15 1/2" MOTOR 457mm 394mm...
- Page 4 inStallation, opERation and maintEnancE 2. Remove the knock-out, insert the power cable into the connection point and keep it in place with a proper cable clamp. Make sure the cable is long enough to easily make the connections and allow the unit to rotate. 3.
- Page 5 REplacEmEnt componEnt liSt REpLACEmENT CompoNENT LIsT ReF. # paRt # deScRiption BLA-009 FAN BLADE 10” 26° 4B BOUT-011 THERMOSTAT KNOB (ALMOND) EFUHGX25 ELEMENT 5000W-240V FD-003 FAN DELAY (240V) MO-020 MOTOR (240V) PL-240 PILOT LIGHT 240V PROT-002 THERMAL PROTECTION (MAN.) ST-012 THERMOSTAT DP (BULB TYPE) SWI-006 SWITCH (SPDT)
-
Page 6: Limited Warranty
Moreover, it does not cover the cost of disconnection, transport, and installation. The warranty is limited to the repair or the replacement of the unit or the refund of its purchase price, at the discretion of Stelpro. Any parts replaced or repaired within the warranty period with the written authorization of Stelpro will be warranted for the remainder of the original warranty period.
Need help?
Do you have a question about the FUHGX Series and is the answer not in the manual?
Questions and answers