Table of Contents
Advertisement
Quick Links
Advertisement
Table of Contents

Related Manuals for Aquatica Digital A70


Summary of Contents for Aquatica Digital A70
- Page 1 DIGITAL U/W HOUSING FOR NIKON D70 SERIES OPERATING MANUAL...
-
Page 2: Safety Precautions
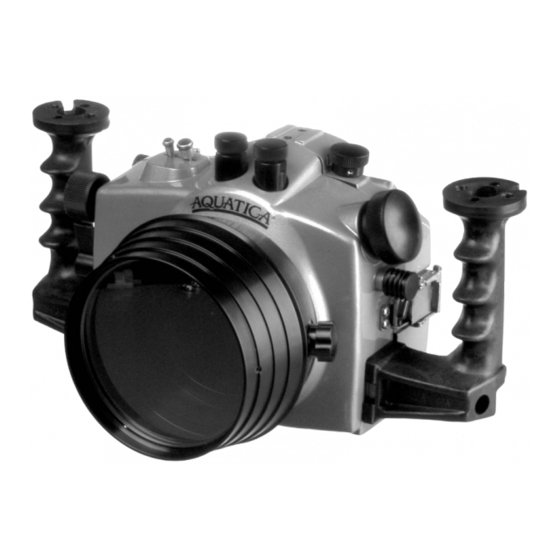
Thank you for having selected the AQUATICA A70 Digital Camera Housing System for your underwater photography. The AQUATICA A70 Digital Housing is the result of a long and continuing relationship with the most demanding under- water photographers in the world. Each housing is handcrafted, quality checked and pressure tested to 300 feet by a small group of specially trained individuals, each of whom takes the utmost pride and satisfaction in offering the best underwater camera housing in the world. - Page 3 SHUTTER RELEASE LEVER SUB -COMMAND INPUT KNOB EXPOSURE COMPENSATION CONTROL METERING MODE CONTROL BULKHEAD FOR FLASH CONNECTOR SECOND BULKHEAD FOR FLASH CONNECTOR (OPTIONAL) FOCUS/ZOOM KNOB FOCUS / ZOOM RING CONNECTING GEAR LENS LOCK RELEASE LEVER GRIPS (X2) MOUNTING HOLES (1/4” X 20) FOR BASE BRACKETS FOR ARMS HOTSHOE CONNECTOR BAYONNET MOUNTING FLANGE...
-
Page 4: Controls In Detail
CONTROLS IN DETAIL SHUTTER RELEASE LEVER : Pulling the shutter release lever back part way activates the camera meter and autofocus. Pulling the lever back all the way fires the camera. SUB-COMMAND INPUT / APERTURE KNOB : Rotates clockwise and counterclockwise. Use alone or in combination with other controls to select or set various camera functions or modes. - Page 5 MOUNTING HOLES : Two 1/4” X 20 holes are provided for mounting strobes trays or accessories. FEATURES The Aquatica A70 is issued from the world's most technologically advanced underwater housing lineage, ergonomically designed to place all the essential camera controls under your finger tips and features the following: A Lens Lock Release control that will activate the lens release button of camera from the outside of the housing.
-
Page 6: Preparation Of The Housing
PREPARATION OF THE HOUSING 1. Attach Grip Bracket to the housing: The housing comes with two Grips for both right and left hand grips which should be installed on the sides of the housing with the supplied screws and Allen key. Occasionally remove the brackets and lubri- cate the screws (see Care and Maintenance: of the housing.) Depending on which strobe system you are using, you can mount the necessary shoes or brackets onto the 1/4"-20 threaded holes on the top of the hand grips. -
Page 7: Preparation Of The Ports
PREPARATION OF THE PORTS 1. Select the correct port: Depending on whether you've decided to shoot macro or wide angle photography, you will be installing either the flat Macro Port (product # 18426), or 8" Dome Port (Product # 18405). See lens chart for the suggest port and accessories. - Page 8 PREPARATION OF THE LENS Depending on the lens used, there are a number of gear options possible. Using the right gear (s) and correctly mount- ing them on the lens is very important for a smooth housing operation. Use the following chart to determine which gear(s) to use and follow the installation directions for each gear carefully.
-
Page 9: Camera Preparation And Installation
CAMERA PREPARATION AND INSTALLATION Set the Focus Mode Selector (AF or M) Switch to the proper focusing mode Important Note: “D” Clips that attach the strap should be removed prior to installing the camera in the housing. Make sure the exposure compensation and metering knobs (no. 3 & 4) are pulled in the UP position. Carefully place the camera on the saddle and ensure the camera is properly installed and aligned as follows: The camera is properly aligned and secured against rotation or movement. -
Page 10: Lens Installation
The lens mounted gears may restrict the view and ease of access to the lens release button of camera. The AQUATICA A70 features a Lens Release Lever (key # 8) that is designed to trigger the lens release button of camera to allow easy removal of lens. -
Page 11: Mounting And Attaching Flashes
Aquatica bracket or Base Ball that can hold a small dive light or a strobe arm. The AQUATICA A70 Digital housing can be fitted with a standard single or double bulkhead connector for strobes •... -
Page 12: Care And Maintenance
NOTE : Always select the proper focus mode AF or M prior to closing the housing. For more detailed information concerning the operation of the different focus modes consult the Nikon instruction book for the A70. USING THE HOUSING Whenever changing ports or O-rings, it is highly advisable to perform a simple seal test without the camera inside. - Page 13 Of the Latches: The two latches of the AQUATICA A70 are designed to have a locking action to prevent accidental opening. Always ensure that the locking mechanism is secure. Watch for the build-up of corrosion or salt residue around the latches.
-
Page 14: Please Read Carefully
WARRANTY PLEASE READ CAREFULLY One year Limited Warranty. Thank youfor purchasing an AQUATICA manufactured product! Your AQUATICA housing is hand- crafted by a small group of specially trained individuals - each of whom takes the most pride and satisfaction in offering you the best underwater camera housings in the world. All AQUATICA products are garanteed against defects in material or workmanship for (1) one full year from the date of purchase for consumer use.