Advertisement
Available languages
Available languages
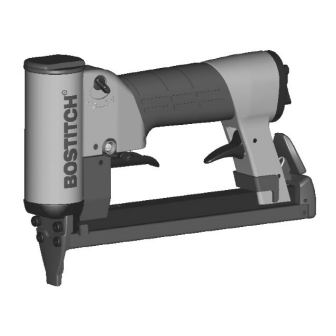
TU-216 Series
Industrial Fine Wire Stapler
Grapadora industrial de alambre fino
Agrafeuse industrielle à agrafes fines
OPERATION and MAINTENANCE MANUAL
MANUAL DE OPERACIÓN Y DE MANTENIMIENTO
MANUEL D'INSTRUCTIONS ET D'ENTRETIEN
BEFORE OPERATING THIS TOOL, ALL OPERATORS SHOULD STUDY THIS MANUAL TO UNDERSTAND AND
FOLLOW THE SAFETY WARNINGS AND INSTRUCTIONS. KEEP THESE INSTRUCTIONS WITH THE TOOL
FOR FUTURE REFERENCE. IF YOU HAVE ANY QUESTIONS, CONTACT YOUR BOSTITCH REPRESENTATIVE
OR DISTRIBUTOR.
ANTES DE OPERAR ESTA HERRAMIENTA, TODOS LOS OPERADORES DEBERÁN ESTUDIAR ESTE
MANUAL PARA PODER COMPRENDER Y SEGUIR LAS ADVERTENCIAS SOBRE SEGURIDAD Y LAS
INSTRUCCIONES. MANTENGA ESTAS INSTRUCCIONES CON LA HERRAMIENTA PARA FUTURA
REFERENCIA, SI TIENE ALGUNA DUDA, COMUNÍQUESE CON SU REPRESENTANTE DE BOSTITCH O CON
SU DISTRIBUIDOR.
LIRE ATTENTIVEMENT LE PRÉSENT MANUEL AVANT D'UTILISER L'APPAREIL. PRÉTER UNE ATTENTION
TOUTE PARTICULIÈRE AUX CONSIGNES DE SÉCURITÉ ET AUX AVERTISSEMENTS. GARDER CE MANUEL
AVEC L'OUTIL POUR FUTUR RÉFÉRENCE. SI VOUS AVEZ DES QUESTIONS, CONTACTEZ VOTRE
REPRÉSENTANT OU VOTRE CONCESSIONNAIRE BOSTITCH.
STANLEY FASTENING SYSTEMS
121265REVA 6/02
Advertisement
Table of Contents

Related Manuals for Bostitch TU-216 Series


Summary of Contents for Bostitch TU-216 Series
- Page 1 MANUAL PARA PODER COMPRENDER Y SEGUIR LAS ADVERTENCIAS SOBRE SEGURIDAD Y LAS INSTRUCCIONES. MANTENGA ESTAS INSTRUCCIONES CON LA HERRAMIENTA PARA FUTURA REFERENCIA, SI TIENE ALGUNA DUDA, COMUNÍQUESE CON SU REPRESENTANTE DE BOSTITCH O CON SU DISTRIBUIDOR. LIRE ATTENTIVEMENT LE PRÉSENT MANUEL AVANT D’UTILISER L’APPAREIL. PRÉTER UNE ATTENTION TOUTE PARTICULIÈRE AUX CONSIGNES DE SÉCURITÉ...
-
Page 2: Table Of Contents
Bostitch nails, staples and accessories. LIMITED WARRANTY Bostitch, Inc., warrants to the original retail purchaser that this product is free from defects in material and workmanship, and agrees to repair or replace, at Stanley-Bostitch's option, any defective product within 1 year from the date of purchase. This warranty is not transferable. It only covers damage resulting... -
Page 3: Safety Instructions
SAFETY INSTRUCTIONS EYE PROTECTION which conforms to ANSI specifications and provides protection against flying particles both from the FRONT and SIDE should ALWAYS be worn by the operator and others in the work area when loading, operating or servicing this tool. Eye protection is required to guard against flying fasteners and debris, which could cause severe eye injury. -
Page 4: Tool Specifications
TOOL SPECIFICATIONS All screws and nuts are metric MODEL LENGTH HEIGHT WIDTH WEIGHT TU-216-71 8.71" (221.25 mm) 5.92” (150.26 mm) 1.58” (40.2 mm) 1.88 lb (.853 kg) TU-216-71LN 8.71" (221.25 mm) 7.81” (198.30 mm) 1.58” (40.2 mm) 2.01 lb (.912 kg) TU-216-71LM 13.925”... -
Page 5: Air Supply And Connections
AIR SUPPLY AND CONNECTIONS Do not use oxygen, combustible gases, or bottled gases as a power source for this tool as tool may explode, possibly causing injury. Fittings: Install a male plug on the tool which is free flowing and which will release air pressure from the tool when disconnected from the supply source. -
Page 6: Loading The Tool
LOADING THE TU-216 EYE PROTECTION which conforms to ANSI specifications and provides protection against flying particles both from the FRONT and SIDE should ALWAYS be worn by the operator and others in the work area when loading, operating or servicing this tool. Eye protection is required to guard against flying fasteners and debris, which could cause severe eye injury. -
Page 7: Tool Operation
II. REFER TO “TOOL SPECIFICATIONS” IN THIS MANUAL TO IDENTIFY THE OPERATING SYSTEM ON YOUR TOOL. BOSTITCH offers two types of Operation for the TU-216 series tools. MODEL IDENTIFICATION Refer to Tool Operation Check on page 9 before proceeding to use this tool. -
Page 8: Power Adjustment Valve
MODEL IDENTIFICATION (Continued) Trigger Operated: The Trigger Operated model is cycled by actuation of the trigger. The Trigger Operated tool will cycle each time the trigger is actuated. Automatic: The automatic model is cycled by actuation of the trigger. When the trigger is pulled lightly with a short motion the tool will drive one fastener. - Page 9 IN ADDITION TO THE OTHER WARNINGS CONTAINED IN THIS MANUAL OBSERVE THE FOLLOWING FOR SAFE OPERATION • Use the BOSTITCH pneumatic tool only for the purpose for which it was designed. • Never use this tool in a manner that could cause a fastener to be directed toward the user or others in the work area.
-
Page 10: Maintaining The Pneumatic Tool
When working on air tools, note the warnings in this manual and use extra care evaluating problem tools. Replacement Parts: BOSTITCH replacement parts are recommended. Do not use modified parts or parts which will not give equivalent performance to the original equipment. Assembly procedure for seals: When repairing a tool, make sure the internal parts are clean and lubricated. -
Page 11: Trouble Shooting
TROUBLE SHOOTING PROBLEM CAUSE CORRECTION Trigger valve housing leaks air O-ring cut or cracked ....Replace O-ring Trigger valve stem leaks air O-ring/seals cut or cracked ..Replace O-ring Frame/nose leaks air Damaged valve housing/valve stem . - Page 12 Si tiene alguna pregunta referente a la herramienta y su uso llame al Servicio a clientes de Bostitch al 1-800-556-6696 o escriba a: Bostitch Customer Service, Briggs Drive, East Greenwich, RI 02818. Puede consultar también la página web www.stanleybostitch.com...
- Page 13 INSTRUCCIONES DE SEGURIDAD Al cargar, operar o dar servicio a esta herramienta, el operador y los demás presentes en el área de trabajo deben usar SIEMPRE PROTECCIÓN DE LOS OJOS en conformidad con las especificaciones ANSI y que proteja contra partículas que vuelen por DELANTE y por el LADO. Se exige protegerse la vista para resguardarse contra grapas/puntas o residuos que vuelen, lo cual puede causar lesiones graves a los ojos.
- Page 14 ESPECIFICACIONES DE LA HERRAMIENTA Todos los tornillos y tuercas son métricos MODELO LONGITUD ALTURA ANCHURA PESO TU-216-71 221,25 mm 150,26 mm 40,2 mm 0,853 kg TU-216-71LN 221,25 mm 198,30 mm 40,2 mm 0,912 kg TU-216-71LM 353,69 mm 150,26 mm 40,2 mm 1,061 kg TU-216-71A 221,25 mm...
- Page 15 SUMINISTRO DE AIRE Y CONEXIONES No use oxígeno, gases combustibles ni gas envasado en cilindros como fuente de energía para esta herramienta porque puede explotar, causando posibles lesiones. Conectores: Instale un enchufe macho en la herramienta con flujo libre y que liberará presión de aire de la herramienta al desconectarse de la fuente de suministro.
- Page 16 CARGA DEL MODELO TU-216 Al cargar, operar o dar servicio a esta herramienta, el operador y los demás presentes en el área de trabajo deben usar SIEMPRE PROTECCIÓN DE LOS OJOS en conformidad con las especificaciones ANSI y que proteja contra partículas que vuelen por DELANTE y por el LADO.
-
Page 17: Funcionamiento De La Herramienta
II. CONSULTE LAS “ESPECIFICACIONES DE LA HERRAMIENTA” EN ESTE MANUAL PARA IDENTIFICAR EL SISTEMA OPERATIVO EN LA HERRAMIENTA. BOSTITCH ofrece dos tipos de funcionamiento para las herramientas de la serie TU-216. IDENTIFICACIÓN DEL MODELO Consulte la Revisión funcional de la herramienta en la página 19 antes de proceder a usar esta herramienta. - Page 18 IDENTIFICACIÓN DEL MODELO (Continuación) Funcionamiento con gatillo: El modelo que funciona con gatillo hace ciclos según se accione el gatillo. La herramienta que funciona con gatillo hace ciclos cada vez que se usa el gatillo. Automático: El modelo automático hace ciclos según se accione el gatillo. Cuando se acciona ligeramente el gatillo con un movimiento corto la herramienta aplica una grapa o clavo.
- Page 19 OBSERVE LO SIGUIENTE PARA LA OPERACIÓN SEGURA • Use la herramienta neumática BOSTITCH solamente para el fin que fue diseñada. • Nunca use esta herramienta en forma que pueda causar la salida de una grapa hacia el usuario u otros presentes en el área de trabajo.
- Page 20 Al trabajar con herramientas neumáticas, observe las advertencias de este manual y tenga sumo cuidado al evaluar herramientas con problemas. Piezas de repuesto: Se recomienda usar repuestos BOSTITCH. No use piezas modificadas ni componentes que no tengan un rendimiento equivalente al equipo original. Procedimiento de ensamblaje para los sellos: Al reparar una herramienta, fíjese que las piezas internas estén limpias y lubricadas.
- Page 21 SOLUCIÓN DE PROBLEMAS PROBLEMA CAUSA CORRECCIÓN El alojamiento de la válvula de La junta tórica está cortada ..Cambie la junta tórica disparo tiene fuga de aire o agrietada El vástago de la válvula de La junta tórica o los sellos están .
- Page 22 GARANTIE LIMITÉE Bostitch, Inc. garantit à l’acheteur original au détail que ce produit est exempt de défaut de matériaux ou de fabrication et accepte de réparer ou de remplacer, à la discrétion de Stanley-Bostitch, tout produit défectueux pour une période de 1 an suivant la date d’achat original.
- Page 23 INSTRUCTIONS DE SÉCURITÉ UNE PROTECTION DES YEUX conforme aux normes ANSI et fournissant une protection contre les projectiles en provenance de l’AVANT et des CÔTÉS, doit toujours être portée par l’opérateur et les personnes présentes dans la zone de travail, lors du chargement, du fonctionnement et de la maintenance de l’outil. Une protection des yeux est indispensable pour vous protéger contre les attaches et débris projetés, susceptibles d’entraîner des blessures sérieuses.
- Page 24 CARACTÉRISTIQUES TECHNIQUES DE L’OUTIL Toutes les dimensions de vis et d’écrous sont exprimées en métrique MODÈLE LONGUEUR HAUTEUR LARGEUR POIDS TU-216-71 221,25 mm 150,26 mm 40,2 mm 0,853 kg TU-216-71LN 221,25 mm 198,30 mm 40,2 mm 0,912 kg TU-216-71LM 353,69 mm 150,26 mm 40,2 mm 1,061 kg...
- Page 25 ALIMENTATION D’AIR ET CONNEXIONS N’utilisez pas d’oxygène, de gaz combustibles ni de gaz en bouteille comme source d’alimentation pour cet outil; il pourrait exploser et causer des blessures. Raccords : Installez un bouchon mâle sur l’outil qui assurera un passage intégral et libèrera la pression d’air de l’outil lorsqu’il est déconnecté...
- Page 26 CHARGEMENT DU TU-216 UNE PROTECTION DES YEUX conforme aux normes ANSI et fournissant une protection contre les projectiles en provenance de l’AVANT et des CÔTÉS, doit TOUJOURS être portée par l’opérateur et les personnes présentes dans la zone de travail, lors du chargement, du fonctionnement et de la maintenance de l’outil.
- Page 27 II. CONSULTEZ LA SECTION « CARACTÉRISTIQUES DE L’OUTIL » DE CE MANUEL POUR IDENTIFIER LE TYPE D’EXPLOITATION DE VOTRE OUTIL. BOSTITCH offre deux types d’exploitation pour les outils de la série TU-216. IDENTIFICATION DU MODÈLE Consultez la section Vérification du fonctionnement de l’outil à la page 29 avant d’utiliser cet appareil.
- Page 28 IDENTIFICATION DU MODÈLE (suite) Commande par gâchette : Le modèle commandé par gâchette est mis en marche par l’activation de la gâchette Ce modèle se mettra en marche à chaque pression de la gâchette. Automatique : Le modèle automatique est aussi mis en marche par l’activation de la gâchette. Lorsqu’elle est enfoncée légèrement, avec un bref mouvement, l’outil enfoncera une attache.
- Page 29 EN PLUS DES AUTRES AVERTISSEMENTS CONTENUS DANS CE MANUEL, VEILLEZ À OBSERVER LES PRÉCAUTIONS SUIVANTES : • Utilisez l’outil pneumatique BOSTITCH uniquement dans le but pour lequel il a été conçu. • N’orientez jamais l’outil de façon à ce qu’il puisse éjecter une attache en direction de l’utilisateur ou d’autres personnes dans la zone de travail.
- Page 30 à problèmes. Pièces de rechange : Nous recommandons les pièces de rechange BOSTITCH. N’utilisez pas de pièces modifiées ni de pièces qui ne donneront pas un rendement équivalent à celui de l’équipement original. Procédure d’assemblage pour les joints : Lors de la réparation d’un outil, assurez-vous que les pièces internes sont propres et lubrifiées.
- Page 31 DÉPANNAGE PROBLÈME CAUSE CORRECTION Le logement de soupape de la gâchette Le joint torique est coupé ... .Remplacez le joint torique laisse fuir de l’air. ou craquelé La tige de soupape de la gâchette Le joint torique est coupé...
Need help?
Do you have a question about the TU-216 Series and is the answer not in the manual?
Questions and answers