Table of Contents
Advertisement
Quick Links
Installation Instructions
and User Guide
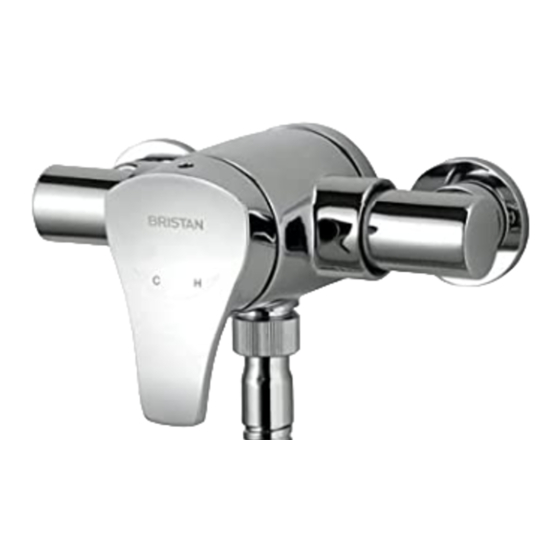
Capri & Sonique
Thermostatic Surface
Mounted/Recessed Mini
Shower Valves
C
H
Models covered: CAP2 SHUAR C
& SOQ2 SHUAR C
Please note: The Capri Shower Valve is
shown as a typical example.
Please keep this booklet for future
reference.
Installer, when you have read these
instructions please ensure you leave them
with the user.
Advertisement
Table of Contents
Troubleshooting

Related Manuals for Bristan CAP2 SHUAR C


Summary of Contents for Bristan CAP2 SHUAR C
-
Page 1: Installation Instructions
User Guide Capri & Sonique Thermostatic Surface Mounted/Recessed Mini Shower Valves Models covered: CAP2 SHUAR C & SOQ2 SHUAR C Please note: The Capri Shower Valve is shown as a typical example. Please keep this booklet for future reference. -
Page 2: Table Of Contents
These instructions are for your guidance to a safe and successful installation and should be left with the user. All products manufactured and supplied by Bristan are safe providing they are installed correctly and receive regular maintenance in accordance with these instructions. -
Page 3: Important Safety Information
Important Safety Information • Please read these instructions thoroughly and retain for future use. • All products manufactured and supplied by Bristan are safe provided they are installed, used correctly and receive regular maintenance in accordance with these instructions. • If you are in any doubt about your ability to install this shower valve safely you must employ the services of an experienced qualified plumber. -
Page 4: General Information
General Information Operating pressure range: Minimum 0.1 bar, Maximum 5.0 bar. Maximum static pressure: 10.0 bar. This product has been tested to the TMV2 scheme which complies with the BS EN 1287:1999 (LP) and BS 1111:1999 (HP) thermostatic mixing valve standards and satisfies the requirements of the water supply (water fittings) regulations 1999 and current bylaws. -
Page 5: Product Features
Product features 1. On/Off and Temperature Control Capri Shower Valve (Surface Mounted) Turn lever anti-clockwise to turn on and increase temperature. Turn lever clockwise to turn off and decrease temperature. 2. Shower Hose (Surface mounted option) Connects the showerhead to the shower valve (recessed option attaches to wall outlet). -
Page 6: Installation Requirements
Installation Requirements Important: If you install this shower This shower valve must be installed in compliance with current water valve with a gravity fed system, there must regulations. If you have any doubts about be a minimum head (vertical distance) the water regulation requirements contact from the underside of the cold water your local water services provider or use... - Page 7 Installation Requirements Instantaneous Water Heater Unvented System cold mains supply cold mains supply Pumped System Pumped System (with Essex flange) 1m min. 1m min. If less than 1m see note. 50mm cold mains supply cold mains supply Key: Isolating Shower Pump Reducing Essex...
- Page 8 Installation Requirements Conditions of use for Type 2 (Thermostatic mixer) valves High Pressure Low Pressure Maximum Static Pressure (Bar) Flow Pressure, Hot & Cold (Bar) 0.5 to 5 0.1 to 1 Hot Supply Temperature (˚C) 55 to 65 55 to 65 Cold Supply Temperature (˚C) Equal to or Less than 25 Equal to or Less than 25...
-
Page 9: Flow Regulators
Installation Requirements Selecting Flow Regulators Supply System Flow Regulator Cold Supply Hot Supply Cold Comments Maximum pressure 0.1 to 1.0 bar 0.1 to 1.0 bar loss ratio 5:1 ◊ Use arrangement 1 to 5 bar Green Yellow 1 to 5 bar or pumped or pumped (7 litre) (5 litre) - Page 10 Installation Requirements Flow Regulators etc. Flow regulators are factory fitted. Study the table on the previous page and decide which flow regulators etc. are required for your particular situation. Compression Unscrew both inlet elbows from the valve body and both compression nuts from the elbows.
- Page 11 Installation Requirements This fitting needs to be installed in Size of tap or Vertical distance accordance with the following Installation combination fitting of outlet above Requirements and Notes (IRN) to ensure spill-over level they meet the requirements of the Water 1.
-
Page 12: Dimensions
Dimensions (mm’s) Surface Mounted Shower Valve 148 - 152 Recessed Shower Valve 148 - 152 *Note: The Riser rail wall brackets can be positioned up or down the riser rail (max. 600mm apart) as required. This allows any 68 - 77 existing holes to be reused or covered by the wall brackets. -
Page 13: Specifications
Specifications Specifications Inlet connections: 15mm compression, with approximately 150mm between centres. Operating pressure range: Min. 0.1 bar - Max. 5.0 bar - Maximum recommended imbalance between hot and cold supply should not exceed a ratio of 5:1. Maximum outlet temp: Factory pre-set to 41°C (can be re-set to suit site conditions). Supply requirements: Minimum cold water supply temperature: 5°C. -
Page 14: Pack Contents
Pack Contents - CAP2 SHUAR C 1 Shower valve 2 Concealing plate 3 Covers x2 4 Filters x2 5 Washers x2 6 Retaining rings x2 7 White disc 8 Green flow regulator 9 Yellow flow regulator 10 Hexagonal key 11 Showerhead (single function) -
Page 15: Soq2 Shuar C
Pack Contents - SOQ2 SHUAR C 1 Shower valve 2 Concealing plate 3 Covers x2 4 Filters x2 5 Washers x2 6 Retaining rings x2 7 White disc 8 Green flow regulator 9 Yellow flow regulator 10 Hexagonal key 11 Showerhead (single function) 12 Wall outlet / Backnut 13 Rubber washers x2 14 Shower hose... -
Page 16: Surface Mounted Shower Valve - First Fix
Surface Installation - First Fix Surface Mounted Shower Valve Before Installation Important: Water supplies to the mixer must be with hot on the left and cold on Flush through the pipework to ensure the right when viewed from the front. removal of debris. -
Page 17: Surface Mounted Shower Valve - Second Fix
Surface Installation - Second Fix 1. Attach shower valve Place the covers (3) over the water supply Re-attach the shower valve to the pipes. Insert the 15mm hot and cold water backplate by tightening the grub screw. supply pipes into the inlet connections and tighten the nuts. -
Page 18: Recessed Shower Valve - First Fix
Recessed Installation - First Fix Recessed Shower Valve Before Installation Important: Water supplies to the mixer must be with hot on the left and cold on Flush through the pipework to ensure the right when viewed from the front. removal of debris. Turn off the mains water supply and close any isolating valves. - Page 19 Recessed Installation - First Fix 3. Fit wall outlet There are two methods of fixing the wall outlet depending on the type of wall: a: With rear access once wall finished Remove the backnut from the wall outlet Backnut (12). Insert the wall outlet through a 21- 24mm hole in the wall and secure with the backnut.
-
Page 20: Recessed Shower Valve - Second Fix
Recessed Installation - Second Fix 1. Fit concealing plate Note: The concealing plate (2) can be used as a template by drawing around the plate and measuring in by 15mm to give sufficient clearance. Run a bead of silicon sealant around the groove on the rear outer seal. -
Page 21: Installation
Installation - Riser Rail 1. Mark the position Note: If replacing an existing riser rail, check to see if the existing holes can Position the assembled riser rail on the be reused or covered by the new wall wall, bearing in mind the different heights brackets. - Page 22 Installation - Riser Rail cont. 3.Insert rail clamps Insert the rail clamps into both wall brackets. 4. Insert riser rail Push the riser rail up through the bottom Rail clamp wall bracket. Push the slider down onto the riser, ensuring it is the correct way up - as Bottom wall shown.
-
Page 23: Installation
Installation - Riser Rail cont. Attaching the Shower hose 7. Connect shower hose to shower valve / wall outlet Screw the shower hose (ribbed nut end) onto the shower valve / wall outlet ensuring that the rubber washer is fitted. 8. -
Page 24: Riser Rail
Operation On/Off and Temperature Control Turn the lever anti-clockwise to turn on and increase temperature. Turn the lever clockwise to decrease temperature and turn off. Riser rail Turning the slider handle will allow the slider to be raised and lowered and the angle of the showerhead to be adjusted. -
Page 25: Commissioning
Commissioning Commissioning notes for If there is no significant change to the set outlet temperature (+/-2˚C or less change Thermostatic Mixing Valves from the original settings) and the fail- safe shut off is functioning, then the valve The first step in commissioning a is working correctly and no further service thermostatic mixing valve is to check the work is required. -
Page 26: Maintenance
(using a 30mm spanner) and remove from smear free, deep clean by breaking up the valve body. and holding dirt, which normal cloths leave behind. Order through your Bristan 3. Carefully remove the cartridge stockist (order code: ECLOTH). assembly and spring. Remove all visible ‘O’... - Page 27 Maintenance - cont. Adjusting the Temperature cap, loosen the grub screw using the hexagonal key (10) and carefully pull the The shower valve has been factory set lever off. with equal (balanced) hot and cold water 3. Using the hexagonal key, turn the supply pressures with the hot water temperature adjusting screw to alter the supply at 65˚C.
-
Page 28: Map Of Hard Water Regions In The Uk
Hard Water Regions in the UK Hard to very hard Soft to moderately soft Above 200mg/l as 0 - 100mg/l as calcium carbonate equivalent calcium carbonate equivalent Slightly hard to moderately hard 100 - 200mg/l as calcium carbonate equivalent L WN L WN L WN London area postcodes... -
Page 29: Troubleshooting
Troubleshooting Symptom Cause Remedy No flow or low Check showerhead, hose and Clean as necessary, refer to flow rate and filters for any blockage. Maintenance section (page 26). / or varying Partially closed stop or service Open stop or service valve. temperatures. -
Page 30: Troubleshooting
Troubleshooting - cont. Symptom Cause Remedy Maximum water Maximum water temperature Reset maximum water temperature too set incorrectly. temperature. Refer to ‘Maximum hot or cold. Temperature Setting’ in Commissioning section (page 25) and ‘Adjusting the Temperature’ in Maintenance section (page 27). Outlet water Inlet filter is partially blocked. -
Page 31: Guarantee
Guarantee Bristan offers solid guarantees to provide *Labour provided by an approved Bristan you with complete peace of mind. engineer. Guarantee only applies to products with a manufacturing fault. A deferred Taps and Mixers payment will be necessary in order to secure 5 year parts and 1 year labour*. -
Page 32: Service Policy
Our service staff are fully qualified to advise on correct installation procedures and will be able to diagnose whether the fault will require a replacement part or a visit from a Bristan engineer. - Page 33 Notes Please use this space to add any notes you or your installer may have regarding the plumbing system/installation of this product.
- Page 34 Notes...
- Page 35 Notes...
- Page 36 Part Number: 800079 A Issue: FI CAP2/SOQ2 SHUAR D1 Bristan Group Ltd. Birch Coppice Business Park Dordon Tamworth Staffordshire B78 1SG Web: www.bristan.com Email: enquire@bristan.com A Masco Company...
Need help?
Do you have a question about the CAP2 SHUAR C and is the answer not in the manual?
Questions and answers