Table of Contents
Advertisement
Advertisement
Table of Contents

Related Manuals for Oregon 88-025


Summary of Contents for Oregon 88-025
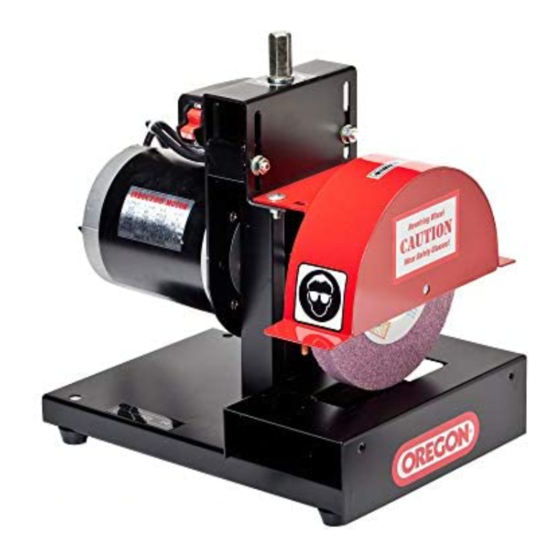
- Page 1 OPERATOR’S MANUAL FOR MODEL 88-025 BLADE GRINDER...
-
Page 2: Table Of Contents
T able of Contents Page Blade Grinder Safety and User Instructions Unpacking the Grinder Assembling the grinder Adjusting the grinding angle Adjusting the table plate Grinding the blade Balancing the blade Grinder maintenance Exploder view and Parts Warranty... -
Page 3: Blade Grinder Safety And User Instructions
Blade Grinder Safety and User Instructions Caution!!! B E FO RE US I NG T HE BL A DE G RI ND E R C A RE F U LL Y F O L LO W T HE S E S A FE T Y P RE C A U TI O NS A ND U S E R I NS T RU C TI O NS Always check to see that the power switch is in the off position and the safety lock is removed anytime other than during use. - Page 4 2. Always place the grinder on a flat and level working surface making sure that it is properly supported. 3. Always check the working area to be sure that it is free from all flammables such as shop rags, gas cans, and other solvents. 4.
- Page 5 9. Never use the grinder if the clearances listed in #8 above are not correctly adjusted to these tolerances. Never adjust the guards without first checking to see that the power switch is in the off position and the lock is removed. Adjust the guards by first loosening the nuts holding the guards in place.
-
Page 6: Unpacking The Grinder
Unpacking the grinder Carefully remove the grinder and all components from the box. This should include the grinder plus 3 guards, hardware (3 nuts, 5 washers, and 2 plastic thumb screws) and 1 table plate. Table Plate Table Plate... -
Page 7: Assembling The Grinder
Assembling the grinder Be sure the on/off switch is in the off position and the power cord is unplugged!! Installing the guards The 2 small guards install on the studs on the bottom of the stone guard on each side using one nut and one washer per stud. - Page 8 Assembling the grinder (cont.) Installing the guards (cont.) PLEASE NOTE: the large “T” guard is offset and only mounts one direction so it slides along the angled lip in the stone opening of the main frame. The “T” guard must be adjusted so it is no more than 1/8”...
-
Page 9: Adjusting The Grinding Angle
Adjusting the grinding angle In order to provide a proper grind the angle of the grinding wheel to the work rest may need to be adjusted. Adjust the angle to the original angle of the blade as provided by the OEM. This is usually 30 degrees. - Page 10 Adjusting the grinding angle (cont.) 6. Adjust the grinding angle by first loosening the nuts that lock the adjustment in place. LOOSEN BOTH 7. Turn the adjuster on top of the grinder to either raise or lower the grinding wheel creating the correct angle.
-
Page 11: Adjusting The Table Plate
Adjusting the table plate After the correct depth and angle are set adjust the table plate to within 1/8” of the stone by loosening the thumb screws and sliding it toward the stone. Retighten all thumb screws. 1/8”... -
Page 12: Grinding The Blade
Grinding the blade Always be sure that you have proper eye protection. A pair of safety glasses or a safety shield with the safety rating of Z87 must be worn at all times while grinding. After all of the safety precautions have been followed and the angle has been checked and set you can prepare to sharpen your blade. - Page 13 Grinding the blade (cont.) 2. Ensure that the area is safe and the grinding wheel is clear of any obstructions or loose objects. 3. While sharpening the blade stand so that the face of the grinding wheel, not the edge used to sharpen, is in front of you.
- Page 14 Grinding the blade (cont.) 11. Continue this motion until the edge is sharp...
-
Page 15: Balancing The Blade
Grinding the blade (cont.) 12. Do not sharpen the blade with so much pressure as to overheat the blade and turn the metal blue. This can cause changes in the properties of the metal the blade is made from. 13. After sharpening one cutting edge of the blade hold it from the opposite end. Be careful of the sharp edge and the possibility that the blade may be hot. -
Page 16: Grinder Maintenance
Grinder Maintenance The Oregon Blade Grinders are designed to be maintenance free. They do not require any oiling. Keep the motor clean and the grinding wheel in good shape and it should provide years of use. The grinding wheel should be replaced any time that the proper grinding angle can no longer be obtained or maximum clearance on the guards can not be achieved. -
Page 17: Exploder View And Parts
Grinder exploded view Only the parts listed below are available as replacement parts. If you require other parts please call 1-800-743-3150 Ext 307 REF # Part # Description 88-048 Grinding stone 8” blue 36 grit 88-047 Grinding stone 8” red 46 grit 88-011 On/Off switch 88-010...
Need help?
Do you have a question about the 88-025 and is the answer not in the manual?
Questions and answers