Table of Contents
Advertisement
Advertisement
Table of Contents

Subscribe to Our Youtube Channel
Related Manuals for Golden compass


Summary of Contents for Golden compass
- Page 1 ERVICE ANUAL...
-
Page 2: Table Of Contents
Compass™ Service Manual TABLE OF CONTENTS ..................2 ARRANTY .................. 3 PECIFICATIONS .................... 4 REFACE I. S ............5 ERVICING THE OWER HAIR A. Removing and Installing the H-bar Seat Receivers ..........5 B. Removing and Installing a Front Caster Arm Cover and Rear Fender ....5 C. -
Page 3: Warranty
Compass™ Service Manual WARRANTY IFETIME ARRANTY Power Chair Frame Golden Technologies, Inc. will repair the frame with new or refurbished parts, free of charge in the USA, in the event of defective materials or workmanship. IMITED ARRANTY Electronic Controller Drive train components Golden Technologies, Inc. -
Page 4: Specifications
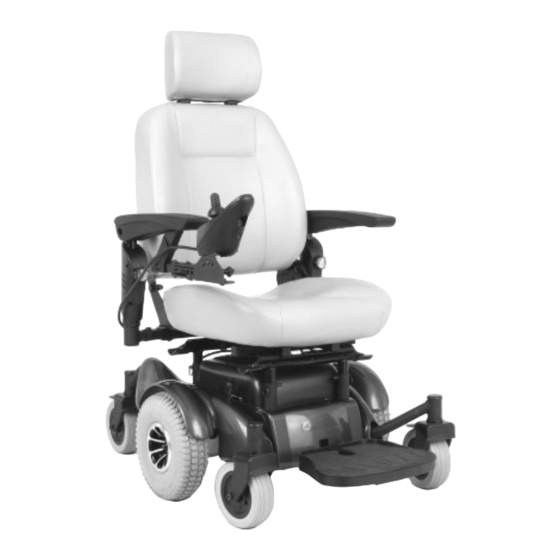
Compass™ Service Manual SPECIFICATIONS WEIGHT Base: includes frame, motors, wheels, seat receivers, and 88 lbs. shrouds Armrests with joystick 14 lbs. Seat with headrest (without armrests) 34 lbs. Batteries (each) U1 = 24 lbs. NF22 = 39 lbs. Total weight with batteries With U1batteries = 184 lbs. -
Page 5: Preface
This manual is intended to enhance, not replace, other materials provided by Golden Technologies, Inc., such as the Compass™ Owner’s Manual and the Shark® Owner’s Manual. As the product is changed, updates to service procedures will be announced to you. -
Page 6: Servicing The Power Chair
Compass™ Service Manual I. SERVICING THE POWER CHAIR WARNING: W E STRONGLY RECOMMEND THAT BEFORE PERFORMING ANY SERVICE ON THE POWER CHAIR YOU FOLLOW THESE STEPS ISCONNECT THE JUMPER HARNESS FROM THE JOYSTICK CABLE EMOVE THE ARMREST ASSEMBLIES AND SEAT... -
Page 7: Changing A Drive Wheel And Motor
Compass™ Service Manual C. Changing a Drive Wheel and Motor 1. Lock (engage) the motors. 2. Place the power chair on its side, being careful to protect its surface. Note: Performing the removals in instruc- tion set A is not necessary, but makes wheel and motor removal easier. -
Page 8: Removing And Installing A Fender-Fork Assembly
Compass™ Service Manual E. Removing and Installing a Fender- Fork Assembly 1. Remove the weather cap (E1), on top of the fork assembly, by popping it off. See figure 4. 2. Remove the 3-mm Allen-head screw (E2) from the top of the fork assembly. -
Page 9: Removing And Installing The Battery Tray Shroud
Compass™ Service Manual G. Removing and Installing the Battery Tray Shroud CAUTION: When working in this area of the power chair, use a cloth or blanket to protect the shroud from damage. 1. Remove the circuit breaker cover (G1), using a 17-mm deep dish socket or box wrench. -
Page 10: Removing And Installing The Retractable Desk Arm Assembly
Compass™ Service Manual I. Removing and Installing the Retractable Desk Arm Assembly 1. Remove the retractable desk arm assembly from the receiver bracket (I1) by loosening the 4-mm setscrew (I2). See figure 8. 2. Reverse these instructions to reinstall the retractable desk arm assembly. -
Page 11: Troubleshooting The Shark ® Controller
Compass™ Service Manual II. TROUBLESHOOTING ELECTRONICS AND THE SHARK® CONTROLLER Note: The Dynamic® control module can be mounted on either side of the power chair frame, in an upright position, using M5 screws. These should be tightened to a torque of approximately 2 Newton meters (1816 lb.-in.). -
Page 12: Flash Code 3 Or 4
Compass™ Service Manual Flash Code 3 (Right Motor Fault) or 4 (Left Motor Fault): Checking the Motors Disconnect the motor and measure the motor resistances at the motor connectors, using an ohm meter. If the resistance is more than 1 ohm or less than 1 milliohm, the motor is probably faulty. -
Page 13: Flash Code 9
Compass™ Service Manual Flash Code 9: Communications Fault Check the connections and wiring; replace the joystick. Flash Code 10: Unknown Fault Check the connections and wiring; consult a service agent. NOTES: GP600-SM RevA 02062006...
Need help?
Do you have a question about the compass and is the answer not in the manual?
Questions and answers