Table of Contents
Advertisement
Advertisement
Table of Contents

Related Manuals for Varytec Easy Move XS HP Wash


Summary of Contents for Varytec Easy Move XS HP Wash
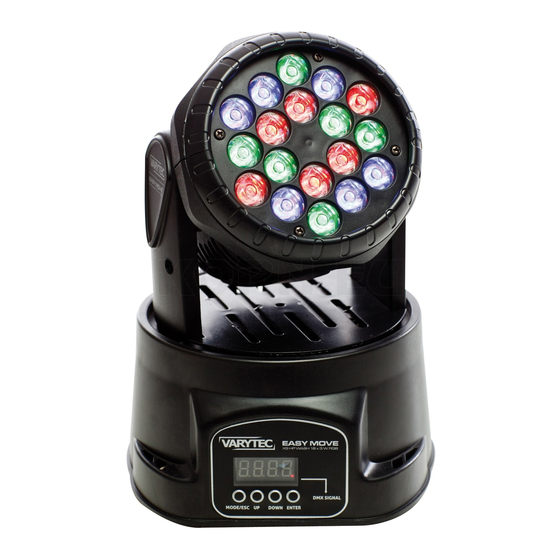
- Page 1 User manual Easy Move XS HP Wash...
-
Page 2: Table Of Contents
Table of content Safety instructions ........................3 1.1. FOR SAFE AND EFFICIENT OPERATION ................3 Preface ............................4 2.1. Packing list ..........................4 2.2. Unpacking instructions ......................4 2.3. AC Power ..........................4 2.4. Safety instructions .......................5 Introduction ..........................6 3.1. Features ..........................6 3.2. DMX Channels ........................6 Set up ............................7 4.1. -
Page 3: Safety Instructions
1. Safety instructions This device is suitable for indoor use only. All modifications to the device will void the warranty. Repairs are to carry out by skilled personnel only. Use only fuses of the same type and original parts as spare parts. Protect the unit from rain and humidity to avoid fire and electric shocks. -
Page 4: Preface
Important: Damages caused by the disregard of this user manual are not subject to warranty. The dealer will not accept liability for any resulting defects or problems. Make sure the electrical connection is carried out by qualified personnel. All electrical and mechanical connections have to be carried out according to the European safety standards. -
Page 5: Safety Instructions
2.4. Safety instructions Please read these instructions carefully, it includes important information about the installation, usage and maintenance of this product. Be sure that the local power outlet matches that of the required voltage for your unit. Do not attempt to operate this unit if the power cord has been frayed or broken. Do not attempt to remove or break off the ground prong from the electrical cord. -
Page 6: Introduction
3. Introduction 3.1. Features Multi-Colors Color Strobe Electronic Dimming 0-100% Built in Microphone DMX-512 Control Auto/ Master & Slave synchronization Multi-channel mode 3.2. DMX Channels In 5 channel mode Channel Function TILT DIMMER & STROBE COLOR BLANK In 12 channel mode Channel Function PAN FINE... -
Page 7: Set Up
4. Set up Disconnect the power cord before replacing a fuse and always replace with the same type fuse. Power Supply: Before plugging your unit in, be sure the source voltage in your area matches the required voltage. The Light is available in a 110v to 250v version. Because line voltage may vary from venue to venue, you should be sure your unit voltage matches the wall outlet voltage before attempting to operate you fixture. -
Page 8: Master/Slave Fixture Linking
4.4. Master/Slave fixture linking 1. Connect the (male) 3 pin connector side of the DMX cable to the output (female) 3pin connector of the first fixture. 2. Connect the end of the cable coming from the first fixture which will have a (female) 3 pin connector to the input connector of the next fixture consisting of a (male) 3 pin connector. -
Page 9: One-In-Built Program Mode (Continued)
5.4. One-in-built Program Mode (continued) As the unit can be mounted hung under earth trussing, or can sit equally well on a flat surface, pan, tilt and LED display settings can be reserved to provide correct coverage and ease of use. 5.4.1. -
Page 10: Slave Mode
6.3. Slave Mode Up-to 32 units can be daisy chained together with one single unit acting as Master and all other linked units as Slaves. Slave units will all run in synch with the master unit without the need for an additional controller. -
Page 11: Color Options
6.6. Color Options The Unit offers a range of 16 preset colors. These can be individually selected with DMX control and feature in Auto Run Sound Active modes. Color Preset White Dark Green Dark Blue Light Blue Magenta Yellow Purple Orange Light Green Pink... - Page 12 64-77 Light blue 78-91 Magenta 92-105 Yellow 106-119 Purple 120-133 Orange 134-147 Light green 148-161 Pink 162-175 Ochre 176-189 Gold 190-203 Crimson 204-217 Violet 218-231 Dark Purple 232-255 Color Change 0-255 BLANK In 12 channel mode Channel Function 0-255 0-255 PAN FINE TILT 0-255...
-
Page 13: Technical Data
106-119 Purple 120-134 Orange 135-147 Light Green 148-161 Pink 162-175 Ochre 176-189 Gold 190-203 Crimson 204-217 Violet 218-231 Dark Purple 232-255 Color Change COLOR SPEED 0-255 MOVEMENT(AUTO & SOUND EFFECT) Blank 8-22 Auto 1 23-37 Auto 2 38-53 Auto 3 54-67 Auto 4 68-82... - Page 14 Importer: B & K Braun GmbH Industriestraße 1 D-76307 Karlsbad www.bkbraun.com info@bkbraun.com 14 / 14...
Need help?
Do you have a question about the Easy Move XS HP Wash and is the answer not in the manual?
Questions and answers