Table of Contents
Advertisement
Advertisement
Table of Contents

Related Manuals for Christie LWU420


Summary of Contents for Christie LWU420
- Page 1 LWU420 User Manual-Operating Guide 020-000262-01...
-
Page 3: About This Manual
Projector LWU420 User Manual-Operating Guide User's Manual (detailed) – Operating Guide Thank you for purchasing this projector. WARNING ►Before using this product, please read the "User's Manual - Safety Guide" and related manuals to ensure the proper use of this product. -
Page 4: Table Of Contents
UTO KEYSTONE EXECUTE Warranty and after-service . . . 77 EYSTONE EYSTONE ERFECT FIT Specifications ... . . 77 ICTURE MODE RIGHTNESS ONTRAST LWU420 User Manual-Operating Guide 020-000262-01 Rev. 1 (06-2010) -
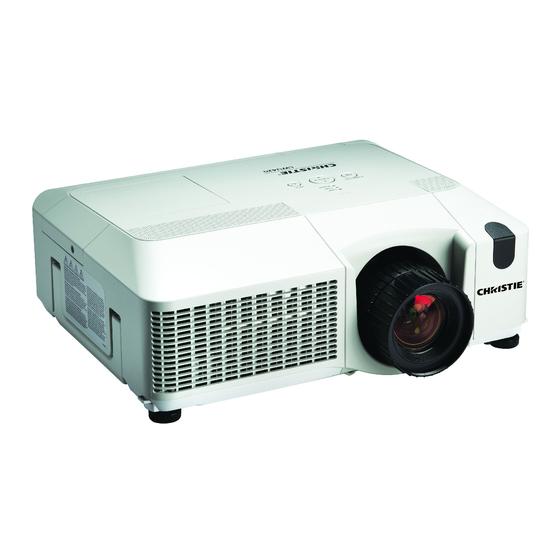
Page 5: Projector Features
WARNING ►If the projector is bumped against Lens cover a wall or other object without the lens cover in place, the projector could malfunction. Lens cover LWU420 User Manual-Operating Guide 020-000262-01 Rev. 1 (06-2010) -
Page 6: Part Names
Do not cover, block or plug up the vents. Do not place anything that can stick or be sucked to the vents, around the intake vents. Clean the air filter periodically. LWU420 User Manual-Operating Guide 020-000262-01 Rev. 1 (06-2010) -
Page 7: Control Panel
CAUTION ►Use the shutdown switch only when the projector is not turned off by normal procedure, since pushing this switch stops operation of the projector without cooling it down. LWU420 User Manual-Operating Guide 020-000262-01 Rev. 1 (06-2010) -
Page 8: Remote Control
LASER button, since the beam is not good for eyes. CAUTION ►Note that the laser beam may result in hazardous radiation exposure. Use the laser pointer (31) only for pointing on the screen. LWU420 User Manual-Operating Guide 020-000262-01 Rev. 1 (06-2010) -
Page 9: Setting Up
►Position the projector to prevent light from directly hitting the projector's remote sensor. LWU420 User Manual-Operating Guide 020-000262-01 Rev. 1 (06-2010) -
Page 10: Arrangement
9.1 (356) 18.0 (710) 381 (150) 300 (7.6) 9.6 (378) 19.1 (752) 404 (159) 10.9 (428) 21.6 (852) 457 (180) 350 (8.9) 11.2 (441) 22.3 (878) 471 (185) 12.7 (499) 25.2 (994) 533 (210) LWU420 User Manual-Operating Guide 020-000262-01 Rev. 1 (06-2010) -
Page 11: Adjusting The Projector's Elevator
NOTE • The security bar and the security slot are not Security slot comprehensive theft prevention measures. They are intended to be used as supplemental theft prevention measure. LWU420 User Manual-Operating Guide 020-000262-01 Rev. 1 (06-2010) -
Page 12: Connecting Your Devices
For cables with a core only at one end, connect the end with the core to the projector. ►Make sure that devices are connected to the correct ports. An incorrect connection may result in malfunction or damage to the device and the projector. LWU420 User Manual-Operating Guide 020-000262-01 Rev. 1 (06-2010) - Page 13 • When the projector is connected with a device having DVI connector, use a DVI to HDMI cable to connect with the HDMI input and an audio cable to connect with one of the AUDIO input. LWU420 User Manual-Operating Guide 020-000262-01 Rev. 1 (06-2010)
-
Page 14: Connecting Power Supply
• Only plug the power cord into an outlet whose voltage is matched to the power cord. The power outlet should be close to the projector and easily accessible. Remove the power cord for complete separation. • Never modify the power cord. LWU420 User Manual-Operating Guide 020-000262-01 Rev. 1 (06-2010) -
Page 15: Remote Control
• If you observe battery leakage, wipe out the leakage and then replace a battery. If the leakage adheres to your body or clothes, rinse well with water immediately. • Obey the local laws on disposing the battery. LWU420 User Manual-Operating Guide 020-000262-01 Rev. 1 (06-2010) -
Page 16: About The Remote Control Signal
To set the mode of the remote control, slide the knob of the frequency switch inside the battery cover into the position indicated by the mode number to choose. Frequency switch LWU420 User Manual-Operating Guide 020-000262-01 Rev. 1 (06-2010) -
Page 17: Using As A Wired Remote Control
PC’s configurations and mouse drivers. - Operating simultaneously two or more keys is void except for mouse drag and drop operation. - This function is activated only when the projector is working properly. LWU420 User Manual-Operating Guide 020-000262-01 Rev. 1 (06-2010) - Page 18 • Improper use of the simple mouse & keyboard function could damage your equipment. While using this function, please connect this product only to a computer. Be sure to check your computer’s manuals before connecting this product to the computer. LWU420 User Manual-Operating Guide 020-000262-01 Rev. 1 (06-2010)
-
Page 19: Power On/Off
47). projection lamp light on without pushing the STANDBY/ON button ( 74) only when the projector is not turned off by • Use the shutdown switch ( normal procedure. LWU420 User Manual-Operating Guide 020-000262-01 Rev. 1 (06-2010) -
Page 20: Operating
47). If RGB button is pushed when VIDEO, S-VIDEO or is detected ( COMPONENT port is selected, the projector will check RGB1 port first. (continued on next page) LWU420 User Manual-Operating Guide 020-000262-01 Rev. 1 (06-2010) -
Page 21: Searching An Input Signal
Some input signals may not be displayed in the aspect ratio as selected in the menu. In this case, use the ASPECT button on the remote control to select other aspect ratio. LWU420 User Manual-Operating Guide 020-000262-01 Rev. 1 (06-2010) -
Page 22: Adjusting The Zoom And Focus
● The items adjusted by this function may vary when the FINE or DISABLE is selected for the AUTO ADJUST item of the SERVICE item in the OPTION 50). Menu ( LWU420 User Manual-Operating Guide 020-000262-01 Rev. 1 (06-2010) -
Page 23: Adjusting The Position
● When the vertical lens shift is not set fully upward, this function may not work well. ● When the horizontal lens shift is not set to the center, this function may not work well. LWU420 User Manual-Operating Guide 020-000262-01 Rev. 1 (06-2010) - Page 24 This function should be used when the zoom adjustment is set to the full WIDE (wide-angle focus) whenever possible. 56). ● This function will be unavailable when Transition Detector is on ( LWU420 User Manual-Operating Guide 020-000262-01 Rev. 1 (06-2010)
-
Page 25: Using The Magnify Feature
● If the projector continues projecting a still image for a long time, the LCD panel might possibly be burned in. Do not leave the projector in the FREEZE mode for too long. LWU420 User Manual-Operating Guide 020-000262-01 Rev. 1 (06-2010) -
Page 26: Temporarily Blanking The Screen
NOTE • The sound is not connected with the blank screen function. If necessary, set the volume or mute first. LWU420 User Manual-Operating Guide 020-000262-01 Rev. 1 (06-2010) -
Page 27: Pbyp (Picture By Picture)
49). The position of the both area is exchanged without any setting change. NOTE •For some signals, it may not be displayed correctly in the PbyP mode, even if it can be displayed properly in the normal mode. LWU420 User Manual-Operating Guide 020-000262-01 Rev. 1 (06-2010) -
Page 28: Using The Menu Function
Press the MENU button on the remote control again to close the menu and complete this operation. Even if you do not do anything, the dialog will automatically disappear after about 10 seconds. LWU420 User Manual-Operating Guide 020-000262-01 Rev. 1 (06-2010) -
Page 29: Easy Menu
PICTURE MODE is “CUSTOM”. Please refer to the GAMMA and 29, 30) items in PICTURE Menu. COLOR TEMP ( • When this function is performed, a certain extra such as a line may appear. (continued on next page) LWU420 User Manual-Operating Guide 020-000262-01 Rev. 1 (06-2010) -
Page 30: (Easy Menu Continued
Select “Go to Advanced Menu…” on the menu, and press the ► Go to or ENTER button to use the menu of PICTURE, IMAGE, INPUT, Advanced Menu... SETUP, AUDIO, SCREEN, OPTION, NETWORK or C.C.. LWU420 User Manual-Operating Guide 020-000262-01 Rev. 1 (06-2010) -
Page 31: Picture Menu
“1”. The darkest tone at the left end of the test pattern cannot be controlled with any of equalizing adjustment bar. • When this function is performed, lines or other distortion may appear. (continued on next page) LWU420 User Manual-Operating Guide 020-000262-01 Rev. 1 (06-2010) - Page 32 Using the ▲/▼ buttons adjusts the sharpness. Strong Weak SHARPNESS • There may be some noise and/or the screen may flicker for a moment when an adjustment is made. This is not a malfunction. (continued on next page) LWU420 User Manual-Operating Guide 020-000262-01 Rev. 1 (06-2010)
- Page 33 • Remember that the current data being stored of a memory will be lost by saving a new data into the memory. LWU420 User Manual-Operating Guide 020-000262-01 Rev. 1 (06-2010)
-
Page 34: Image Menu
It is not possible to adjust when the OVER SCAN is set to 10. SCAN ( • This item cannot be selected for an HDMI signal. (continued on next page) LWU420 User Manual-Operating Guide 020-000262-01 Rev. 1 (06-2010) - Page 35 • The items adjusted by this function may vary when the FINE or DISABLE is selected for the AUTO ADJUST item of the SERVICE 50). item in the OPTION Menu ( LWU420 User Manual-Operating Guide 020-000262-01 Rev. 1 (06-2010)
-
Page 36: Input Menu
• The AUTO mode automatically selects the optimum mode. • The AUTO operation may not work well at some signals. In such a case, it might be good to select a suitable mode except AUTO. (continued on next page) LWU420 User Manual-Operating Guide 020-000262-01 Rev. 1 (06-2010) - Page 37 Suitable for DVD signals (16-235) ENHANCED Suitable for VGA signals (0-255) • If the contrast of the screen image is too strong or too weak, try finding a more suitable mode. (continued on next page) LWU420 User Manual-Operating Guide 020-000262-01 Rev. 1 (06-2010)
- Page 38 In such a case, remove the signal connector so that no signal is received and select the SYNC ON G OFF, and then reconnect the signal. (continued on next page) LWU420 User Manual-Operating Guide 020-000262-01 Rev. 1 (06-2010)
- Page 39 ◄ button. The screen will then return to the RESOLUTION menu displaying the previous resolution. • For some pictures, this function may not work well. LWU420 User Manual-Operating Guide 020-000262-01 Rev. 1 (06-2010)
-
Page 40: Setup Menu
• When the horizontal lens shift is not set to the center, this function may not work well. • This function will be unavailable when the Transition Detector is 56) or the PERFECT FIT ( 39) is adjusted. on ( (continued on next page) LWU420 User Manual-Operating Guide 020-000262-01 Rev. 1 (06-2010) -
Page 41: Perfect Fit , W
• The adjustable range of this correction will vary among inputs. For some input, this function may not work well. • This function will be unavailable when the Transition Detector is 56). on ( (continued on next page) LWU420 User Manual-Operating Guide 020-000262-01 Rev. 1 (06-2010) - Page 42 • While QUIT is selected, pressing the ◄ button returns to the previous menu. (2) Select one of the RGB ports using ◄/► buttons. RGB1 RGB2 • OFF disables the RGB OUT port. LWU420 User Manual-Operating Guide 020-000262-01 Rev. 1 (06-2010)
-
Page 43: Audio Menu
65). from the input port supports the C.C. feature ( The HDMI AUDIO is set to 1 as default. In case the HDMI audio does not work well, try 2. HDMI AUDIO LWU420 User Manual-Operating Guide 020-000262-01 Rev. 1 (06-2010) -
Page 44: Screen Menu
Plain screens in each color. BLACK • To avoid remaining as an afterimage, the MyScreen or ORIGINAL screen will change to the plain black screen after several minutes. (continued on next page) LWU420 User Manual-Operating Guide 020-000262-01 Rev. 1 (06-2010) -
Page 45: Tart Up
• When the TURN ON is selected to the MyScreen PASSWORD of 53), the START UP is fixed to SECURITY item in OPTION Menu ( MyScreen. (continued on next page) LWU420 User Manual-Operating Guide 020-000262-01 Rev. 1 (06-2010) - Page 46 MyScreen. • This function cannot be selected when the TURN ON is selected to the MyScreen PASSWORD of SECURITY item in OPTION Menu 53). (continued on next page) LWU420 User Manual-Operating Guide 020-000262-01 Rev. 1 (06-2010)
- Page 47 SAVE on screen and press the ENTER or INPUT button. To revert to the previous name without saving changes, move the cursor to the CANCEL on screen and press the ENTER or INPUT button. (continued on next page) LWU420 User Manual-Operating Guide 020-000262-01 Rev. 1 (06-2010)
- Page 48 Using ▲/▼ buttons switches the mode for the template screen. The selected template pattern can be displayed when the MY BUTTON allocated TEMPLATE 49). to the TEMPLATE function is pressed ( DOT-LINE4 DOT-LINE3 DOT-LINE2 TEST PATTERN DOT-LINE1 LWU420 User Manual-Operating Guide 020-000262-01 Rev. 1 (06-2010)
-
Page 49: Option Menu
• After turning the lamp on by the AUTO ON function, if neither input nor operation is detected for about 30 minutes, the projector is 48) is disabled. turned off, even though the AUTO OFF function ( (continued on next page) LWU420 User Manual-Operating Guide 020-000262-01 Rev. 1 (06-2010) - Page 50 • Please reset the filter time only when you have cleaned or replaced the air filter, for a suitable indication about the air filter. 68). • For the air filter cleaning, see the section “Air filter” ( (continued on next page) LWU420 User Manual-Operating Guide 020-000262-01 Rev. 1 (06-2010)
- Page 51 Using the ▲/▼ buttons switches the rotation speed of the cooling fans. The HIGH is the mode for use at highlands etc. Note that the projector is noisier when the HIGH is selected. HIGH NORMAL (continued on next page) LWU420 User Manual-Operating Guide 020-000262-01 Rev. 1 (06-2010)
- Page 52 • Please be careful with the operating environment of the projector and the condition of the air filter. (continued on next page) LWU420 User Manual-Operating Guide 020-000262-01 Rev. 1 (06-2010)
- Page 53 Note that the items LAMP TIME, FILTER TIME, LANGUAGE, SECURITY and NETWORK settings are not reset. RESET CANCEL (continued on next page) LWU420 User Manual-Operating Guide 020-000262-01 Rev. 1 (06-2010)
- Page 54 Pressing the ENTER button on the remote NOTE NEW control or INPUT button on the projector will PASSWORD BOX close the NOTE NEW PASSWORD BOX. • Please do not forget your PASSWORD. (continued on next page) LWU420 User Manual-Operating Guide 020-000262-01 Rev. 1 (06-2010)
-
Page 55: Using The Myscreen Password Function
PASSWORD. Move the cursor to the right side of the ENTER PASSWORD BOX (small) and press the ► button to display the PASSWORD AGAIN BOX, enter the same PASSWORD PASSWORD AGAIN again. (continued on next page) LWU420 User Manual-Operating Guide 020-000262-01 Rev. 1 (06-2010) -
Page 56: Using The Pin Lock Function
PIN LOCK on/off menu 3.1-2 Use the ▲/▼ buttons on the PIN LOCK on/off menu to select TURN ON and the PIN BOX will be displayed. (continued on next page) LWU420 User Manual-Operating Guide 020-000262-01 Rev. 1 (06-2010) - Page 57 Inquiring Code is displayed, the projector will turn off. 3.3-2 Contact your dealer with the 10 digit Inquiring Code. Your PASSWORD will be sent after your user registration information is confirmed. (continued on next page) LWU420 User Manual-Operating Guide 020-000262-01 Rev. 1 (06-2010)
-
Page 58: Using The Transition Detector Function
Pressing the ENTER button on the remote control or NOTE PASSWORD BOX the INPUT button on the projector will return to the Transition Detector on/off menu. • Please do not forget your Transition Detector PASSWORD. (continued on next page) LWU420 User Manual-Operating Guide 020-000262-01 Rev. 1 (06-2010) -
Page 59: Using The My Text Password Function
CANCEL on screen and press the ENTER or INPUT button. • The MY TEXT WRITING function is available only when the MY TEXT PASSWORD function is set to TURN OFF. (continued on next page) LWU420 User Manual-Operating Guide 020-000262-01 Rev. 1 (06-2010) - Page 60 • The MY TEXT DISPLAY menu will be unavailable, which can prohibit changing the DISPLAY setting. • The MY TEXT WRITING menu will be unavailable, which can prevent the MY TEXT from being overwritten. (continued on next page) LWU420 User Manual-Operating Guide 020-000262-01 Rev. 1 (06-2010)
- Page 61 10 digit inquiring code will be displayed inside the box. (3) Contact your dealer with the 10 digit inquiring code. Your PASSWORD will be sent after your user registration information is confirmed. LWU420 User Manual-Operating Guide 020-000262-01 Rev. 1 (06-2010)
-
Page 62: Network Menu
IP address from DHCP server. Protocol) • Auto IP function will be assigned an IP address if the projector could not obtain an IP address from server even if DHCP is “ON”. (continued on next page) LWU420 User Manual-Operating Guide 020-000262-01 Rev. 1 (06-2010) - Page 63 • The projector will override this setting and retrieve TIME DATE AND TIME information from the Time server when SNTP is enabled. ( Date/Time Settings of the User’s Manual (detailed) - Network Guide) (continued on next page) LWU420 User Manual-Operating Guide 020-000262-01 Rev. 1 (06-2010)
- Page 64 ENTER or INPUT button. To revert to the previous PROJECTOR NAME without saving changes, move the cursor to the CANCEL on screen and press the ENTER or INPUT button. (continued on next page) LWU420 User Manual-Operating Guide 020-000262-01 Rev. 1 (06-2010)
- Page 65 (2) Press the ENTER button on the remote control or the INPUT button on the projector to perform to erase. To stop erasing, press the ESC button on the remote control or the ◄ button on the projector. (continued on next page) LWU420 User Manual-Operating Guide 020-000262-01 Rev. 1 (06-2010)
- Page 66 SERVICE Network will be once cut off when choose restart. If DHCP is selected on, IP address may be changed. After selecting RESTART, NETWORK Menu may not be controlled approx. 30 seconds. LWU420 User Manual-Operating Guide 020-000262-01 Rev. 1 (06-2010)
-
Page 67: C.c. (Closed Caption) Menu
1: Channel 1, primary channel / language CHANNEL 2: Channel 2 3: Channel 3 4: Channel 4 The channel data may vary, depending on the content. Some channel might be used for secondary language or empty. LWU420 User Manual-Operating Guide 020-000262-01 Rev. 1 (06-2010) -
Page 68: Maintenance
(5) Press the ▲ button to select “RESET” on the dialog. It performs resetting the lamp time. NOTE • Please reset the lamp time only when you have replaced the lamp, for a suitable indication about the lamp. LWU420 User Manual-Operating Guide 020-000262-01 Rev. 1 (06-2010) -
Page 69: Lamp Warning
When the pictures appear dark, or when the color tone is poor, please replace the lamp as soon as possible. Do not use old (used) lamps; this is a cause of breakage. LWU420 User Manual-Operating Guide 020-000262-01 Rev. 1 (06-2010) -
Page 70: Air Filter
filter, for a suitable indication about the air filter. • The projector may display the message such as “CHECK THE AIR FLOW” or turn off the projector, to prevent the internal heat level rising. LWU420 User Manual-Operating Guide 020-000262-01 Rev. 1 (06-2010) -
Page 71: Internal Clock Battery
• The internal clock’s time will be reset when the battery is removed. Please reconfi gure the time via the menu or a web browser after replacing the battery. Date/Time Settings in the User’s Manual (detailed) - Network Guide) LWU420 User Manual-Operating Guide 020-000262-01 Rev. 1 (06-2010) -
Page 72: Other Care
Incorrect care could cause not only an injury but adverse influence such as discoloration, peeling paint, etc. ►Do not use cleaners or chemicals other than those specified in this manual. ►Do not polish or wipe with hard objects. LWU420 User Manual-Operating Guide 020-000262-01 Rev. 1 (06-2010) -
Page 73: Troubleshooting
filter referring to the “Air filter” section of this manual 68). After you have cleaned or changed the air filter, 28, 48). please be sure to reset the filter timer ( LWU420 User Manual-Operating Guide 020-000262-01 Rev. 1 (06-2010) -
Page 74: Regarding The Indicator Lamps
After Lighting performing any needed maintenance, turn the power on again. If the same indication is displayed after the remedy, please contact your dealer or service company. (Continued on next page) LWU420 User Manual-Operating Guide 020-000262-01 Rev. 1 (06-2010) - Page 75 45 minutes. After the projector has sufficiently cooled down, please make confirmation of the attachment state of the lamp and lamp cover, and then turn the power on again. LWU420 User Manual-Operating Guide 020-000262-01 Rev. 1 (06-2010)
-
Page 76: Phenomena That May Be Easy To Be Mistaken For Machine Defects
AV mute may be active. Refer to the item “Sound does not come out” and “No pictures are displayed” on the next page to turn off the MUTE and BLANK functions. (Continued on next page) LWU420 User Manual-Operating Guide 020-000262-01 Rev. 1 (06-2010) - Page 77 – Turn off the both equipment, and turn on them again The signal format on the HDMI is not supported. Check the video setting on your HDMI equipment. (Continued on next page) LWU420 User Manual-Operating Guide 020-000262-01 Rev. 1 (06-2010)
- Page 78 NOTE • Although bright spots or dark spots may appear on the screen, this is a unique characteristic of liquid crystal displays, and it does not constitute or imply a machine defect. LWU420 User Manual-Operating Guide 020-000262-01 Rev. 1 (06-2010)
-
Page 79: Warranty And After-Service
LAN ................RJ45 x 1 Lamp: 003-120457-01 (DT00873) Optional parts Air filter: 003-002119-01 (MU05661) * For more information, please consult your dealer. NOTE • These specifications are subject to change without notice. LWU420 User Manual-Operating Guide 020-000262-01 Rev. 1 (06-2010) - Page 80 Specifications Specifications (continued) [unit: mm] LWU420 User Manual-Operating Guide 020-000262-01 Rev. 1 (06-2010)
- Page 82 USA – Cypress ph: 714-236-8610 Canada – Kitchener ph: 519-744-8005 United Kingdom Hungary/Eastern Europe Beijing ph: +44 118 977 8000 ph: +36 (0) 1 47 48 100 ph: +86 10 6561 0240 Germany Singapore Korea ph: +49 2161 664540 ph: +65 6877 8737 ph: +82 2 702 1601 France Shanghai...
Need help?
Do you have a question about the LWU420 and is the answer not in the manual?
Questions and answers