Advertisement
LightHawk
Wall Switch Occupancy Sensors
™
Installation and Operating Instructions
Hubbell Building Automation, Inc.
9601 Dessau Road, Building One, Suite 100
Austin, Texas 78754
512-450-1100 • 512-450-1215 Fax
www.hubbell-automation.com
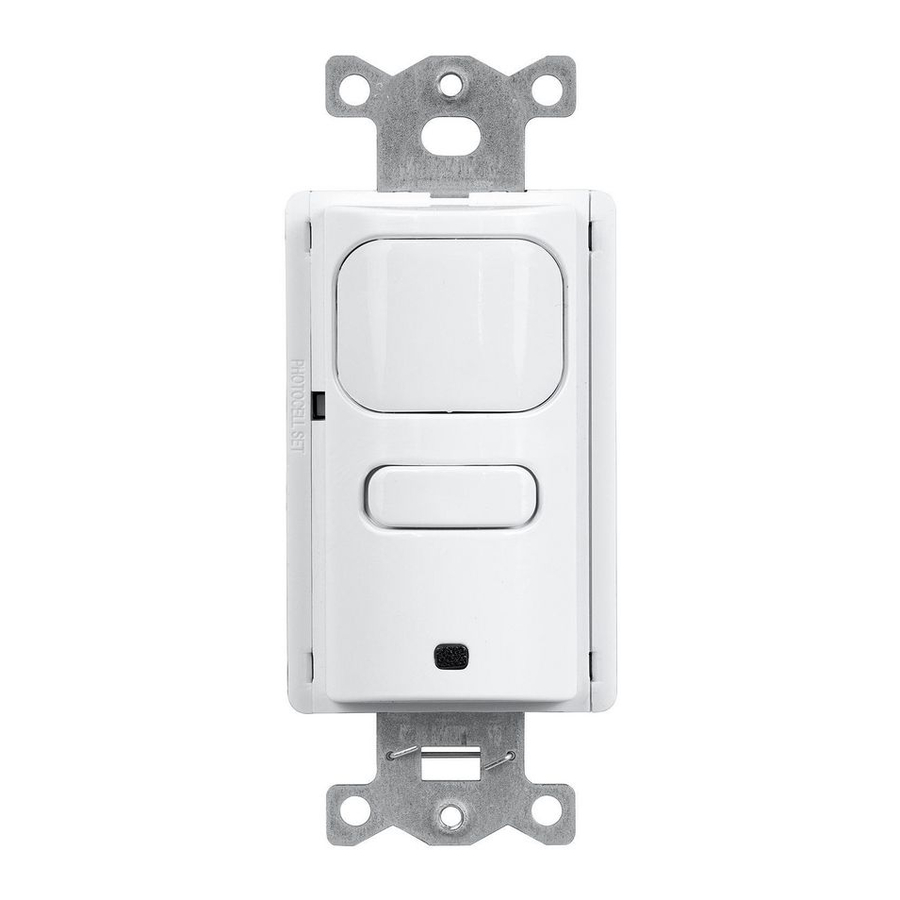
Description
Th e LightHAWK is an intelligent self-adapting occupancy sensor that is
designed to replace existing wall switches.
Specifi cations
• 1000 sq. ft coverage area (Models: LHIR and LHMT)
• 400 sq. ft. coverage area (Models: LHUS)
• Single or Dual circuit 120/277VAC, 50/60Hz operation
• Electrical Ratings: (Each Output Separately)
120VAC – 800W Incandescent, 1000W Ballast, 1/6 HP
277VAC – 1800W Ballast, 1/6 HP
• Adjustable Time Delay: 4-30 minutes, self-adapts based
on occupancy
• Light Level Adjustment (Circuit B output on Dual Circuit versions):
10-500+FC
• ETL listed (Conforms to UL STD 508 Certifi ed to CAN/CSA STD
C22.2 No. 14)
Precautions
CAUTION: RISK OF ELECTRICAL SHOCK. Turn power off at
service panel before beginning installation. Never wire energized electrical
components.
Read and understand all instructions before beginning installation.
NOTICE: For installation by a licensed electrician in accordance with
National and/or local Electrical Codes and the following instructions.
NOTICE: For indoor use only.
CAUTION: USE COPPER CONDUCTOR ONLY.
Confi rm that device ratings are suitable for application prior to installation.
NOTICE: Do not install if any damage to product is noticed.
Installation
1. Turn power off at the service panel.
2. Remove the old switch(es) if applicable.
3. Wire as shown in the Wiring Diagram section. A secure connection
to ground is necessary for the sensor to function properly.
4. Install sensor in wall box using mounting screws provided.
5. Restore power to the sensor and allow it to warm up (up to 2 min.).
6. Remove the sensor's cover – see Adjustments section.
7. If desired, calibrate the photocell sensor and adjust the sensor's
confi guration switch settings as described below.
8. Reinstall the sensor's cover.
9. Install a Decorator style wall plate (not included).
Test Mode – to enter test mode:
1. Make sure lights are on.
Wiring Diagram
Sensor Operation
Range Diagram
Advertisement

Related Manuals for Hubbell LightHawk LHMT


Summary of Contents for Hubbell LightHawk LHMT
-
Page 1: To Enter Test Mode
LightHawk Wall Switch Occupancy Sensors ™ Installation and Operating Instructions Hubbell Building Automation, Inc. 9601 Dessau Road, Building One, Suite 100 Austin, Texas 78754 512-450-1100 • 512-450-1215 Fax www.hubbell-automation.com Description Th e LightHAWK is an intelligent self-adapting occupancy sensor that is designed to replace existing wall switches. -
Page 2: Manual Override/Air-Gap Override
To return the sensor to normal operation, fl ip the air-gap switch to the ON position and push the button(s) to return the circuit(s) to Automatic mode. Re-install the sensor cover. Note: Sensor cover cannot be re-installed unless the air-gap switch is in the ON position.
Need help?
Do you have a question about the LightHawk LHMT and is the answer not in the manual?
Questions and answers
we have installed LHMTS1-N-WH throughout the bathrooms in a school. they are set to manual on and we need them to be auto on at all times. i can get it to test mode but that times out after an hour. is there a way to make it stay in auto on? Thanks
To configure the Hubbell LHMT sensor to stay in Auto ON mode instead of Manual ON, set Switch 1 to the Auto ON/Auto OFF position. This means positioning Switch 1 away from the edge of the sensor.
This answer is automatically generated