
Related Manuals for Emerson CF755AB06


Summary of Contents for Emerson CF755AB06
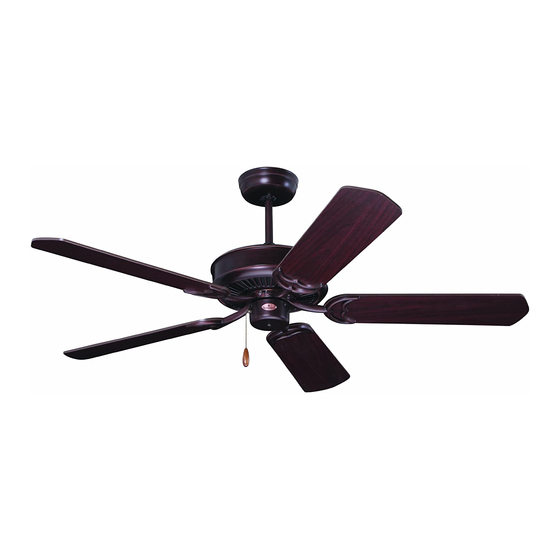
- Page 1 READ AND SAVE THESE INSTRUCTIONS DESIGNER Ceiling Fan Owner's Manual Model Numbers CF755AB06 CF755BS06 CF755ORB06 CF755VNB06 CF755WW06 18.0 Net Weight: Lbs. Part No. F40BP73170002 Form No. BP7317-2 U.L. Model No.: CF755...
-
Page 2: Safety Instructions
6. Follow the recommended instructions for the proper method of wiring your ceiling fan. If you do not know enough about electrical wiring, have your fan installed by a licensed electrician. WARNING: To avoid fire, shock or injury, do not use an Emerson or any other brand of control not specifically approved for this fan. -
Page 3: Unpacking Instructions
Emerson Electric Co. Substitution of parts or accessories not designated for use with this product by Emerson Electric Co. could result in personal injury or property damage. 1. Check to see that you have received the following... - Page 4 How to Put Your Ceiling Fan Together 1. Remove the hanger ball by loosening the setscrew in the hanger ball until the ball falls freely down the downrod (Figure 1). Remove the pin from the downrod, then remove the hanger ball. Retain the pin and hanger ball for reinstallation in Step 4.
- Page 5 How to Put Your Ceiling Fan Together (continued) 4. Reinstall the hanger ball (Figure 4) on the downrod as follows. Route the three 80” motor leads through the hanger ball. Position the pin through the two HANGER holes in the downrod and align the hanger ball so BALL the pin is captured in the groove in the top of the hanger ball.
-
Page 6: Electrical Requirements
How to Put Your Ceiling Fan Together (continued) 8. Turn fan assembly upside down in preparation for mounting fan blade assemblies. M5 x 6 WASHER HEAD BLADE SCREW (3) 9. Mount blade flanges to fan blades using three M5 x BLADE WASHER (3) 6 washer head blade screws and three blade washers (Figure 7). -
Page 7: How To Hang Your Ceiling Fan
How to Hang Your Ceiling Fan CEILING WARNING Turning off wall switch is not sufficient. To avoid possible electrical shock, be sure electricity is turned off at the main fuse box before wiring. All AT LEAST wiring must be in accordance with National and Local codes and the ceiling fan must be properly grounded as a precaution against possible electrical shock. -
Page 8: How To Wire Your Ceiling Fan
CEILING COVER NOTE: If you are using an Emerson Light Fixture with your fan, see Light Fixture Owner’s Manual for wiring. 2. Securely connect the fan motor white wire to the... -
Page 9: Using Your Ceiling Fan
8 - 9 feet above the floor for optimal simple step! airflow. Consult your Emerson Retailer for optional Turn Off When Not in the Room. Ceiling fans cool mounting accessories. -
Page 10: Maintenance
Emerson Electric Co. Substitution of parts or accessories not designated for use with this product The use of any other control not specifically by Emerson Electric Co. could result in personal approved for this fan could result in fire, shock and injury or property damage. -
Page 11: Troubleshooting
Trouble Shooting WARNING: For your own safety, turn off power at fuse box or circuit breaker before trouble shooting your fan. TROUBLE PROBABLE CAUSE SUGGESTED REMEDY 1. Fan will not start. 1. Fuse or circuit breaker blown. 1. Check main and branch circuit fuses or circuit breakers. -
Page 12: Repair Parts
Repair Parts U.L. Model No.: CF755... - Page 13 Repair Parts Listing Model Numbers Description CF755AB06 CF755BS06 CF755ORB06 CF755VNB06 CF755WW06 Hanger Ball Assembly, 761655-3 761655-17 761655-32 761655-94 761655 Consisting of: Hanger Bracket — — — — — Hanger Ball — — — — — Downrod — — — —...
- Page 14 Notes U.L. Model No.: CF755...
- Page 15 Notes U.L. Model No.: CF755...
- Page 16 Emerson Ceiling Fan. Once we have processed your return authorization request, we will provide you with a postage paid return label which should be affixed to the Emerson Ceiling Fan package you ship to the address listed at the end of this limited warranty. The return label will be sent to the mailing address you provide to us by phone.
Need help?
Do you have a question about the CF755AB06 and is the answer not in the manual?
Questions and answers