
Related Manuals for Robertshaw 9700


Summary of Contents for Robertshaw 9700
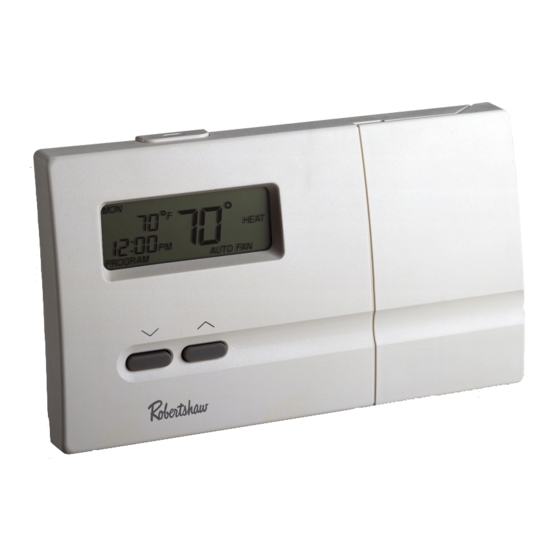
- Page 1 9700 DELUXE PROGRAMMABLE ® THERMOSTAT ™ I N T E G R A T E D C O M F O R T S O L U T I O N S ELECTRIC 7 Day Programmable 1 Heat / 1 Cool User’s Manual...
-
Page 2: Product Features
PRODUCT FEATURES • Attractive, StyleLine™ design • 7-day programming; 4 pre-programmed ® setpoints per day NERGY • QuickSet™ programming mode • Autochangeover mode automatically switches system from heat to cool • Programmable fan control • Detachable sub-base allows you to remove mounted thermostat for easy, convenient programming. -
Page 3: Keypad Quick Reference
KEYPAD QUICK REFERENCE SET - Begins, saves, and advances programming inputs PROG/MAN - Sets thermostat to either program or manual mode. Provides PROG/MAN quick return to normal operating mode from any menu AUTO FAN QUICKSET - Allows quick programming MAIN DISPLAY (OFF MODE) by enabling user to program all seven QUICKSET days at once... -
Page 4: Table Of Contents
The Maple Chase Item 9700 is directly compatible with 24V AC single stage heating and cooling systems. It will operate with all standard forced air gas, oil, and electric heating and air conditioning systems as well as hot water heating systems and single stage heat pump systems that do not have auxiliary or emergency heating. -
Page 5: Important Safety Information
IMPORTANT SAFETY INFORMATION WARNING: Always turn off power at the main power source by unscrewing fuse or switching circuit breaker to the off position before installing, removing, or cleaning this thermostat. Read all of the information in this manual before programming this thermostat. This is a 24V AC low-voltage thermostat. -
Page 6: Helpful Programming Tips
HELPFUL PROGRAMMING TIPS 1. Make sure the SYSTEM switch is in the HEAT or COOL position SYSTEM before programming. The thermostat will not allow programming in AUTO or OFF modes. 2. Make sure you set the time of day (note AM/PM indicator) and day of week accurately to ensure correct operation. -
Page 7: Niteview™ Lcd Display Backlight
NITEVIEW™ LCD DISPLAY BACKLIGHT This thermostat incorporates a revolutionary new display backlight to make nighttime temperature or program adjustments quick and easy. The NiteView™ display backlight uses modern lighting technology to provide an even-flowing light behind the display. There are two ways to activate the backlight: 1. -
Page 8: Removing Thermostat From Wiring Subbase
REMOVING THERMOSTAT FROM WIRING SUBBASE Your new thermostat can be removed from its wiring subbase for easy programming, resetting the thermostat, or changing the batteries. The wiring subbase will remain attached to the wall. To remove thermostat from wiring subbase: AUTO FAN 1. - Page 9 To replace thermostat onto wiring subbase (cont.): 3. Press SYSTEM button to put the thermostat into HEAT, SYSTEM COOL, or AUTO mode. The thermostat will return to normal operating mode. You may reset the thermostat at any time. Reset is located on the back side of thermostat in the lower, right corner.
-
Page 10: Programming
PROGRAMMING PROGRAMMING Set or Change Time, Day, Temp. Differential, and Residual Cooling NOTE: During programming, the setting to be changed will flash on the display. If no key presses are made within 45 seconds, the display will revert to the main display. Press PROG/MAN button at any time during programming to return to the main display. -
Page 11: Selecting ˚F/˚C
5. Press SET button. The temperature differential (1˚F) will appear on the display as 10˚. 6. Press either ∨ or ∧ button to change the temperature differential. The differential may be adjusted from .5˚F (05˚), 1˚F (10˚), 1.5˚F (15˚), or 2˚F (20˚). (If your system cycles too often, increase the temperature differential setting.) NOTE: If SYSTEM button is in COOL, the display will show ":60."... - Page 12 PROGRAMMING This programmable thermostat can have up to four setpoints a day (MORN, DAY, EVE, and NIGHT). Each of these setpoints will have a time, temperature, and programmable fan setting. The thermostat monitors the time of day and turns the system on or off, based on the temperature differential you have already set, to maintain the programmed or manually selected setpoint temperatures.
- Page 13 NOTE: If "AUTO CHANGEOVER" was enabled during installation, refer to "SELECTING AUTO CHANGEOVER" for restrictions on setting heating or cooling setpoint temperatures for proper operation. AUTO (changeover) will not function unless the thermostat is set to PROGRAM mode. If "AUTO CHANGEOVER" was disabled during installation, you may set heating or cooling setpoints to any temperature settings you desire.
-
Page 14: Programming With Quickset
PROGRAMMING Programming with QuickSet™ NOTE: To save valuable programming time, QuickSet™ allows you to set one schedule that is automatically copied to each individual day of the week. You may then go into the program and change any specific day, time setting, or temperature setting to suit your personalized schedule. - Page 15 4. Press SET button. The display will show the setpoint temperature NOTE: Pressing QUICKSET button instead of the SET button will MON TUE WED THU FRI SAT SUN also save your program settings. MORN 5. Press either ∨ or ∧ button to adjust the setpoint temperature for the programmed MORN time.
-
Page 16: Review, Change, Or Personalize
PROGRAMMING SYSTEM 10.Press SYSTEM button for opposite program (HEAT or COOL). 11.Repeat the above steps to enter the temperature settings for the opposite season. NOTE: When programming opposite season, remember that both programs use the same time settings and programmable fan settings. Review, Change, or Personalize Program NOTE: The thermostat will not allow programs to be entered in the HEAT... - Page 17 2. Press SET button. The display will show the current day of the week or the last programmed day. Press ∨ or ∧ to advance to the day of the week you will program. 3. Press SET button. The display will show the time setting: 4.
- Page 18 PROGRAMMING 7. Press SET button. The display will show AUTO with FAN. MORN 8. Press either ∨ or ∧ button to adjust the fan setting to be in AUTO AUTO FAN (fan controlled by system when required for heating or cooling) or ON (fan remains on continuously) for the individual daily setpoint you are programming.
-
Page 19: Review Or Modify Program
Review or Modify Program 1. Press SYSTEM button until the word "HEAT" or "COOL" appears on SYSTEM HEAT the right side of the display. This will choose the program you wish to review or modify. M A N U A L AUTO FAN 2. -
Page 20: Programming Filter Monitor
PROGRAMMING Programming Filter Monitor The filter monitor keeps track of the total time the system fan has been in operation during the heating or cooling modes. The "Check Filter" message appears when the hours of fan operation equals your programmed filter monitor hours setting. 1. -
Page 21: Programming Keypad Lock
Programming Keypad Lock NOTE: In order for the lock function to work as described below, the "LOCK" function must have been enabled during installation. If the Lock function does not seem to work, you must change a dip switch located on the back of the thermostat. -
Page 22: Unlocking Keypad
PROGRAMMING 5. Press SET button to save second digit. The third digit will flash. 6. Press ∨ or ∧ button to enter the third (right) digit. 7. Press SET button to save third digit. "Lock” appears on the screen and your combination is now saved. LOCK HEAT AUTO FAN... -
Page 23: Operation
OPERATION The thermostat is now ready to run your saved programs and automatically control the temperature at your programmed time settings. The thermostat will “flash” the word “heat” or “cool” in the main display when the system is active. Beginning Programmed Operation: NOTE: DO NOT switch system to COOL if outside temperature is below 50˚F. -
Page 24: Resetting The Thermostat
OPERATION You may press the ∨ or ∧ buttons to temporarily change the programmed temperature while in COOL or HEAT mode. The ∨ or ∧ buttons will not change the setting while the system is in AUTO. You may also press the PROG/MAN button to change to manual mode and manually change the temperature settings. -
Page 25: Selecting Auto Changeover
Selecting Auto Changeover 75˚ Lowest cool setting You may wish to set your thermostat so it will automatically choose between the HEAT or COOL programs for proper temperature ˚ control. This program feature is referred to as the AUTO (Auto Changeover) mode of system operation. - Page 26 OPERATION Your room temperature rises above the COOL setpoint programmed AUTO temperature setting, the thermostat will activate the COOL program. If the COOL temperature continues to increase, the thermostat will turn on the COOL mode and COOL will slowly flash in the display, indicating that it is in AUTO FAN P R O G R A M operation.
-
Page 27: Changing Dip Switch Settings
CHANGING DIP SWITCH SETTINGS Thermostat functions are determined by settings on two sets of dip switches: "SWITCH 1" and "SWITCH 2". These dip switches are pre-set at installation. However, some users may want to change some of the dip switch settings on SWITCH 2 to enable or change certain thermostat options. -
Page 28: Replacing The Batteries
OPERATION Changing dip switch settings: TCH 1 1. Use a small screwdriver or pencil to move the switch to the desired setting. 2. Press RESET button. See Figure 5. Pressing RESET will erase any previously entered programming information. IMPORTANT: New dip switch settings for Dip Switch #2 will not register or operate options until the RESET button is pressed. -
Page 29: Replacing Batteries
Replacing Batteries: CAUTION: Installing batteries backwards can damage thermostat. NOTE: Replace batteries with four “AA” alkaline batteries only. 1. Press SYSTEM button until "OFF" appears in the time field on SYSTEM the display. AUTO FAN 2. Remove thermostat from wiring subbase. (See “REMOVING THERMOSTAT FROM SUBBASE”... -
Page 30: Cleaning
OPERATION CLEANING DANGER: ELECTRIC SHOCK HAZARD. Turn off power at the main service panel before cleaning, servicing, or removing thermostat. Use a dry cloth to remove any dust from the thermostat cover. Do not use water or submerge the thermostat in water to clean. -
Page 31: Troubleshooting
TROUBLESHOOTING Symptom Remedy Thermostat does not turn on system. Check wiring. (See “Installation Instructions” included with thermostat.) Check to see if "OFF" is indicated in display. Select HEAT or COOL mode by pressing SYSTEM button. Heat turns on instead of cool and Check wiring and system specifications. - Page 32 Symptom Remedy Thermostat beeps and does not allow Autochangeover "deadband" conflict (See "SELECTING AUTO temperature changes when ∨ or ∧ CHANGEOVER".) or thermostat is locked. buttons are pressed. Thermostat does not follow program. Check AM/PM indicators at time of day and programmed time changes. (See “PROGRAMMING.”) Thermostat may be in "Early Recovery"...
- Page 33 Symptom Remedy System runs too long. Temperature differential may be set too high. Decrease temperature differential to lower setting, see "PROGRAMMING". System will not enter AUTO Thermostat must be in PROGRAM mode to run AUTO system operation. (Auto Changeover) mode. Press PROG/MAN button until PROGRAM is indicated in display.
- Page 34 Symptom Remedy Thermostat turns off system before my Early recovery mode is in effect. This optional feature maximizes comfort programmed setpoint time. for occupied periods and eliminates energy wasting demand cycling prior to set-back periods. See "PROGRAMMING". If you wish to change your thermostat to normal recovery, see "CHANGING DIP SWITCH SETTINGS".
-
Page 35: Warranty
FIVE YEAR LIMITED WARRANTY Maple Chase Company warrants to the original contractor installer or to the original consumer user, each new Coleman thermostat to be free from defects in materials and workmanship under normal use and service for a period of five (5) years from the date of purchase. - Page 36 Maple Chase Company 2820 Thatcher Road Downers Grove, Illinois 60515 United States of America...
Need help?
Do you have a question about the 9700 and is the answer not in the manual?
Questions and answers