Table of Contents
Advertisement
Advertisement
Table of Contents

Related Manuals for York Aspire 51110


Summary of Contents for York Aspire 51110
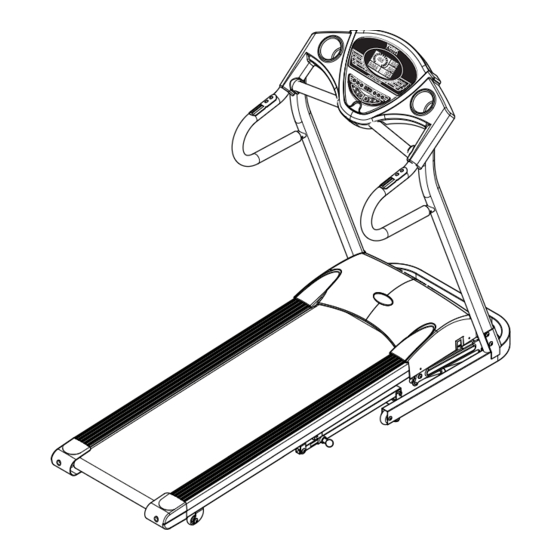
- Page 1 Owner’s Manual Aspire Treadmill 51110 26Feb2012 www.yorkfitness.com...
-
Page 2: Table Of Contents
Table of contents Congratulations on CONTENTS purchasing your exercise Safety information equipment from Customer support Assembly instructions You have chosen a high quality, safe and Operational instructions innovative piece of equipment as your training partner and we are certain it will keep you motivated on the way to achieving your Care &... -
Page 3: Safety Information
• This product has been tested for use in a home • The safety key should be attached to the user via environment and is warranted for In Home, personal, the cord and clip. If for any reason the user falls the family or household use. cord will pull the safety key from the treadmill and the • Due to our continuous policy of product treadmill will begin to decelerate. development, York Fitness reserves the right to • In an emergency take hold of the handrails and place change specifications without notice. your feet on the side platforms provided, once you CAUTION! The instructions must be followed are stable pull out the safety key, the treadmill will carefully in the assembly, use and maintenance begin to decelerate until it stops. • The safety level of this equipment can only be of your equipment. The warranty does not... -
Page 4: Customer Support
• Place of purchase • Information about the place and conditions of use • Precise description of the issue / defect IMPORTANT!! - Please retain your sales receipt, York Fitness Customer Care may request proof of purchase to validate eligibility for warranty service. Warranty cover starts from the date shown on the proof of purchase. -
Page 5: Assembly Instructions
Assembly instructions PREPARE YOUR WORK AREA - It is important you assemble the product in a clean and uncluttered space. WORK WITH A FRIEND - We recommend you have someone assist you with the assembly as some of the components are quite heavy. OPEN THE CARTON - Check any warnings on the carton and make sure you have it the right way up. -
Page 6: Assembly
Assembly instructions STEP 1 A x 4 B x 8 H x 4 STEP 2 C x 2 www.yorkfitness.com... - Page 7 STEP 3 Attach the provided wire to cable as Insert any excess indicated below and pull back to cable into the hole pull in any excess cable between as indicated below. the console and handle post. STEP 4 D x 4 www.yorkfitness.com...
-
Page 8: Operational Instructions
Operational instructions Final Check Your treadmill is now assembled. Please make the following final checks: • Make sure all screws / bolts are tightened. • Make sure the equipment is on a flat, level surface. Power Up 1. Plug one end of power cable into the treadmill as shown. 2. Plug the other end into a suitable AC outlet (220-240 volt, 50Hz). 3. Switch the treadmill on using the on/off switch. 4. Attach the safety key to the console. NOTE: Before you run on the treadmill for the first time, allow the treadmill to run independently for 10 minutes. -
Page 9: Operating Console & Display
Operating the console Displays FIRST VALUE AVAILABLE RANGE INITIALIZE DISPLAY RANGE DISPLAYED FOR SETTING TIME (MIN:SEC) 0:00 30:00 8:00-99:00 0:00~99:59 SPEED (KM/H) 1.0-16.0 DISTANCE(KM) 0.00 1.00 1.0-99.0 0.0-99.9 INCLINE 0-15 0-15 PULSE 40-199 CALORIES 20-990 0-999 www.yorkfitness.com... -
Page 10: Major Function Keys
Operational instructions Major function keys KEYS DISPLAY RANGE START / PAUSE Starts / Pause the treadmill. STOP Stop the treadmill. PROG. When the treadmill is stopped, press this button to select an exercise program: (PROGRAM) P1 > P2 > P3 > P4 > P5 > P6 > Body Fat Program > P0 (Manual Mode) MODE During P0 (Manual Mode), press this button to select a count down mode: Time Mode >... -
Page 11: Quick Start
Quick Start 1. Make sure the treadmill is plugged in and the safety key is in position. Turn on the switch and the LCD will turn on and beep. 2. Press the “START / PAUSE” button and the display will begin count down: 05 > 04 > 03 > 02 > 01 and beep five times. 3. The treadmill mat will slowly begin to run. Use the function keys to adjust your workout level. Manual Mode 1. Turn on the switch and the treadmill will enter manual mode directly. Press “START / STOP” to begin work out. Use “PROG.” button to select P0 (Manual Mode) from other program mode. Use the function keys to adjust your workout level. 2. Before workout, press “MODE” button to select a count down mode (Time Mode, Distance Mode, Calorie Mode). The display will blink with the initialize setting, you can use the “Speed +” and “Speed -” to change the count down setting for each mode at this time. 3. When the count down have reached 0, the treadmill will decrease to a stop and the buzzer will beep five times. Program Mode Speed and incline will change automatically during the workout. 1. Turn on the switch and use the “PROG.” button to select a desire program. A red LED light will indicate which program (P1-P6) you have selected. Use the “SPEED +” and “SPEED -” to adjust the work out time. The default value is 30 min. -
Page 12: Care & Maintenance
Care & Maintenance Placement in your Home This treadmill should not be placed outdoors, in a garage or an outbuilding. Keep the treadmill in a dry place with as little temperature variation as possible. We recommend placing a mat beneath the treadmill, to protect both the treadmill and your flooring. -
Page 13: Lubrication
If you need more lubricant, we recommend you use the Lube-N-Walk Treadmill Lubrication Kit, it can be obtained from local York distributors - see the Contact Us details at the front of this manual or visit www.yorkfitness.com. -
Page 14: Adjusting Running Mat Alignment
Care & Maintenance Adjusting Running Mat Alignment The alignment of the mat has been pre-set at the factory, however, the mat can be caused to run out-of-line by a user’s running style (eg, more weight on one foot), or if it is placed on an uneven surface - so it may need adjusting from time to time. -
Page 15: Troubleshooting
The following table details the most common problems and how to fix them. If you still have a problem after going through the troubleshooting guide please call your local YORK distributor for advice. PROBLEM... -
Page 16: Fitness Guide
Fitness guide Starting Your Workout Finishing Your Workout 1. Turn the treadmill to the lowest speed and incline Begin each workout with a Warm Up session - a few settings. minutes of stretching to help prevent strains, pulls and cramps. 2. Using the handrails for support place your feet on the side rails (either side of the running mat). 1. Get onto the treadmill, using the handrails for support, and place your feet on the side rails (either side of the 3. Stop the treadmill. running mat). -
Page 17: How Long Should I Exercise For
How Long Should I Exercise For? That really depends on your current level of fitness. If you’re just starting out on a new exercise program, you should start gradually and build up - do not try to do too much too quickly. 30 minutes, 3 times a week should be enough. -
Page 18: Exploded Drawing
Exploded drawing www.yorkfitness.com... -
Page 19: Part List
Part list PART NO. DESCRIPTION PART NO. DESCRIPTION 51110-01 BOTTOM FRAME WELDMENT 51110-47 RUNNING BELT 51110-02 MAIN FRAME WELDMENT 51110-48 MOTOR BELT 51110-03 LEFT UPRIGHT POST WELDMENT 51110-49 HANDLE BAR FOAM 51110-04 RIGHT UPRIGHT POST WELDMENT 51110-50 CYLINDER 51110-05 COMPUTER FIXED TUBE 51110-51 SIDE RAIL 51110-06... - Page 20 www.yorkfitness.com...
Need help?
Do you have a question about the Aspire 51110 and is the answer not in the manual?
Questions and answers
When i turn my treadmill on it lights up and just keeps beeping and won't let me do anything can you help please
If your York Aspire 51110 treadmill lights up and beeps but does not respond, check the following:
1. Ensure the safety key is attached correctly.
2. Make sure the treadmill is plugged into a suitable outlet.
3. Confirm the On/Off switch is turned on.
4. Check if the circuit breaker has tripped and reset it if needed.
5. Unplug and re-plug the electrical cord to reset from auto shut down.
If the problem persists after these steps, check for loose or disconnected cables.
This answer is automatically generated
How the fat program works?
Where is the circuit breaker switch on my york aspire 51110 treadmill located