
Related Manuals for York T900 PLUS


Summary of Contents for York T900 PLUS
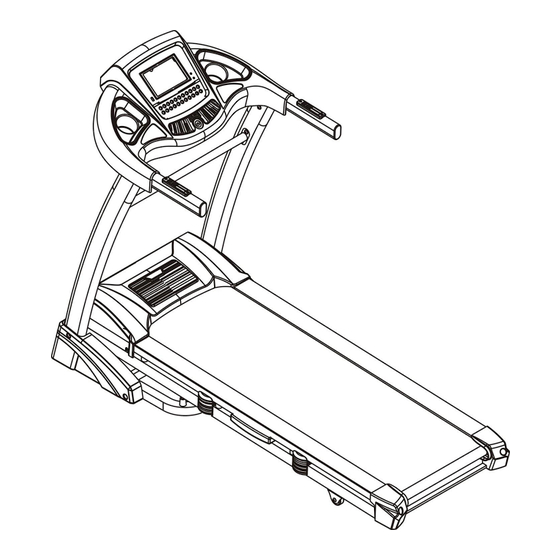
- Page 1 Assembly Manual YORK T900 PLUS Please read all precautions and instructions in this manual in detail before using this equipment. Save this manual for future reference.
-
Page 2: Table Of Contents
CONTENTS Contents Safety Caution Assembly Instruction Operation Guide 7-12 How to Fold and Move Suggested Stretches 14-15 Maintenance 16-17 Exploded Drawing Part List... -
Page 3: Safety Caution
SAFETY CAUTIONS When using this product, basic precautions should always be followed, including the following: Please read the instruction carefully before starting to use this product. Danger – To reduce the risk of electric shock: Always unplug this product from the electrical outlet immediately after using and before cleaning. - Page 4 SAFETY CAUTIONS GROUNDING INSTRUCTIONS The products must be grounded first. If malfunction or breakdown occurs, grounding will provide a path of least resistance for electric current to reduce the risk of electric shock. The product is equipped with a cord having an equipment-grounding conductor and a grounding plug.
-
Page 5: Assembly Instruction
ASSEMBLY INSTRUCTIONS PARTS SUPPLIED AS BELOW: Part list Description Quantity Description Quantity Main frame 1 set Bolt M8x15 4 pcs Left upright 1 pc Bolt M5x12 4 pcs Right upright 1 pc Washer M10 4 pcs Console 1 pc Washer M8 4 pcs Connecting tube 1 pc... - Page 6 ASSEMBLY INSTRUCTIONS STEP 1 1. Please note that this treadmill needs at least two people to complete assembly. 2. Open the carton box, and take out all the protection foam and assembly parts. 3. As the photo shows, take out the running deck from the box, lay it on the flat floor, and then to cut the belt.
- Page 7 ASSEMBLY INSTRUCTIONS STEP 4 1. Connect the cable extent from console (4) with the cable extent from right upright (3). Pay attention to the connection of the cable, a wrong connection or rough operation would cause damage of the connector. 2.
- Page 8 ASSEMBLY INSTRUCTIONS NOTE: For your safety and comfort, please check if all screws are fastened.
- Page 9 OPERATION GUIDE GENERAL SAFETY TIPS A. Practice mounting and dismounting your treadmill before beginning your workout. B. Attach the safety key to the computer (the treadmill will not operate without the Safety Key). Clip the other end of the safety key to your clothing before exercising to ensure the treadmill will stop if the user accidentally walks off the Treadmill.
- Page 10 OPERATION GUIDE GETTING STARTED NOTES: . Check to make sure nothing is on or will hinder the movement of the treadmill. 2. Plug in the power cord and turn the treadmill ON Stand on the foot rails of the treadmill. Attach the safety key clip to part of your clothing.
- Page 11 OPERATION GUIDE MANUAL PROGRAMS OPERATION NOTES: Under this program, one of DISTANCE, CALORIE and TIME can be set to count-down for your workout, the others will count up during your workout. After the count-down reaches zero, the program will be ended and stop the belt movement.
-
Page 12: Operation Guide
OPERATION GUIDE STEP 4: During the program you can adjust the SPEED & INCLINE by pressing SPEED +/- and INCLINE+/- buttons, or use QUICK SPEED and QUICK INCLINE buttons to jump directly to a setting. The speed and incline can also be adjusted by the buttons on both handrails, the buttons on left handrail to adjust incline, the buttons on right handrail to adjust speed. - Page 13 OPERATION GUIDE BODY FAT SCALE This function is to estimate your body fat according to the basic information of your body condition. This estimate is not exact and persons with medical conditions and/or a specific need for accurate body fat value should not rely on the estimations provided. STEP 2: Press PROGRAM button repeatedly, on the “9”...
-
Page 14: How To Fold And Move
HOW TO FOLD AND MOVE HOW TO FOLD THE TREADMILL Before folding the treadmill ensure incline is set to zero, and unplug the power cord. CAUTION: You must be able to safely lift 45 pounds (20kg) in order to raise, lower, or move the treadmill. -
Page 15: Suggested Stretches
SUGGESTED STRETCHES A successful exercise program consists of a warm-up, aerobic exercise, and a cool-down. Do the entire program at least two and preferably three times a week, resting for a day between workouts. After several months, you can increase your workouts to four or five times per week. - Page 16 SUGGESTED STRETCHES 4. Shoulder Lift Lift your right shoulder up toward your ear for one count. Then lift your left shoulder up for one count as you lower your right shoulder. 5. Toe Touch Slowly bend forward from your waist, letting your back and Shoulders relax as you stretch toward your toes.
-
Page 17: Maintenance
MAINTENANCE WARNING! Before performing any maintenance to your treadmill, always unplug the power cord from the surge protector. To prevent electrical shock, be sure the power to the treadmill is OFF and the unit is unplugged from the wall electrical outlet before attempting any cleaning or maintenance. - Page 18 MAINTENANCE Running belt tension adjustment The treadmill has been adjusted and passed QC inspection before leaving the factory. If there is phenomenon of bias running of the belt, the possible reasons might be: A. The frame is not stably laid B.
-
Page 20: Exploded Drawing
EXPLODED DRAWING... -
Page 21: Part List
PART LIST DESCRIPTION Q'TY DESCRIPTION Q'TY BASE MOTOR COVER INCLINE FRAME LEFT REAR END CAP MAIN FRAME RIGHT REAR END CAP LEFT UPRIGHT POWER RACK RIGHT UPRIGHT HANDRAIL BUTTON(L) CONSOLE RACK HANDRAIL BUTTON(R) BOLT M10*55 BASE COVER(L) BOLT M10*50 BASE COVER(R) BOLT M10*40 SIDE RAIL BOLT M10*20...
Need help?
Do you have a question about the T900 PLUS and is the answer not in the manual?
Questions and answers