Canon Selphy CP800 User Manual
Compact photo printer
Hide thumbs
Also See for Selphy CP800:
- User manual (73 pages) ,
- User manual (326 pages) ,
- User manual (35 pages)

Related Manuals for Canon Selphy CP800


Summary of Contents for Canon Selphy CP800
- Page 1 Printer User Guide ENGLISH Make sure you read this guide, including the “Safety Precautions” section, before using the printer. Store his guide safely so that you can use it in the future. ...
-
Page 2: Package Contents
Package Contents □ Check if the following items are included in your printer package, using the check boxes. If anything is missing, contact the retailer where you purchased the printer. □ □ □ SELPHY Printer Unit Compact Power Adapter Power Cord CA-CP200 W □... -
Page 3: Table Of Contents
Warranty Limitations This product’s warranty is only effective in the country of sale. If there is a problem with the printer while abroad, please return it to the country of sale before proceeding with a warranty claim to a Canon Customer Support Help Desk. -
Page 4: Safety Precautions
This could result in electrical shock or fire. If liquid comes into contact with the product, unplug it from the outlet and consult your retailer or a Canon Customer Support Help Desk. Do not touch this printer or the power plug during thunderstorms. -
Page 5: Setting Up Selphy
Caution Denotes the possibility of damage to the equipment. Unplug the product from the power outlet when you are not using it. Do not place anything, such as cloth, on top of the printer while in use. Leaving the unit plugged in for a long period of time may cause it to overheat and become distorted, resulting in fire. -
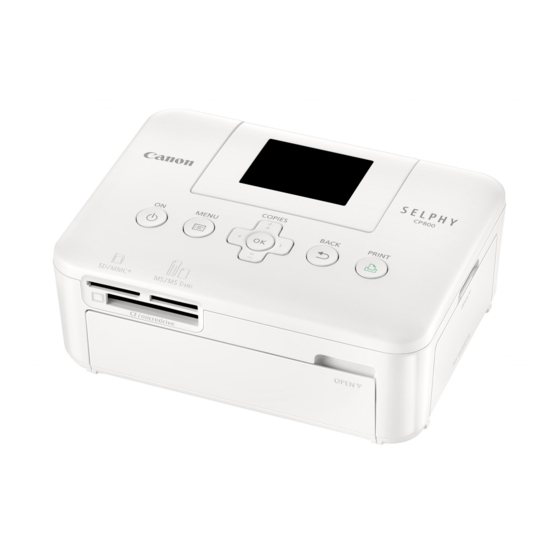
Page 6: Components Guide
Components Guide Card Slots (p. 12) Paper Cassette Ink Cassette Lock (p. 14) Compartment (p. 10) Ink Cassette Compartment (p. 10) Paper Cassette Ink Cassette Compartment Cover Compartment Cover (p. 10) (p. 10) USB Terminal for Digital Camera/ USB Flash Memory Connection USB Terminal for Computer (pp. 14, 27, 30) Connection (p. 24) Battery/Battery Cover Lock (p. 29) Battery Cover (p. 29) DC IN (Power Input) Terminal (Air vents are behind (p. -
Page 7: Information Displayed On The Screen
Information Displayed on the Screen Memory card slot (p. 12) currently in use (An SD card is used in this example) Paper orientation Print settings (pp. 18 – 21) (Settings that are not available are grayed out) File number Installed ink cassette type Total number of images to be printed (Postcard size is used in this example) Number of copies for the displayed image Hiding Information Displayed on the Screen... -
Page 8: Getting Started
Getting Started Preparations for printing images. A Postcard size Color Ink Cassette/Paper Set (sold separately) (p. 2) will be used as an example, however Color Ink Cassette/Paper Sets other than Postcard size may also be used in the same way to prepare for printing. Preparing the Ink Cassette Check the ink cassette. -
Page 9: Set The Paper
Close the inner lid until it clicks into place. Leave the outer lid open during printing. Use only dedicated paper for use in SELPHY CP series printers included in the genuine Canon brand Color Ink Cassette/Paper Sets. Regular printing paper, regular postcards, or dedicated paper for SELPHY ES series printers cannot be used. -
Page 10: Connecting Selphy
Inserting the Ink and Paper Cassettes Open the covers. Open the covers for the ink cassette and paper cassette compartments. Insert the ink cassette. Insert the ink cassette into the printer in the direction indicated by the arrow on the cassette until it clicks and locks into place. Close the ink cassette compartment cover. Insert the paper cassette. Make sure that the outer lid is open (p. 8) and insert the paper cassette all the way into the compartment. Connecting SELPHY Plug the adapter cord into SELPHY. -
Page 11: Setting The Display Language
Setting the Display Language You can change the language displayed in the LCD monitor menus and messages. Turn on SELPHY. Press and hold the q button until the screen shown at the left displays. To turn the power off, press and hold the q button again ... -
Page 12: Compatible Memory Cards And Memory Card Slots
Compatible Memory Cards and Memory Card Slots Memory Cards That Can be Memory Cards That Require an Adapter Card Slots Used Without an Adapter (commercially available) SD Memory Card miniSD Memory Card SDHC Memory Card miniSDHC Memory Card SDXC Memory Card microSD Memory Card ... -
Page 13: Selecting And Printing Images
Selecting and Printing Images You can select an image and specify the number of copies for printing. In this section, an SD memory card will be used as an example, but you can print from other memory cards using the same steps. Turn on SELPHY. -
Page 14: Insert The Paper
Print. Press the p button to start printing. During printing, the paper will pass in and out from the back of SELPHY several times. Do not touch the paper until printing has finished and the printed sheets collect on the print output tray (on the outer lid of the paper cassette). -
Page 15: Printing All Images
Printing All Images You can print all images on a memory card at once. Display the menu. Press the k button. Display the settings screen. Press the ud buttons to select [Print All Images], then press the o button. Select the number of copies. Press the ud buttons to set the number of copies. -
Page 16: Storing The Printed Photos
If you wish to mount prints in an a bum, select an album with photo covers made of nylon, polypropylene or cellophane. Color may change over time or depending on storage conditions. Canon assumes no liability for color changes. Cleaning Up After Printing After you finish printing, follow the steps below to clean up and store SELPHY. -
Page 17: Printing A Variety Of Images
Printing a Variety of Images You can use various printing features, such as imprinting the shooting date or adjusting the color of an image. You do not need to repeat the settings for each image because once the settings are made, they are applied for all images. - Page 18 Printing With the Date (Date) You can print the shooting date recorded by the digital camera. Off (Default setting) / 08/08/2010 Turning off SELPHY will return the setting to [ Off]. Since the date printed will be the date the image was recorded by the digital camera, it cannot be ...
- Page 19 Selecting a Layout and Printing (Page Layout) You can set the number of images that you want to print on one sheet. The number of images that you specified (p. 13) will be printed in the selected layout. 1-up Prints one image using a full sheet Index Prints as an index...
- Page 20 Arranging Images of Different Sizes (Shuffle) Shuffle automatically arranges images in a variety of sizes for printing. A group of up to 8 images, or a group of up to 20 images can be printed on a single sheet. Prints can be made on L size or Postcard size paper ...
- Page 21 Making Skin Look Smooth in Prints (Smooth Skin) Makes skin look smooth and beautiful in prints. Off (Default setting) / On When printing is finished, turning off SELPHY and removing the memory card will return the setting to ...
-
Page 22: Printing From Your Computer
Printing From Your Computer If you connect your computer to SELPHY and use the supplied software, you can view all images at once and take advantage of various printing functions that cannot be done with just SELPHY alone. Following the audio guidance will allow inexperienced computer users to print easily. -
Page 23: Installing And Starting The Software
Installing and Starting the Software Windows Vista and Mac OS X 10.5 are used for these explanations. Items to Prepare Computer Supplied CD-ROM (COMPACT PHOTO PRINTER Solution Disk) A commercially available USB Cable shorter than 2.5 m (8.2 ft.) (SELPHY terminal requires a Type B ... - Page 24 If the screen in Step 5 does not appear, open it from the [Start] menu r [All Programs] r [Canon Utilities] r [SELPHY Photo Print] r [SELPHY Photo Print]. Macintosh If the screen in Step 5 does not appear, follow the procedure below to register your printer.
-
Page 25: Using The Software To Print
Using the Software to Print Use the installed software (SELPHY Photo Print) to print images from your computer. The [Simple print] feature will be explained in this section. Using this feature, you can view all your images at once and select which ones you want to print. If your computer is equipped with speakers, set the volume so that the audio guidance for necessary operations can be heard. - Page 26 Select the number of prints. Select the number of copies for each image. For Windows, click [Print] to start printing. For Macintosh, click [Print menu], then click [Print] in the screen that appears. Press the - or + buttons to set the number of prints. End the program. Windows When all printing is finished, click at the top right...
-
Page 27: Printing From Your Digital Camera
You can select and print images from a digital camera that supports the PictBridge standard. A Canon brand compact digital camera will be used as an example to explain the print method. If operations are different for the digital camera you use, refer to the user guide included with your digital camera. -
Page 28: Printing Images Using Digital Camera Specified Settings (Dpof Print)
The date and file number are the DPOF settings made with the digital camera (these set ings cannot be changed with SELPHY). If, on a Canon brand digital camera, the [Print Type] is set to [Standard], the settings made in “Printing a Variety of Images”... -
Page 29: Using The Battery Pack
Use the battery pack NB-CP2L (sold separately) for printing images in places without a power outlet. With a fully charged battery, you can print approximately 54 sheets* of Postcard size paper. * The number of possible prints is based on Canon testing standards, and may change depending on printing conditions. -
Page 30: Printing From Your Mobile Phone
(p. 2) you use, images may print with the edges cut off. Select Canon CP800 (XX:XX:XX) (X stands for one digit) when selecting a target device name on your mobile phone. You cannot establish a wireless connection between a computer and SELPHY. -
Page 31: Troubleshooting
Troubleshooting If you think there is a problem with SELPHY, first check the following. If the items below do not solve your problem, contact a Canon Customer Support Help Desk as listed on the included customer support list. Power Power will not turn on ... -
Page 32: Paper Problems
If no solution displays, refer to “Troubleshooting” 31). If these items do not solve your problem, contact a Canon Customer Support Help Desk as listed on the included customer support list. If a problem occurs while SELPHY is connected to a digital camera, an error message may appear on... -
Page 33: Specifications
Specifications SELPHY CP800 Printing Method Dye-sublimation thermal transfer (with overcoating) Resolution/Color 300 x 300 dpi Representation YMC (256 shades per color, 16.77 million colors per dot (max)) (Resolution based on the “area intensity method” is equivalent to a 4800 x 4800... -
Page 34: Handling Precautions
Printer specifications or appearance are subject to change wi hout notice. As an ENERGY STAR Partner, Canon Inc. has determined that this product meets the ENERGY STAR guidelines for energy efficiency. CAUTION RISK OF EXPLOSION IF BATTERY IS REPLACED BY AN INCORRECT TYPE. -
Page 35: Fcc Notice
Do not make any changes or modifications to the equipment unless otherwise specified in the manual. If such changes or modifications should be made, you could be required to stop operation of the equipment. Canon U.S.A., Inc. One Canon Plaza, Lake Success, NY 11042, U.S.A. Tel No. (516) 328-5600 Canadian Radio Interference Regulations... -
Page 36: Trademark Acknowledgments
Reprinting, transmitting, or storing in a retrieval system any part of this guide without the permission of Canon is proh bited. Canon reserves the right to change the contents of this guide at any time without prior notice. Illustrations and screenshots in this guide may differ slightly from the actual equipment.
Need help?
Do you have a question about the Selphy CP800 and is the answer not in the manual?
Questions and answers