Chapters
Table of Contents
Troubleshooting

Related Manuals for SMART LightRaise 60wi


Summary of Contents for SMART LightRaise 60wi
- Page 1 LightRaise™ 60wi interactive projector User’s guide Scan the following QR code to read this guide on your smart phone or other mobile device or go to: onlinehelp.smarttech.com/english/mobile/projectors/60wi/index.htm...
-
Page 2: Product Registration
© 2013 SMART Technologies ULC. All rights reserved. No part of this publication may be reproduced, transmitted, transcribed, stored in a retrieval system or translated into any language in any form by any means without the prior written consent of SMART Technologies ULC. Information in this manual is subject to change without notice and does not represent a commitment on the part of SMART. -
Page 3: Important Information
W A R N I N G To reduce the risk of fire or electric shock, do not expose the SMART product to rain or moisture. Two people are required to mount your SMART product because it may be too heavy for one person to safely maneuver. - Page 4 I M P O R T A N T I N F O R M A T I O N Use of controls or adjustments or performance of procedures other than those specified herein may result in hazardous radiation exposure. Keep the interactive pen and pen holder out of reach of small children as there are small parts that may pose a potential choking hazard.
-
Page 5: Table Of Contents
Choosing a surface Choosing a location Choosing a height Routing the cables Projector connections Installing SMART Notebook software Aligning the interactive projector Chapter 3: Using your interactive projector How your interactive projector works Interacting with your computer Using the remote control... - Page 6 Determining projector status Determining touch status Determining interactive pen status Determining curtain alignment tool (CAT) status Determining XCP status Troubleshooting your SMART product with the Connection Wizard Troubleshooting pen and finger touch issues Troubleshooting image issues Troubleshooting projector errors Troubleshooting audio issues...
- Page 7 C O N T E N T S More information Index smarttech.com/kb/170295...
-
Page 9: Chapter 1: About Your Interactive Whiteboard
It’s the only interactive projector that provides touch and pen-enabled input, enabling two users to simultaneously write, draw and manipulate content in SMART Notebook™ collaborative learning software using a finger or the interactive pens. -
Page 10: Features
3400:1 contrast ratio 100" (254.0 cm) diagonal maximum interactive area size on a blank, vertical wall 0.36:1 throw-ratio Two built-in 10W speakers N O T E For further details about projector features, see the LightRaise 60wi interactive projector specifications (smarttech.com/kb/170335). smarttech.com/kb/170295... -
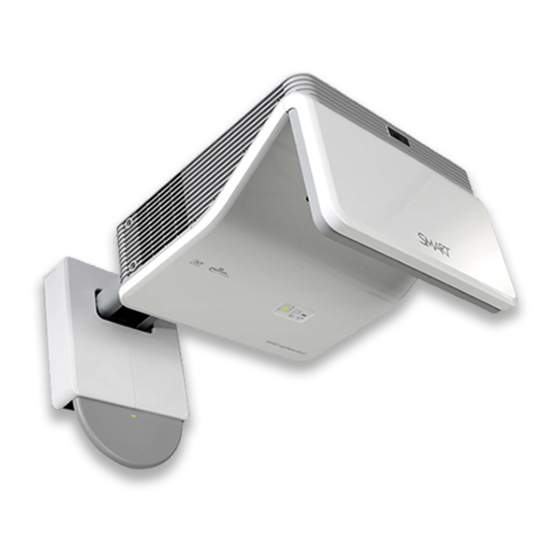
Page 11: Projector Boom
C H A P T E R 1 About your interactive projector Projector boom The projector is mounted to the wall by attaching the ball-joint to the boom and the boom to the wall-mount plate. You can adjust the length of the boom for different image sizes. -
Page 12: Interactive Touch And Pen Features
About your interactive projector Interactive touch and pen features A computer vision-based SMART touch detection system tracks dual finger touch using an infrared source, as well as dual interactive and synchronized infrared pen, on any reasonably flat surface. This enables you to write or draw digital ink with the interactive pens or with your fingers—up to two at a time. -
Page 13: Optional Accessories
You can connect a single USB cable to the SMART Connect port for an all-in-one audio, video and data connection to your computer using DisplayLink™ technology;... -
Page 15: Chapter 2: Installing Your Interactive Projector
Installing SMART Notebook software Aligning the interactive projector See the printed installation guide and mounting template that came with your LightRaise 60wi interactive projector for information on installing your projector. You can access these documents by visiting the LightRaise support page at smarttech.com/Support. -
Page 16: Choosing A Wall Surface
C H A P T E R 2 Installing your interactive projector Choosing a wall surface Consider the following factors when selecting a wall surface to project your image onto: Select a wall that is straight and flat. All of the lines that you draw to install the interactive projector must be straight and level on a plumb wall. - Page 17 C H A P T E R 2 Installing your interactive projector Install the dry-erase board and the projector straight, level and plumb to the wall. Select a dry-erase board with no bezel or with a bezel thickness of less than 3 mm above the board surface.
-
Page 18: Surface Obstructions
C H A P T E R 2 Installing your interactive projector 3. Repeat the above steps to measure the flatness of the board vertically and diagonally. I M P O R T A N T The overall finger touch performance is strongly influenced by the projection surface flatness. If the distance is less than 5 mm in all directions, optimal finger touch performance will likely be achieved. -
Page 19: Choosing A Location
Choosing a location SMART includes a mounting template with your interactive projector (smarttech.com/kb/170271). Using this template ensures that you can do the following: Determine where to install the projector in relation to the studs in the wall and the size of the projection surface. -
Page 20: Choosing A Height
C H A P T E R 2 Installing your interactive projector Select an area with sufficient clearance to accommodate your interactive projector. For best presentation alignment, mount your interactive projector in a location that’s central to your audience’s viewing direction. Choosing a height The height of your projector depends on the size of the projected image and the available space for it. -
Page 21: Routing The Cables
C H A P T E R 2 Installing your interactive projector 3. Compare your measurements to the chart which appears on page 12 of the SLR 60wi installation guide (smarttech.com/kb/170259), and select a row in the table that is smaller than your available width and height. - Page 22 C H A P T E R 2 Installing your interactive projector 2. Connect all the cables to the projector and let them hang loose. N O T E See Projector connections on the next page for more information. 3. After you’ve connected all the cables, connect the power cable to a power outlet. 4.
-
Page 23: Projector Connections
C H A P T E R 2 Installing your interactive projector Projector connections The following diagram describes the connections available on the projector. N O T E S You can connect a variety of peripheral input devices to your projector, including DVD/Blu- ray™... -
Page 24: Installing Smart Notebook Software
To install SMART software Insert the SMART software DVD that came with your interactive projector, and then follow the on-screen instructions. Aligning the interactive projector After you install SMART Notebook software, you can perform the alignment procedure. This procedure must be completed before you can use the interactive projector. -
Page 25: Chapter 3: Using Your Interactive Projector
How your interactive projector works The LightRaise 60wi interactive projector is a unique finger and pen touch solution. A specially filtered infra-red camera and signal processor, embedded in your interactive projector, can track up to two fingers or two pens simultaneously. The Touch Detection Module (TDM), located immediately under the projector boom, generates a tightly controlled infra-red light beam very close to the surface. -
Page 26: Interacting With Your Computer
C H A P T E R 3 Using your interactive projector Interacting with your computer You interact with your computer by touching the surface with your finger. You can touch the screen to open files, navigate folders and manipulate content. Each touch acts as a left-click. Right-click by touching and holding your finger to the surface for about two seconds. -
Page 27: Adjusting Projector Settings
N O T E Some projector settings aren’t available for all video sources. Setting Notes Image Adjustment menu Display Mode Indicates the projector’s display The default is Bright output (Bright Classroom, Classroom. Dark Classroom, sRGB White, Wall Color, SMART Presentation and User). smarttech.com/kb/170295... - Page 28 C H A P T E R 3 Using your interactive projector Setting Notes Wall Color (displays the Adjusts projector brightness and The default is Blackboard. color’s numeric value) color temperature based on these N O T E wall colors: This is equivalent to a Color 1: Blackboard Whiteboard.
- Page 29 I M P O R T A N T Do not adjust this setting unless advised to by SMART Support. Adjust this setting only after you make all physical image adjustments. V-Position Moves the vertical position of the The default is 0.
- Page 30 C H A P T E R 3 Using your interactive projector Setting Notes Basic Audio Control menu Line Out Turns the audio output jack On or The default is On. Off. Microphone Turns the microphone input jack On The default is On. or Off.
- Page 31 C H A P T E R 3 Using your interactive projector Setting Notes Composite Speaker Enables or disables the Composite input to the internal speaker. Microphone Boost Boost is applied in the Off setting. The default is On (-20 dB). Keep this setting on if your microphone is too sensitive.
- Page 32 0 to 30. Zooming in cuts off the outer edges of the source video. I M P O R T A N T SMART recommends you leave Zoom at the default setting of 0. Adjusting this setting can affect touch function.
- Page 33 C H A P T E R 3 Using your interactive projector Setting Notes Aspect Ratio Adjusts the image output to The default is Match Input. Fill Screen, Match Input or 16:9. Fill Screen produces an image that fills the entire screen by stretching and scaling the source video to match the projector’s native aspect ratio.
- Page 34 Opens the Startup Screen sub- The default is SMART. menu where you can select the This screen displays when the type of startup screen (SMART or projector lamp is starting and a USER), capture an image to use for video source signal isn’t your startup screen and preview the displayed.
- Page 35 This action is irreversible. Don’t adjust this setting unless you want to reset all of the applied settings, or unless you’re advised to by a SMART Support specialist (smarttech.com/contactsupport). Network menu Network and VGA1 out Activates the projector’s VGA1 out...
- Page 36 C H A P T E R 3 Using your interactive projector Setting Notes Displays the projector’s primary domain name number in values between 0.0.0.0 and 255.255.255.255. MAC Address Displays the projector’s MAC address in xx-xx-xx-xx-xx-xx format. Group Name Displays the projector’s workgroup You can set the projector’s name as set by an administrator workgroup name using the...
- Page 37 C H A P T E R 3 Using your interactive projector Setting Notes Projector Information menu Lamp Hours Displays the current number of Always reset the lamp hours lamp usage hours from 0 to 5000 after you replace a lamp, hours from when it was last reset.
-
Page 38: Focusing The Image
C H A P T E R 3 Using your interactive projector Focusing the image To focus the projected image, use the focus ring located on the projector lens. To focus and adjust the image Rotate the focus ring right or left until the image is in focus. Adjusting the image Refer to these notes when adjusting the projected image as described in the included SLR60wi textless installation guide (smarttech.com/kb/170259). -
Page 39: Using Your Interactive Pen
N O T E The center of the image is offset 1.75" to the left from the center of the mounting bracket with a tolerance of ± 2". See the LightRaise 60wi interactive projector installation template (smarttech.com/kb/170271) for more information. -
Page 40: Charging The Interactive Pen
The interactive pen doesn’t write while it’s charging. Writing or drawing with SMART Ink™ When you connect your computer to your SMART interactive product, you can use SMART Ink to write and draw in digital ink over open applications, files, folders, websites and any other open window on your computer. - Page 41 3. Write over an open file, folder or website with the interactive pen. N O T E S SMART Ink remembers the last ink color or tool you selected. When you change the ink color with the interactive pen, it doesn’t change the ink color you set for finger touch.
-
Page 43: Chapter 4: Using The Xcp
You can connect a single USB cable to the SMART Connect port for an all-in-one audio, video and data connection to your computer. The XCP features built-in composite connectors, as well as a... -
Page 44: Connecting The Xcp To The Projector
C H A P T E R 4 Using the XCP Connecting the XCP to the projector The following diagram describes the connectors of the XCP harness cable. smarttech.com/kb/170295... -
Page 45: Xcp Input Connections
See the SLR-XCP projector control quick connect guide (smarttech.com/kb/170431) for more information on how to connect the XCP adapters. SMART Connect port for connecting audio, video and data to your computer with a single USB B cable. RCA composite video input jack and RCA composite audio input and output jacks 4-pin receptacle for third-party room control system Reset button can be pressed using a small object, such as a pencil, to reset the XCP. -
Page 46: Using The Xcpprojector Controls
C H A P T E R 4 Using the XCP Using the XCPprojector controls The following diagram and table describe the basic projector controls you can access from the XCP. Number Control Function Power button Tap the Power button to turn the projector on and off. The button illuminates to indicate the projector status (see Determining projector status on page 56). - Page 47 Depending on which adapter is connected to the XCP, some of the supported input modes vary as follows: If no adapter is connected, the SMART Connect or composite input modes are available. If the optional VGA + USB adapter is connected, the VGA and composite input modes are available.
-
Page 49: Chapter 5: Integrating Other Devices
Chapter 5 Integrating other devices Native video format Video format compatibility HD and SD signal format compatibility Connecting peripheral sources and outputs This chapter provides information on integrating your LightRaise60wi interactive projector with peripheral devices. N O T E The 16:9 on-screen display (OSD) menu setting delivers all video modes with black bands along the top and bottom edges of the screen. - Page 50 N O T E Although other resolutions might work, only the resolutions listed in the table below are supported by SMART. The projector scales the image to fit one of the following aspect ratios: Fill: The full size of the projection area is used.
-
Page 51: Hd And Sd Signal Format Compatibility
C H A P T E R 5 Integrating other devices Resolution Mode Aspect ratio Refresh rate Match input (Hz) appearance 1280 × 1024 SXGA 85 85.024 Pillarbox 1360 x 768 1360 x 768 60 16:9 59.848 Letterbox 1600 × 1200 UXGA Pillarbox 1680 X 1050... -
Page 52: Connecting Peripheral Sources And Outputs
C H A P T E R 5 Integrating other devices Connecting peripheral sources and outputs Follow these instructions if you have a peripheral device to connect to your interactive projector, such as a DVD/Blu-ray player. W A R N I N G Measure the distance between the projector and the peripheral device you want to connect. -
Page 53: Chapter 6: Maintaining Your Interactive Projector
Chapter 6 Maintaining your interactive projector Replacing the remote control battery Replacing the CAT battery Cleaning the projector and accessories When cleaning the projector’s exterior When cleaning the projector’s mirror and lens When cleaning the projector’s accessories Replacing the projector lamp module Resetting the lamp hours This chapter describes how to clean and prevent damage to your interactive projector and also how to replace parts. -
Page 54: Replacing The Cat Battery
C H A P T E R 6 Maintaining your interactive projector Dispose of the exhausted battery and product components in accordance with applicable regulations. To replace the remote control battery 1. Hold down the side release on the left side of the battery holder and pull the battery holder completely out of the remote control. -
Page 55: Cleaning The Projector And Accessories
C H A P T E R 6 Maintaining your interactive projector Cleaning the projector and accessories W A R N I N G Cleaning a wall-mounted projector can result in a fall or injury. Use caution when climbing a ladder, and consider removing the projector from its wall-mounting bracket to clean it. -
Page 56: Replacing The Projector Lamp Module
Thoroughly clean the area around the projector, and discard any edible items placed in that area because they could be contaminated. Call your authorized SMART reseller for instructions. Do not attempt to replace the lamp. Replacing the lamp module in a wall-mounted projector can result in a fall or injury. Use caution when climbing a ladder, and consider removing the projector from the wall-mount bracket to replace the lamp module. - Page 57 Wear protective eyewear while changing the lamp module. Failure to do so can cause injuries including loss of eyesight if the lamp shatters or bursts. Use only replacement lamp modules approved by SMART Technologies. Contact your authorized SMART reseller for replacement parts.
-
Page 58: To Remove Old Lamp Module
C H A P T E R 6 Maintaining your interactive projector To remove the old lamp module 1. If the projector is on and its status light displays solid green, press the Power button twice on the remote control to put the projector into Standby mode. 2. -
Page 59: To Put New Lamp Into Projector
C H A P T E R 6 Maintaining your interactive projector 6. Use the Phillips screwdriver to loosen the captive screw on the lamp module, and disconnect the lamp module’s power plug. Use the handle on the lamp module to gently slide the lamp module out and remove it from the projector. -
Page 60: Resetting The Lamp Hours
C H A P T E R 6 Maintaining your interactive projector To finish the projector lamp module installation 1. Connect the projector power cable to the wall outlet, and then turn on the projector. 2. Press the Power button once on the remote control or XCP to confirm that the projector is operating and that the lamp module is correctly installed. - Page 61 C H A P T E R 6 Maintaining your interactive projector 2. Scroll down to Lamp Hour Reset, and then press OK. Both Lamp Hour values (Standard and Economy) reset to zero. C A U T I O N Do not reset the lamp hours unless you have just replaced the lamp module.
-
Page 63: Chapter 7: Troubleshooting Your Interactive Projector
Determining curtain alignment tool (CAT) status Determining XCP status Projector status light Active input status lights Troubleshooting your SMART product with the Connection Wizard Troubleshooting pen and finger touch issues Interactive pen issues Finger touch issues Touch accuracy and alignment issues... -
Page 64: Determining Projector Status
C H A P T E R 7 Troubleshooting your interactive projector Determining projector status The projector has one status light and one service light. Use the table below to determine the status of the projector. Power Service Projected Status and related troubleshooting light light image... -
Page 65: Determining Touch Status
Normal operating states Solid Full control The Touch USB is connected, and SMART Product Drivers is running. green Flashing Full control The Touch USB is connected, and the default operating system drivers green are running. You might have single touch only, depending on your operating system. -
Page 66: Determining Interactive Pen Status
C H A P T E R 7 Troubleshooting your interactive projector Touch Status and related troubleshooting status interaction light Flashing No touch The TDM is in red laser mode which is used during alignment. Wait three amber/red minutes for the red lasers to turn off. Error states Solid No touch... -
Page 67: Determining Curtain Alignment Tool (Cat) Status
C H A P T E R 7 Troubleshooting your interactive projector Touch interaction Status and related troubleshooting status light None The pen is turned off. Turn the switch to the On position (see Interactive pen components on page 31 for the location of the On/Off switch). -
Page 68: Determining Xcp Status
The XCP has two input status lights. The status light is illuminated next to the active input. Troubleshooting your SMART product with the Connection Wizard SMART Product Drivers enables you to view information about your interactive projector and can help you troubleshoot your interactive projector. To troubleshoot your SMART product with the Connection Wizard 1. - Page 69 If the SMART Settings window indicates your projector is working properly, see Troubleshooting pen and finger touch issues on the next page for more information. 3. Select LightRaise 60wi interactive projector from the SMART products found drop-down list, and then click Next.
-
Page 70: Troubleshooting Pen And Finger Touch Issues
C H A P T E R 7 Troubleshooting your interactive projector 4. Select your troubleshooting issue from the list that appears, and then click Next. 5. Follow the on-screen instructions. Troubleshooting pen and finger touch issues If you’re experiencing issues with finger touch or the interactive pen, you can troubleshoot the following common issues. -
Page 71: Finger Touch Issues
C H A P T E R 7 Troubleshooting your interactive projector Finger touch issues To resolve common finger touch issues, complete the following tasks: N O T E Finger touch is disabled until the alignment process is completed for the first time. Ensure that the current video input corresponds with the Touch setting in the OSD menu (see Touch on page 24) and that the TDM is connected and has a solid green or flashing green status light (see Determining touch status on page 57). -
Page 72: Troubleshooting Image Issues
Use the Connection Wizard to check the status of your projector connection and to troubleshoot your projector (see Troubleshooting your SMART product with the Connection Wizard on page 60). Click the SMART Board icon , and then select Orient to perform an orientation. -
Page 73: Loss Of Signal
5. If your projector still doesn’t show a source signal, contact your authorized SMART reseller. Partial, scrolling or incorrectly displayed image... -
Page 74: Unstable Or Flickering Image
C H A P T E R 7 Troubleshooting your interactive projector To resolve a partial, scrolling or incorrectly displayed image 1. Select Start > Control Panel. 2. Double-click Display. The Display Properties window appears. 3. Click the Settings tab. 4. -
Page 75: Troubleshooting Projector Errors
Ensure that the projection surface is flat and smooth. Troubleshooting projector errors System administrators can resolve the following projector errors on their own prior to contacting SMART Support. Performing initial troubleshooting on your projector will reduce the time of a support call. Your projector stops responding If your projector stops responding, perform the following procedure. -
Page 76: The "Lamp Failure" Message Appears
3. Replace your lamp module as described in Replacing the projector lamp module on page 48. 4. If replacing the lamp module doesn’t resolve the issue, put the projector into Standby mode, disconnect the power cable, and then contact your authorized SMART reseller. The projector Power and Service lights are off If the projector Power and Service lights are both off, one of the following issues is occurring: There was a power outage or a power surge. -
Page 77: Troubleshooting Audio Issues
4. Reconnect the power cable, and then turn on the projector. 5. If the previous steps don’t resolve the issue, disconnect the power cable and then contact your authorized SMART reseller. Troubleshooting audio issues If the audio isn’t working, you can troubleshoot the following common issues. -
Page 78: Locating The Serial Number
Disconnect and connect all of the cables. selection. Locating the serial number The serial number identifies your projector and helps SMART support troubleshoot issues. The serial number is on top of the projector in the location shown below: Accessing the service menu... -
Page 79: Retrieving Your Password
C H A P T E R 7 Troubleshooting your interactive projector Retrieving your password If you forget the projector’s password, you can retrieve it by accessing the projector service menu directly from the projector or from the password settings menu on your projector’s web page (see Password settings on page 77). -
Page 81: Chapter 8: Remotely Managing Your Interactive Projector
Chapter 8 Remotely managing your interactive projector Accessing web page management Home Control panel Network settings E-mail alerts Password settings Simple Network Management Protocol (SNMP) This chapter describes how to manage your interactive projector from a remote location. Accessing web page management Before you can access the remote management web page, you must connect a network cable to your projector and enable the network functions in the on-screen display (OSD) menu (see Adjusting projector settings on page 19). -
Page 82: Home
C H A P T E R 8 Remotely managing your interactive projector Home The Home menu displays basic projector information and enables you to select the OSD language. N O T E You can view basic projector information but you’re unable to change it (with the exception of the OSD language) from the Home menu. -
Page 83: Network Settings
C H A P T E R 8 Remotely managing your interactive projector Submenu setting Description Lamp Mode Adjusts lamp brightness to Standard or Economy. Standard displays a high-quality, bright image. Economy increases the lamp life by decreasing the brightness of the image. Auto Power Off Sets the length of the auto power off countdown timer between 1 and 240 minutes. - Page 84 C H A P T E R 8 Remotely managing your interactive projector Submenu setting Description Gateway Displays or allows you to set the projector’s default network gateway in values between 0.0.0.0 and 255.255.255.255. Displays or allows you to set the projector’s IP address for your network’s primary domain name server in values between 0.0.0.0 and 255.255.255.255.
-
Page 85: E-Mail Alerts
Select the settings you want, and then click Submit. N O T E The projector sends an alert e-mail (SMART Alert) to your e-mail address. Click E-mail Alert Test to confirm that your e-mail address and SMTP server settings are correct by sending a test e-mail (SMART Alert-Test Mail). -
Page 86: Simple Network Management Protocol (Snmp)
C H A P T E R 8 Remotely managing your interactive projector N O T E S The first time you enable the password settings, the default password value is four numbers, for example, 1234. The maximum allowable password length is four numbers or letters. If you forget the projector password, refer to Accessing the service menu on page 70 to set the projector setting to factory defaults. -
Page 87: Chapter 9: Connecting Your Room Control System To Your Interactive Projector
Chapter 9 Connecting your room control system to your interactive projector Serial interface settings Command inventory Value-based command methods Absolute values and adjustment values Video source specification values Power state controls Source selection controls General source controls Additional VGA source controls Audio controls Network controls System controls... - Page 88 I M P O R T A N T There is a 9V signal active on Pin9 when the control panel power is turned on in the on-screen display (OSD) menu and should never be wired to use anything other than SMART approved control panels.
-
Page 89: Command Inventory
C H A P T E R 9 Connecting your room control system to your interactive projector 3. Configure your serial interface settings using the values from the table in the previous section, and then press ENTER. An “invalid cmd= ? for help” message appears, and the > character appears as a command prompt on the following line. -
Page 90: Value-Based Command Methods
C H A P T E R 9 Connecting your room control system to your interactive projector Value-based command methods Absolute values and adjustment values You can use the command’s target range to set an absolute value for a command or cause an adjustment to be made to the current value. -
Page 91: Power State Controls
C H A P T E R 9 Connecting your room control system to your interactive projector See the following examples for adjusting projector brightness of VGA1, regardless whether it’s the current source: >set brightness vga1=65 brightness vga1=65 >set brightness vga1-7 brightness vga1=58 Power state controls These commands put the projector in and out of Standby mode and request the projector’s current... -
Page 92: Source Selection Controls
C H A P T E R 9 Connecting your room control system to your interactive projector Field Description Cooling The projector is cooling. Confirm off Confirm off is a non-selectable power state that is returned during stage one of the two-button Off sequence. Idle The projector is off but still receiving power (Standby mode). -
Page 93: General Source Controls
Standby mode or when the source is disconnected. See Value-based command methods on page 82 for setting absolute and adjustment commands. Command Command target range Response set displaymode [target] =SMART Presentation displaymode=[target] =Bright Classroom =Dark Classroom =sRGB =White Board... -
Page 94: Additional Vga Source Controls
C H A P T E R 9 Connecting your room control system to your interactive projector Command Command target range Response set brightness [value] =0 to =100 brightness=[value] set contrast [value] =0 to =100 contrast=[value] set saturation [value] =0 to =100 saturation=[value] set tint [value] =0 to =100... -
Page 95: Audio Controls
C H A P T E R 9 Connecting your room control system to your interactive projector These commands inform you of the current VGA source settings. Command Response get frequency frequency=[current frequency offset setting] get tracking tracking=[current tracking offset setting] These commands control the appearance of your VGA source. -
Page 96: Network Controls
C H A P T E R 9 Connecting your room control system to your interactive projector Command Command target range Response set micvolume [target] =0 to =40 micvolume=[target] set mute [target] mute=[target] =off set volumecontrol [target] volumecontrol=[target] =off set cc [target] =cc1 cc=[target] =cc2... -
Page 97: System Controls
C H A P T E R 9 Connecting your room control system to your interactive projector Command Response get gateway gateway=[current network gateway] get primarydns primarydns=[current primary domain server] get macaddr macaddr=[current MAC address] These commands control your network settings. Command Command target range Response... - Page 98 C H A P T E R 9 Connecting your room control system to your interactive projector Command Response get startupscreen startupscreen=[current startup screen setting] get resolution resolution=[current input resolution] get language language=[current language setting] get groupname groupname=[current projector group name] get projectorname projectorname=[current projector name] get locationinfo...
- Page 99 =0 to =99 projectorid=[value] set hposition [value] =0 to =100 hposition=[value] set vposition [value] =-5 to =5 vposition=[value] set aspectratio [target] =fill aspectratio=[target] =match =16:9 set projectionmode [target] =front projectionmode=[target] =ceiling =rear =rear ceiling set startupscreen [target] =smart startupscreen=[target] =usercapture =preview smarttech.com/kb/170295...
- Page 100 C H A P T E R 9 Connecting your room control system to your interactive projector Command Command target range Response set language [target] =English language=[target] =Arabic =Czech =German =Greek =English (UK) =Spanish (Spain) =Spanish (Mexico) =French (France) =French (Canada) =Hungarian =Italian =Japan =Malay...
- Page 101 C H A P T E R 9 Connecting your room control system to your interactive projector These commands control the current system settings. These commands are available when the projector is in Standby mode and when it is on. Command Command target range Response...
-
Page 103: Appendix A: Hardware Environmental Compliance
Appendix A Hardware environmental compliance SMART Technologies supports global efforts to ensure that electronic equipment is manufactured, sold and disposed of in a safe and environmentally friendly manner. Waste Electrical and Electronic Equipment and Battery regulations (WEEE and Battery Directives) Electrical and electronic equipment and batteries contain substances that can be harmful to the environment and to human health. - Page 105 Index accessories 5 HDMI connections 75, 84 alarms 75 height 12 aspect ratios 41 audio controlling volume of 87 muting 19, 88 image resolving issues with 64 input selection 84 installation batteries 95 choosing a height 12 choosing a location 11 choosing a surface 7 routing the cables 13 Installing 7...
- Page 106 I N D E X native video formats 41 VGA connections 75, 84, 86 network communication 75, 88 volume control 87 obstructions 11 Wall-mounting kit 5 Wall protrusions 11 WEEE and Battery Directives 95 passwords 71, 77 Pen holder 4 Perchlorate material 95 XCP 23, 37 power 74, 83...
- Page 108 SMART Technologies smarttech.com/support smarttech.com/contactsupport smarttech.com/kb/170295...
Need help?
Do you have a question about the LightRaise 60wi and is the answer not in the manual?
Questions and answers