
Related Manuals for Franke AX937 DXA


Summary of Contents for Franke AX937 DXA
-
Page 1: Table Of Contents
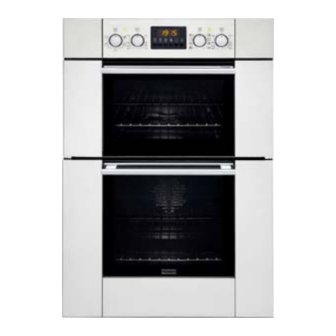
HANDBOOK BUILT-IN MULTIFUNCTION DOUBLE OVE AX937 DXA UPDATED FEBRUARY 2007 CONTENTS: Technical data page 2 TOP oven programme selector knob page 3 Cooking modes bottom oven page 4 Cooking modes top oven page 6 Drawing page 7 Installation page 8... -
Page 2: Technical Data
Technical data Top oven useful dimensions: Power supply voltage and frequency: width 420 mm 230V ~ 50Hz depth 415 mm Total max. power and fuse capacity: height 188 mm Bottom oven useful dimensions: 5.145 kW - 24A Heating element power: roof 1000 W width 440 mm depth 415 mm top oven floor W 800... -
Page 3: Top Oven Programme Selector Knob
Top oven programme selector knob B For selecting the oven mode according to the type of cooking required. When the knob is set to any programme, the oven light comes on indicating that the oven is switched on. The set temperature only refers to the static operation mode. -
Page 4: Cooking Modes Bottom Oven
Set the thermostat knob (E) between 50°C and Max. (260°C).This turns on the circular heating element together with top (roof) and bottom (floor) heating elements and fan. This is the most powerful function available on your Franke oven, and the heat... - Page 5 The grill heating element at the top of the oven switches on. In this case the fast infrared surface cooking keeps the meat tender on the inside; the grill can also be used for quickly toasting up to 9 slices of bread. The Franke oven is designed to grill food with the oven door completely closed.
-
Page 6: Cooking Modes Top Oven
The grill heating element at the top of the oven switches on. In this case the fast infrared surface cooking keeps the meat tender on the inside; the grill can also be used for quickly toasting up to 9 slices of bread. The Franke oven is designed to grill food with the oven door completely closed. -
Page 8: Installation
Fit the appliance in the compartment; fix the oven to the cabinet with the 4 screws provided, using the holes prepared in the side panels. Cabinet requirements For built-in units, the components (plastic materials and veneered wood) must be assembled with heat-resistant adhesives (max.100°C): unsuitable materials and adhesives can result in warpingand ungluing. -
Page 9: Replacing The Oven Lamps
Replacing the oven lamps Franke ovens are equipped with a rectangular side lamps and 2 circular rear lamps. Replace the oven lamp as follows: - switch off the power to the appliance at the omnipolar switch used for connecting it to the electrical system, or disconnect the plug, if accessible;... -
Page 10: Electronic Cooking Programmer
ADVANCED Electronic cooking programmer with bottom oven temperature control Used for programming the bottom oven or its grill in the following modes: • delayed start of cooking with set time; • immediate start of cooking with set time; • timer. •... - Page 11 The flashing symbol on the display indicates the preheating phase, during which the oven has not yet reached the required temperature. Once the set temperature is reached, the oven beeps for two seconds and the symbol stops flashing (steady) to indicate the cooking phase. Immediate start of cooking with set time Assuming cooking for 30 minutes at 200°C Turn the programme selector knob;...
- Page 12 The oven will automatically switch off the heating, the fans will stay on to prevent residual heat, and the lighting remains on for checking cooking. The temperature may remain high for several minutes. To continue cooking manually, press to reactivate heating. The message AUTO disappears, and the symbol will reappear.
-
Page 13: Failures And Error Codes Electronic Programmer
The oven is now programmed and in standby. To check the set duration press the button ; to adjust it operate the buttons - OR + To check the set temperature press a button [-] or + ; to adjust it operate the knob C Cooking phase: On reaching the cooking phase the oven behaves as in point B of the previous paragraph.Except that the cooking duration countdown starts immediately, and not after the required temperature has been reached. -
Page 14: Clearing Programs
Clearing Programs Program times for minute minder or automatic baking can be cleared by "Clear Function”: Press PLUS and MINUS button simultaneously after selecting the program. After this Clear the display returns from adjustment mode immediately. Back counting of program duration to zero. After a zero time value is reached, adjustment mode remains until time window has passed. -
Page 15: General Connection
GENERAL CONNECTION FRANKE ovens are supplied with a three-core power cable with free terminals. If the oven is permanently connected to the power supply, install a device that ensures disconnection from the power supply, with a contact opening distance (at least 3 mm) enabling complete disconnection in category III overvoltage conditions. Make sure:... -
Page 16: List Spare Parts
ID_PRODOTTO SERVICE CODE DESCRIPTION QUANTITY POSITION TECHNICAL NUMBER IN TECHNICAL NOTE 5600243 1992004 HEATER HOLE INSULATOR 5600243 1992639 GASKET 5600243 1992006 OVEN LAMPHOLDER 5600243 1992096 LAMP 5600243 1992094 OVEN LAMP /RECTANGULAR LAMP HOLDER 5600243 1992007 THERMOSTAT SAFETY TY 280° 16A 5600243 1992060 OVEN BACK PANEL 5600243... - Page 17 5600243 1992595 WIRE RACK SIDE LEFT 5600243 1992018 SCREW TSP M5X20 5600243 1992594 WIRE RACK SIDE RIGHT 5600243 1992750 OVEN BACK PANEL 5600243 1992604 TOP DEFLECTOR FOR OVEN CUBE 5600243 1992023 TOP BULKHEAD CASING 5600243 1992025 OUTER CASING 5600243 1992608 SIDE PANEL RIGHT/LEFT 5600243 1992804 LOWER FRAME 5600243...
- Page 18 5600243 1992713 GLASS DOOR+STAINLESS STEEL FRAME 5600243 1992563 RIGHT BRACKET HANDLE HONNER INNER 5600243 1992564 LEFT BRACKET HANDLE HONNER INNER 5600243 1992714 UPPER TRIM 5600243 1992817 DOOR ASSEMBLY UPPER OVEN 5600243 1992818 INTERNAL GLASS 5600243 1992075 RUBBER WASHER NR 10 PCS 5600243 1992043 HANDLE 5600243...
- Page 19 5600243 1992830 PUSH-PULL KNOB SUPPORT 5600243 1992055 OVEN RACK 5600243 1992056 DRIP TRAY BLACK 450X385 MM 5600243 1992144 TELESCOPIC ARMS LEFT 5600243 1992145 TELESCOPIC ARMS RIGHT...
Need help?
Do you have a question about the AX937 DXA and is the answer not in the manual?
Questions and answers