Table of Contents
Advertisement
Advertisement
Table of Contents

Subscribe to Our Youtube Channel
Related Manuals for Euromaid CC9GE1


Summary of Contents for Euromaid CC9GE1
- Page 1 900mm Ceramic Cooktop Manual MODEL CC9GE1 Installation and Operation...
-
Page 2: Table Of Contents
Co ntents Dear Consumer, Thank you for your purchase of our products. To ensure you use the appliance in the best effect, please read this instruction manual with care before the using, and please save it for later learning. The manufacturer declines all responsibility for damage to persons or things caused by non- observance of the above prescriptions or by interference with any part of the appliance or by the use of non-original spares. -
Page 3: Instructions For Proper Use
Inst ruct ion for proper use 1. INSTRUC TIO NS FOR PROPER USE Electrical connection please refer to installation instructions for the gas.& electrical safety regulations and the ventilation requirements. In your own interest, and that of safety, it is the law that all gas and electrical appliances be installed and serviced by competent persons, who will comply with the relevant standards and regulations. -
Page 4: Safety Instructions
Safety instruct ion 2. SAF ETY INSTRUC TIONS Instructions for the installer these are intended for the qualified technician who must install the appliance, set it functioning and carry out an inspection test. It is obligatory for the electrical system to be grounded according to the methods required by safety rules. -
Page 5: Know Your Hob
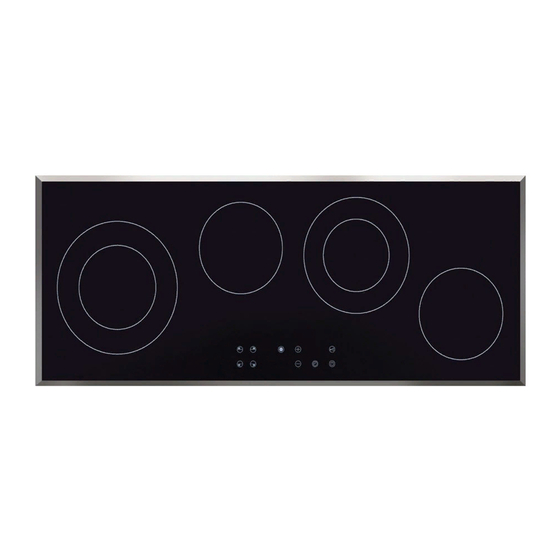
Inst ruct io ns for the user 3. KN OW YOUR HOB C-serial hobs designed in good quality according to the fashion models by modern technology. They are all supposed to spare the long good time together with you, and they will satisfy your life completely. -
Page 6: Cooking Zones
Instruc tions for the user 5. COOKING ZONES... - Page 7 CFMBA311-0/0 CFEN942-0/0 CFMBA311-1/0 A. Single cooking zone 1200W B. Single cooking zone 1800W C. Dual cooking zone 1700/700W D. Dual cooking zone 2200/1000W E. Dual cooking zone 2000/1100W 1 Hob ignition Power & Residual heat warning lights 4 Dual end sensor touch Four ends sensor touch...
-
Page 8: Description Of Control On The Front Control Panel
Ins tructions for the us er 6. DE SCRIPTION OF CONTROL ON THE FRONT CONTROL PANE L All the hob controls are grouped together on the front panel. The table below provides a description of the symbols used. -
Page 9: Use Of The Cooking Hob
Inst ruct io ns for the user 7. USE OF THE COOKING HOB 1. Preparation Please ensure the knob switch or sensor switch is off, than connected to the mains. Using the solid pan with flat bottom, it should satisfy to the request of the standard DIN44094. These diameters for professional pan have been suitable to the electrical hob. - Page 10 Instructions for the user 7.1 Hobs with knobs 7.1.1 Single cooking zones Each knob shows the cooking zone it is for. For example, there is one symbol identifies the knob that controls the rear right-hand cooking zone. To heat, turn the knob to the desired position (low to high). Adjustment is continuous so that the appliance also operates at any intermediate value.
- Page 11 Inst ruct io ns for the user 7.2 Hobs with touch-control buttons When an icon is pressed the unit beeps to confirm. To operate the panel of the hobs equipped with touch-controls, lightly press the icons printed on its surface. On first connection to the electrical mains, an operating check will be carried out automatically and all the indicator lights will come on for a few seconds.
- Page 12 Inst ruct io ns for the user 7.2.8 Timer (on some models only) Some models are equipped with a 1 to 99-minute cooking timer. To use the timed cooking, first set the power level by following the instructions given in paragraphs “7.2.2 Single Cooking Zones”...
- Page 13 Inst ruct io ns for the user 7.2.14 Switching off To switch the hob off, hold down switch key for 1 second; this deactivates all cooking zones even if they are in use or the lock-out function is active, and the hob will turn off completely. If the cooking zones have just been used, will start flashing a few seconds after the hob is turned off to warn that they are still hot.
-
Page 14: Cleaning And Maintenance
Inst ruct io ns for the user 8. CLEAN ING AND MA INTEN A NCE Before any intervention, disconnect the power supply of the device. 8.1 C l e a n i n g the ceramic hob The hob should be regularly cleaned; preferably after every use, once the residual heat warning lights have gone off. -
Page 15: Installation
Inst ruct io ns for the installer 10. INS TALL ATION Before installation Installation and test must be carried out by professional technician. And the hob must be 150mm far away from the wall or anything else. To avoid interference of taking the households when cooking, in the place 300mm from the both sides of the hob must not be put any furniture or separate board. - Page 16 Inst ruct io ns for the installer If the appliance you have purchased is not fitted with a mains power lead a power lead resistant to a temperature of at least 90 °C must be used. Otherwise, the electrical safety of the appliance may be put at risk. The manufacturer declines all responsibility for damage to person s or things caused by non- observance of the above prescriptions or by interference with any part of the applian ce.
- Page 17 Inst ruct io ns for the installer The following operation requires building and/or carpentry work so must be carried out by a competent tradesman. Installation can be carried out on various materials such as masonry, metal, solid wood or plastic laminated wood as long as they are heat resistant (T 90°C). Create an opening with the dimensions shown in the paragraph 10.1 in the top surface of the counter, keeping a minimum distance of 50 mm from the rear edge.
-
Page 18: After Sales Service
The diagrams illustrate the cutting sizes and additional shaping required for the installation hole if you decide to install the hob flush with the work-top surface. The work-top hole and shaping dimensions are purely guideline; it is essential to refer to your actual ceramic hob before making any cuts. After Sales Service 1.
Need help?
Do you have a question about the CC9GE1 and is the answer not in the manual?
Questions and answers