Table of Contents
Advertisement
Advertisement
Table of Contents

Subscribe to Our Youtube Channel
Related Manuals for Mesa/Boogie TriAxis


Summary of Contents for Mesa/Boogie TriAxis
- Page 1 O O G I E Owner's Manual...
- Page 2 Hello from the Tone Farm..You, smart player and all around intuitive human, have put your trust in us to be your amplifier company. This is something we do not take lightly. Our reward is that we've made a classic amplifier and by choosing this amplifier, you have become part of the MESA family...WELCOME! Our goal is to never let you down.
-
Page 3: Table Of Contents
Table of Contents FRONT PANEL: EDITING: PRESETS / PROGRAMS / PARAMETERS __________________________________________________________ 1-2 MAPPING: PRESET / PROGRAM ___________________________________________________________________________ 2 COPY FEATURE / MODE SELECTION _______________________________________________________________________ 3 PROGRAM / CHANNEL WINDOW __________________________________________________________________________ 3-4 CHANGING MIDI CHANNEL _______________________________________________________________________________ 4 DATA DUMP ___________________________________________________________________________________________ 4-5 DEFEAT FACTORY PRESETS / RECALL FACTORY PRESETS __________________________________________________ 5 REAR PANEL: PHANTOM POWER ______________________________________________________________________________________ 6... -
Page 4: Important Safety Instructions
IMPORTANT SAFETY INSTRUCTIONS Read these instructions. Keep these instructions. Heed all warnings. Follow all instructions. Do not use this apparatus near water. Clean only with dry cloth. Do not block any ventilation openings. Install in accordance with the manufacturer’s instructions. Do not install near any heat sources such as radiators, heat registers, stoves, or other apparatus (including amplifiers) that produce heat. - Page 5 AC hum. NOTE: The A.C. power for TriAxis should be derived from the same power strip as that of the power amp in use. Any effects units used should also be plugged into this same strip. This close proximity ON GROUND of A.C.
-
Page 6: Program / Channel Window
FRONT PANEL: (Continued) 1. Press the SHIFT key one time to access the programs. TO ACCESS PROGRAMS (via the numeric keys): 2. Select PROGRAM using nu- meric keys located below GAIN, COPY TREBLE, MIDDLE, BASS, and FLASH SHIFT ENTR LEAD DRIVE windows. PRESET PROGRAM/CHANNEL GAIN... - Page 7 FRONT PANEL: (Continued) COPY FEATURE: To copy one PRESET to another PRESET location: 1. Choose the PRESET you wish to copy. 2. Press the SHIFT key and then press key. This “Source” PRESET now SHIFT COPY FLASH flashes four times. ENTR PRESET PROGRAM/CHANNEL...
-
Page 8: Data Dump
TriAxis memory. NOTE: The manufacture’s system exclusive identification code number for the TriAxis is 00004A. In case you ever need to list your files on a personal computer, this would be a possible title. However, the majority of owners will probably never need this number. -
Page 9: Rear Panel
FRONT PANEL: (Continued) RECEIVE: (Loading) To load all of your previously written sounds and information into the TriAxis, the procedure is very simple! 1. Connect storage medium’s Midi Out jack to the TriAxis Midi IN jack. COPY FLASHES 2. Make sure storage medium is set to transmit the correct information (file) - Page 10 NOTE: 7 -Pin DIN cable will not fit into 5-Pin DIN jacks. Check to see that your foot controller accepts 7-Pin DIN cables and is wired to accept Power in this manner...and of the proper voltage match to TriAxis’ phantom power output.
-
Page 11: Fx Loop:
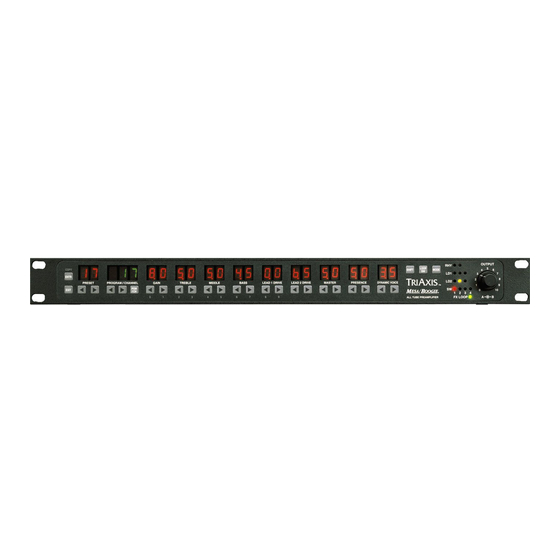
REAR PANEL: (Continued) OUTPUT: These A/B jacks provide two outputs, left and right, for interfacing to power amplifiers or directly to your effects units. MIDI ON/LIFT SWITCH RECORD OUTPUT THRU ON GROUND FX LOOP: These jacks provide a Mono send and Stereo return effects loop configuration. The LOOP is programmable via the LOOP/SWITCH and ENTER keys located on the Font Panel (see illustration below) and its’... - Page 12 BASS GAIN: This is by far the most critical and powerful of the controls in TriAxis. It not only determines the overall gain amount, shape and sensitivity of each mode...but it is sort of a Tone control as well. Generally speaking, whatever is dialed here ultimately determines the mode’s personality.
- Page 13 SECOND: It acts as an effects send control for each mode in the Effects Loop. As with many of the controls in TriAxis, the MASTER best results for balance and tone are usually found in the middle range of this control.
- Page 14 PRESENCE control circuit takes that idea a few steps further. When you’re “going off” on the treble strings in a solo and you go for an expressive bend and lay hard into the note...TriAxis works with you! If you picked the note hard with the PRESENCE control set low, that note would become bigger, rounder and more compressed.
- Page 15 However, don’t let this dedication prevent you from experimenting with the DYNAMIC VOICE, as you will find it an enhancement in virtually all of TriAxis’ 8 modes. We just wanted you to understand our thinking on this - in order to know best where to use the DYNAMIC VOICE and how much to use it, to obtain the best overall results from this intuitive equalizer circuit.
- Page 16 Two of them are Bass players and one is an acoustic player that uses his TriAxis for acoustic guitar sound reinforcement. Hopefully this will tell you that in the three and a half years of R&D time spent on TriAxis, we absorbed it and came up with the curve that seemed to cover most all the bases.
- Page 17 THE MODES The architecture of TriAxis, though vast, is quite simple. Its’ eight pre-amp circuits, or modes as we refer to them, are laid out in three distinct groups. These are Rhythm, LEAD 1 and LEAD 2. Each of these groups consists of pre-amp circuits that share similar circuit architecture, parts, and pre-amp tube stages.However, each mode has unique and specific “bones”...
- Page 18 For a real treat, see the Version 2.0 section later in this manual and program in the great Cranked Vintage Sound that we have laid in as an example of TriAxis’ versatility. This is the easiest way to demo the wide range of possibilities that this mode can produce as you sweep an expression pedal from a sweet, pristine, clean sound, up through the more pushed driving range, to the howling solo sound we just mentioned.
- Page 19 THE MODES: (Continued) Like Green, Yellow Rhythm includes a dynamic bright circuit that transforms the GAIN control into an additional tone control. Again, like Green, the lower the GAIN control is set, the more top-end harmonics are allowed to pass freely. The higher it is set, the less highs are allowed to pass and more lows and mids replace these as the dominant frequencies.
- Page 20 LEAD MODES LD 1: This group of three modes is probably the older, more tradition based of the Lead Modes in TriAxis. They all have one thing in common and that is all three are what is referred to in amp freak circles as pre-tone-control gain circuits. This means the boosting of gain by progressively “slamming”...
- Page 21 Fourteen years and several generations later, TriAxis obviously brings this idea to its’ fruition. To this day this revolutionary circuit remains the sonic backbone of our amplifier design concept.
- Page 22 LEAD MODES: (Continued) for inaccurate playing. We like to think of these modes as having the built in qualities of a good teacher. What you put in is what you get out. However, should you spend much time at all plugged into these modes, we guarantee you will become a master of nuance. These modes are sure to make you a better player if you give them the chance.
- Page 23 TriAxis and a MESA High Gain Amplifier Switch.( see rear of this manual) Use one TriAxis in LEAD 2 Red and another TriAxis in LEAD 1 Red, then blend the two by turning them both on at once! CRAZY? Don’t laugh...you’d be surprised at the number of guys using two TriAxis’...
- Page 24 LEAD MODES: (Continued) MODES OVERVIEW Now that you’ve read about each mode in depth, you should be more familiar with them and able to choose the appropriate one for your particular style and sound of music. For quick referencing, the names of the modes should be of help to you. REMEMBER...
- Page 25 Since the TriAxis is an all tube audio device, we have done the control change software the only way possible to keep your tone intact.
- Page 26 ”VALUE” is simply the amount of change in either a positive or negative direction. A “positive” or “ + “ VALUE on the TriAxis is “turning up” the control. A “negative” or “ - “ VALUE is “turning down” the control. This is programmed by the left &...
- Page 27 CONTROLLER ASSIGN SUB - ROUTINE: (Continued) STEP 2: Choose a Parameter. Press any left or right arrowed key under a parameter display and you will see the correspond- ing display window begin to flash. For now (because you are most likely dealing with a new unit that has never been programmed) all the parameters are set to Controller 00 (PROGRAM/CHANNEL window).
- Page 28 Value of “ 04 “ in the negative direction the Program Window would display 104 . 8. REMEMBER THE HALF POSITIONS. The TriAxis has half position parameter values between 3.0 and 8.0. Remember to count these when entering your modulation values.
- Page 29 VALUES OF CHANGE: SUB-ROUTINE (Continued) Assign a Value. Start with the first parameter that you assigned a controller to, “TRUST US ON THIS ONE”. Press either STEP 2: the left or right arrowed keys under this parameter. It will start to flash! Now Use the keys under the Program/Channel window to Decrease or Increase the parameter’s maximum modulated VALUE.
- Page 30 Mindblowing! Just watching the display windows changing is worth all you coughed up for this baby, isn’t it? What did you say ? you aren’t getting anything cool...Let us help. First...Make sure you read this whole section carefully and thoroughly. Second...Here is an example of what you can do with the control change software.
-
Page 31: Front Panel
TUBE LAYOUT and TASKS INSTRUMENT INPUT Back Panel of TriAxis MESA MESA MESA MESA MESA 12AX7A 12AX7A 12AX7A 12AX7A 12AX7A V1 V2 ALL TUBES 12AX7A LEFT RIGHT SIDE SIDE Front Panel TriAxis Top View TUBE ASSIGNMENT DIMENSIONS SPECIFICATIONS V1 = LEAD 1 INPUT WEIGHT: 9.5 pounds... -
Page 32: Power Amp
CABLE STEREO SIMUL - CLASS 2: NINETY SPEAKERS INPUTS 8 OHMS INPUT LEVEL MODERN 4 OHMS DEEP HALF 4 OHMS EXTEND DRIVE UN-SHIELDED CABLE NOTE: BASIC HOOK-UP OF TRIAXIS AND STEREO SIMUL CLASS 2 : NINETY POWER AMP. PAGE 28... - Page 33 SUGGESTED WIRING #2 SHIELDED CABLE 7-PIN MIDI FOOT-CONTROLLER ON/LIFT SWITCH RECORD OUTPUT RETURN FX LOOP MIDI THRU SEND INST INPUT ON GROUND SHIELDED CABLE SHIELDED CABLE STEREO (MONO) MULTI EFFECTS UNIT SHIELDED CABLE IN MIDI OUT OUTPUT INPUT (MON0) AC POWER SHIELDED CABLE STEREO SIMUL - CLASS 2: NINETY SPEAKERS...
- Page 34 SUGGESTED WIRING #3 MIDI FOOT-CONTROLLER 7-PIN SHIELDED CABLE GUITAR TUNER ON/LIFT MIDI SWITCH RECORD OUTPUT RETURN FX LOOP THRU SEND INST INPUT ON GROUND SHIELDED CABLE SHIELDED CABLE STEREO (MONO) MULTI EFFECTS UNIT IN MIDI OUT OUTPUT INPUT (MON0) AC POWER SHIELDED CABLE STEREO SIMUL - CLASS 2: NINETY...
- Page 35 SUGGESTED WIRING #4 GUITAR MIDI FOOT-CONTROLLER TUNER 7-PIN SHIELDED CABLE ON/LIFT MIDI SWITCH RECORD OUTPUT RETURN FX LOOP THRU SEND INST INPUT ON GROUND "Y" CABLE SHIELDED SHIELDED CABLE CABLE CHANNEL A CHANNEL B IN MIDI OUT STEREO (MONO) COMPRESSOR/LIMITER SHIELDED CABLE OUTPUT...
- Page 36 SUGGESTED WIRING #5 GUITAR MIDI FOOT-CONTROLLER TUNER 7-PIN SHIELDED CABLE ON/LIFT MIDI SWITCH RECORD OUTPUT RETURN FX LOOP THRU SEND INST INPUT ON GROUND SHIELDED CABLE "Y" CABLE SHIELDED SHIELDED CABLE CABLE CHANNEL A CHANNEL B IN MIDI OUT STEREO (MONO) COMPRESSOR/LIMITER SHIELDED CABLE OUTPUT INPUT...
- Page 37 HALF 4 OHMS EXTEND DRIVE STEREO SIMUL - CLASS 2: NINETY UN-SHIELDED CABLE NOTE: USE OF TRIAXIS IN LINE WITH RECORDER AND MIXING CONSOLE. 1 X 12 Extension Cab 1 X 12 Extension Cab 8 Ohms 8 Ohms PAGE 33...
- Page 38 SHIELDED CABLE CHANNEL A CHANNEL B MIDI IN MIDI OUT OF F.S. WITH 5-PIN CABLE MIDI CONTROLLER MIDI OUT (MONO) AC POWER ADAPTER FROM TRIAXIS OUTPUT SHIELDED CABLE FROM TRIAXIS OUTPUT SPEAKERS INPUTS UN-SHIELDED CABLE 8 OHMS INPUT LEVEL MODERN...
-
Page 39: Stereo Delay
SUGGESTED WIRING #8 ON/LIFT MIDI SWITCH RECORD OUTPUT RETURN FX LOOP THRU SEND INST INPUT ON GROUND SHIELDED CABLE SHIELDED SHIELDED CABLE CABLE STEREO CHORUS SHIELDED CABLE SHIELDED CABLE STEREO COMPRESSOR DELAY SPEAKERS INPUTS UN-SHIELDED CABLE 8 OHMS INPUT LEVEL MODERN 4 OHMS DEEP... - Page 40 FACTORY PRESET LIST & SETTINGS 1 THRU 5 FACTORY PRESET 01 MODE: PICKUP Classic British Lead / Solo Sound Lead 1 Red Rear Humbuck PROGRAM / CHANNEL GAIN TREBLE MIDDLE BASS LEAD 1 DRIVE LEAD 2 DRIVE MASTER PRESENCE DYNAMIC VOICE FACTORY PRESET 02 MODE: PICKUP...
- Page 41 FACTORY PRESET LIST & SETTINGS 6 THRU 10 FACTORY PRESET 06 MODE: PICKUP Vintage Amp Cranked Rhy Green Neck Style PROGRAM / CHANNEL GAIN TREBLE MIDDLE BASS LEAD 1 DRIVE LEAD 2 DRIVE MASTER PRESENCE DYNAMIC VOICE Neck Humbuck FACTORY PRESET 07 MODE: PICKUP Bluesy Mk 1 Lead...
-
Page 42: Personal Settings
PERSONAL SETTING SHEET PERSONAL SET 1 MODE: PICKUP DYNAMIC VOICE GAIN TREBLE MIDDLE BASS LEAD 1 DRIVE LEAD 2 DRIVE MASTER PRESENCE PROGRAM / CHANNEL PERSONAL SET 2 MODE: PICKUP DYNAMIC VOICE GAIN TREBLE MIDDLE BASS LEAD 1 DRIVE LEAD 2 DRIVE MASTER PRESENCE PROGRAM / CHANNEL... - Page 43 PERSONAL SETTING SHEET PERSONAL SET 1 MODE: PICKUP DYNAMIC VOICE GAIN TREBLE MIDDLE BASS LEAD 1 DRIVE LEAD 2 DRIVE MASTER PRESENCE PROGRAM / CHANNEL PERSONAL SET 2 MODE: PICKUP DYNAMIC VOICE GAIN TREBLE MIDDLE BASS LEAD 1 DRIVE LEAD 2 DRIVE MASTER PRESENCE PROGRAM / CHANNEL...
- Page 44 PAGE 40...
- Page 45 O O G I E This manual is meant to get you TONE with the least amount of reading and yet guide you with enough information to become a genuine tweakmaster. We are aware that some players will want even more technical info to wade through. We thought we would save the rest of you hours that might be better spent playing music.
- Page 46 The Spirit of Art in Technology (707) 778-6565 FAX NO. (707) 765-1503 1317 Ross Street Petaluma, CA 94954 10/07/09...
Need help?
Do you have a question about the TriAxis and is the answer not in the manual?
Questions and answers