
Related Manuals for Citizen JR10-M01


Summary of Contents for Citizen JR10-M01
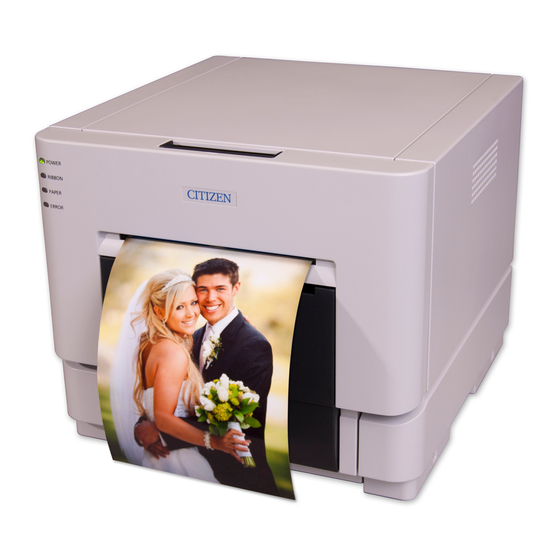
- Page 1 User’s Manual Version 1.00...
- Page 2 ●Concerning Copyright The copyrights for this document are the property of CITIZEN SYSTEMS JAPAN Co.,Ltd. Reproduction of any or all of the contents of this document without consent of the company is a violation of copyright law. However, one back-up copy may be made for non-commercial, personal purposes.
-
Page 3: Introduction
Introduction Thank you for purchasing this device. This document explains the handling and operation required to use this printer. Please read this document well before use. Be sure to read “For Safe Operation” (Pg 2-4), and operate the printer correctly. For Safe Operation ・... - Page 4 WARNING ・ Use only with the designated voltage and frequency. Improper connection could cause electric shock or fire. ・ Avoid overstressing outlets and using extension cords. The outlet could overheat and cause a fire. ・ Do not damage, destroy, bundle, or alter the power cord. Also, placing heavy objects on, pulling on, or bending the cord excessively can damage it, and could cause a fire.
- Page 5 CAUTION ・ Do not set the printer up in dusty or overly humid places. This could cause fire or electric shock, or damage the printer. ・ Do not set the printer up on an unstable surface. It could fall and cause injury to the user or others. ・...
-
Page 6: Cautions For Set-Up
Cautions for Set-up Prior to operation, read “For Safe Operation” carefully and observe the rules therein. ・ Use care when moving the printer. Never try carrying the printer alone. ・ Dropping it could cause injury or damage to other property. Do not use or store the printer near fire, excessive moisture, in direct sunlight, near an air ・... -
Page 7: Regulatory Compliance Statements
Regulatory compliance statements American users FCC part 15 This equipment has been tested and found to comply with the limits for a Class A digital device, pursuant to Part 15 of the FCC Rules. These limits are designed to provide reasonable protection against harmful interference when the equipment is operated in a commercial environment. -
Page 8: Declaration Of Conformity
Declaration of Conformity European users Hereby, CITIZEN SYSTEMS JAPAN Co.,Ltd., declares that this digital color printer is in compliance with the essential requirements and other relevant provisions of Direc tive 1999/5/EC. -
Page 9: Table Of Contents
Table of Contents Introduction・・・・・・・・・・・・・・・・・・・・・・・・・・・・・ 2 For Safe Operation・・・・・・・・・・・・・・・・・・・・・・・・・・ 2 Cautions for Set-up ・・・・・・・・・・・・・・・・・・・・・・・・・・ 5 Regulatory compliance statements ・・・・・・・・・・・・・・・・・・・・ 6 Declaration of Conformity ・・・・・・・・・・・・・・・・・・・・・・・7 Table of Contents ・・・・・・・・・・・・・・・・・・・・・・・・・・ 8 Setting Up the Printer Checking the Contents ・・・・・・・・・・・・・・・・・・・・・・・ 9 Names of Components・・・・・・・・・・・・・・・・・・・・・・・・ 10 Connecting・・・・・・・・・・・・・・・・・・・・・・・・・・・・... -
Page 10: Setting Up The Printer
Setting Up the Printer Checking the Contents Please check that the printer and all accessories are included in the package. Paper Holder Scrap Box Printer Unit Power Cord (*) Paper Tray (*) CD (*) For Safe Operation (*) User’s Manual Start-up Guide (*) Printer Driver (*) mark accessories may not be contained by the destination. -
Page 11: Names Of Components
Setting Up the Printer Names of Components [Front of Unit] Open Lever Print Feed Out Thermal print head Scrap Box Platen Roller [Back of Unit] USB port Ventilation [Side of Unit] Power Switch Power Plug Socket Ventilation CAUTION ・ Please be careful not to hurt yourself or damage anything on the edges of the printer. -
Page 12: Connecting
Setting Up the Printer Connecting 1. Make sure that both the printer and computer power switches are set to the OFF position. 2. Plug the cord connector end into the printer Power Plug Socket. 3. Plug the cord into the wall outlet. 4. -
Page 13: Paper, Ribbon
Setting Up the Printer Paper, Ribbon Type L (5x3.5), 2L (5x7) PC (6x4), A5 (6x8) Paper Width: 127mm Width: 152mm Ribbon Width: 134mm Width: 159mm CAUTION ・ Set the paper and ribbon without putting them directly on the work surface. Any dust or dirt could get inside the printer and adversely affect the print quality. -
Page 14: Setting The Media
Setting Up the Printer Setting the Media 1. Release the Open Lever, and open the front cover. Open Lever 2. Set the paper to the paper holder. When setting it, make sure there are no gaps between the paper and the holder. Make sure the paper is not sticking out. - Page 15 Setting Up the Printer 4. Remove a paper fixed tape, and Insert the paper. Position of form insertion 1 5. Fit the paper to the proper position for each size. L size and 2L size correspond to the line of L, and PC size and A5 size correspond to the line of PC. 6.
- Page 16 Setting Up the Printer 7. Set the ribbon into the printer. Unite and insert the position of the shape of a concave and convex form of an attachment and a holder. Turn the take-up side of the ribbon in the direction indicated by the arrow to take up slack. Take Up side Supply side Ribbon winding direction...
-
Page 17: Setting The Scrap Box
Setting Up the Printer Setting the Scrap Box CAUTION ・ When the scrap box is removed, do not insert your fingers in the cutter at the top. They could be cut or severed. ・ As prints are cut, the scrap box fills with scrap paper. Be sure to empty it when you change the paper and ribbon. -
Page 18: Trouble-Shooting
Trouble-shooting Error Displays The flashing LED indicates the printer status LED display Status Solution Power Ribbon Paper Error Paper End ● Put in a new roll of paper Ribbon End Put in a new roll of ribbon ● Door is Open Set the paper properly and close the front cover ●... -
Page 19: Solving Media Errors
Trouble-shooting Solving Media Errors 1. Release the Open Lever, and open the front cover. 2. Remove the ribbon. a. If the paper is jammed: 1. Pull out any paper remaining in the printer, and cut off any wrinkled or partially printed areas evenly with scissors. - Page 20 Trouble-shooting b. If the ribbon is cut: Remove any ribbon remaining in the printer. 2. Remove any incomplete prints. If the next image is printed over the previous image, the ribbon may stick, and it may cause the paper to jam. Reattach the ribbon with cellophane (or similar) tape.
- Page 21 Trouble-shooting c. If the printer is stopped in the middle of cutting: 1. Turn the power back ON. Free the jammed paper, and return the cutter blade to its ready position. If the jammed paper cannot be freed, please contact a service representative. 2.
-
Page 22: Cleaning
Cleaning Platen Roller If there is an indent on the pictures at a regular interval, or if the back of the picture (white side) is dirty, clean the platen roller. There may be dust, grime, adhesives, etc. from the ribbon or paper on the platen roller. 1. -
Page 23: Specifications
Specifications Model JR10-M01 Manufacturer CITIZEN SYSTEMS JAPAN CO., LTD. Print type Thermal dye sublimation transfer Print mode High-speed mode High quality mode Resolution 300 x 300dpi 300 x 600dpi L (5x3.5) 89 x 127mm PC (6x4) 101 x 152mm Print size... - Page 24 For information on use and repair service of the units, please contact your sales agent. Citizen Systems Japan Co., Ltd. http://www.citizen-systems.co.jp 6-1-12, Tanashi-cho, Nishi-Tokyo-shi Tokyo, 188-8511. Japan Tel: +81 (0) 424 68 4608 CITIZEN is a registered trademark of Citizen Holdings Co., Japan.
Need help?
Do you have a question about the JR10-M01 and is the answer not in the manual?
Questions and answers