Sign In
Upload
Download
Table of Contents
Contents
Add to my manuals
Delete from my manuals
Share
URL of this page:
HTML Link:
Bookmark this page
Add
Manual will be automatically added to "My Manuals"
Print this page
×
Bookmark added
×
Added to my manuals
Manuals
Brands
Citizen Manuals
Printer
Swift 90
User manual
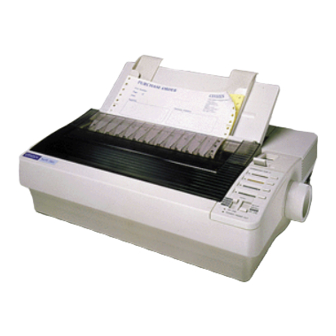
Citizen Swift 90 User Manual
Swift series user's manual
Hide thumbs
Also See for Citizen Swift 90
:
Specifications
(4 pages)
1
Table Of Contents
2
3
4
5
6
7
8
9
10
11
12
13
14
15
16
17
18
19
20
21
22
23
24
25
26
27
28
29
30
31
32
33
34
35
36
37
38
39
40
41
42
43
44
page
of
44
Go
/
44
Contents
Table of Contents
Bookmarks
Table of Contents
Table of Contents
Product Warranty
User Safety Instructions
About this Printer Manual
Introduction
For the Latest Information
Http://Www.citizen.co.uk
What to Do if You Have Problems
Chapter 1
Unpacking and Assembling Your Printer
Unpacking the Printer
Finding a Suitable Location
Getting to Know Your Printer
Printer Components
Assembling the Printer
Installing the Ribbon
Connecting to Your Computer
Installing the Power Cable
Chapter 2
Paper Handling and Loading
Paper Types
Installing the Tractor Unit
Installing the Tractor in the Push Position
Installing the Tractor Unit in the Pull Position
Setting the Paper Thickness
Adjusting the Paper Thickness Lever
Setting the Paper Select Lever
Paper Handling Summary Chart
Printing on Continuous Paper
Printing on Single Sheets
Printing on Multi-Part Forms
Printing on Continuous Feed Labels
Printing on Envelopes
Printing on Overhead Transparencies
Special Paper Handling Features
Paper Parking
Paper Tear off
Top of Form Fine Adjustment - VTOP
Chapter 3
The Control Panel
Basic Operations
Changing the Appearance of Text (the Mode Menu Groups)
Changing the Font
Changing the Text Pitch
Changing the Style of Printing
Power-On Settings
Making a Print out of the Printer's Default Settings
Changing the Default Settings
Menu Mode
Menu Functions
The Install Menu Group
Tear-Off Postition Adjustments
Printer Self-Tests
Factory Default Settings
The Buffer Memory
Chapter 4
Setting up Your Printer to Work with Your Software
Microsoft Windows
IBM Pcs or Compatibles
Choosing a Suitable Emulation
Codepages - International Characters
Euro Currency Symbol
Chapter 5
Maintenance and Fault Finding
Problems and Solutions
Error Messages and Their Causes
Chapter 6
Printer Accessories
RAM Modules
Automatic Sheet Feeder
Installing the Automatic Sheet Feeder
ASF Specification
Changing between Continuous Forms and Single Sheets
The Colour Kit
Using the Colour Kit
The Printer Stand
The Serial Interface
Chapter 7
Specifications for each Printer
General Specifications
Advertisement
Quick Links
1
Connecting to Your Computer
2
Installing the Ribbon
3
Specifications for each Printer
Download this manual
User's Manual
Swift 90, Swift 120D and Swift 90x
Swift 240+ and Swift 240x
Swift 330+ and Swift 330x
1
Table of
Contents
Previous
Page
Next
Page
1
2
3
4
5
Advertisement
Table of Contents
Need help?
Do you have a question about the Citizen Swift 90 and is the answer not in the manual?
Ask a question
Questions and answers
Related Manuals for Citizen Citizen Swift 90
Printer Citizen Swift 90 Specifications
Swift range impact dot matrix printer (4 pages)
Printer Citizen printers Specifications
Citizen systems user manual printer printer (2 pages)
Printer Citizen CT-S4000DCL User Manual
Line thermal printer (38 pages)
Printer Citizen Swift 240+ User Manual
Swift series user's manual (44 pages)
Printer Citizen Citizen CLP 6001 CLP-6001 CLP-6001 User Manual
Citizen printer user's manual (81 pages)
Printer Citizen Citizen CMP-10 User Manual
Citizen systems mobile thermal printer user's manual (41 pages)
Printer Citizen Citizen CT-S300 User Manual
Citizen systems line thermal printer user's manual ct-s300 (32 pages)
Printer Citizen Citizen PD 24 PD-24 PD-24 User Manual
Citizen systems handy printer user's manual (56 pages)
Printer Citizen Citizen PD 22 PD-22 PD-22 Command Reference Manual
Citizen systems printer command reference manual (100 pages)
Printer Citizen Swift 120D User Manual
Swift series user's manual (44 pages)
Printer Citizen Citizen CLP 8301 CLP-8301 CLP-8301 User Manual
Barcode label printer (80 pages)
Printer Citizen 500 User Manual
Citizen systems user's manual printer 500 (32 pages)
Printer Citizen CBM-231 User Manual
Citizen systems line thermal printer user's manual (64 pages)
Printer Citizen CBM-270 User Manual
Citizen systems user's manual line thermal printer cbm-270 (112 pages)
Printer Citizen CBM-720 User Manual
Citizen dot matrix printer user's manual (58 pages)
Printer Citizen CBM-710/720 Service Manual
Citizen systems mini dot matrix printer user's manual cbm-710/720 (69 pages)
This manual is also suitable for:
Swift 120d
Swift 240+
Swift 240x
Swift 330x
Swift 90x
Swift 330+
Table of Contents
Print
Rename the bookmark
Delete bookmark?
Delete from my manuals?
Login
Sign In
OR
Sign in with Facebook
Sign in with Google
Upload manual
Upload from disk
Upload from URL


Need help?
Do you have a question about the Citizen Swift 90 and is the answer not in the manual?
Questions and answers