
Related Manuals for Zephyr Genova ZGE-E36AS290


Summary of Contents for Zephyr Genova ZGE-E36AS290
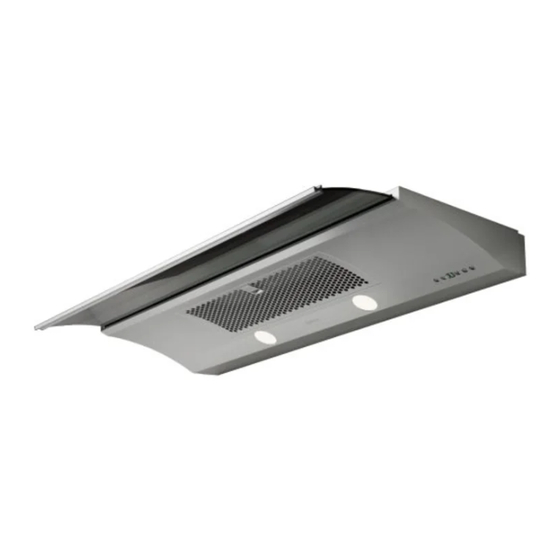
- Page 1 Genova ZGE-E30AS ZGE-E36AS ZGE-E30AS290 ZGE-E36AS290 Model number: Serial Number: JUL11.0301 © Zephyr Corporation...
- Page 2 www.zephyronline.com...
-
Page 3: Table Of Contents
SAFETY NOTICE ..............LIST OF MATERIALS ............INSTALLATION Ducting Calculation Sheet ........Mounting Height & Clearance ........ Ducting Options ............Hood Specifi cations ........... Preparing the Cabinet ..........Installing the Hood 10 - 12 ............Ductless Recirculation ..........FEATURES & CONTROLS Touch Controls 14-15 .............. - Page 4 www.zephyronline.com READ AND SAVE THESE INSTRUCTIONS WARNING TO REDUCE THE RISK OF FIRE OR ELECTRIC SHOCK, DO NOT USE THIS FAN WITH ANY SOLID-STATE CONTROL DEVICE. WARNING TO REDUCE THE RISK OF FIRE ELECTRIC SHOCK, OR INJURY TO PERSONS, OBSERVE THE FOLLOWING: a.
- Page 5 WARNING TO REDUCE THE RISK OF FIRE, USE ONLY METAL DUCTWORK. CAUTION To reduce risk of fi re and to properly exhaust air outside - Do not vent exhaust air into spaces within walls, ceilings, attics, crawl spaces or garages. Hood not intended for installation over an outdoor grill. OPERATION Always leave safety grilles and fi...
-
Page 6: Installation
www.zephyronline.com MODELS: ZGE-E30AS, ZGE-E30AS290, ZGE-E36AS, ZGE-E36AS290 PARTS SUPPLIED (1) 6” round damper (pre-installed) (1) hood body with sliding glass (2) upper installation brackets (2) lower installation brackets (1) filler panel (pre-installed) (2) halogen lights, GU-10 50W (1) decorative mesh filter (1) hardware package HARDWARE PACKAGE CONTENTS (4) 3/16 x 3/8”... - Page 7 Equivalent number Equivalent number Duct pieces Duct pieces length x used T otal length x used T otal 3- 1/ 4” x 10” 1 Ft. 6”- 8” Round 30 Ft. Rect., wall cap straight with damper 7” Round, 1 Ft. 6”- 8”...
- Page 8 www.zephyronline.com Mounting height from top of cooking surface to bottom of hood should be no less than 24” and no more than 32”. It is important to install the hood at the proper mounting height. Hoods mounted too low could result in heat damage and fi...
-
Page 9: Ducting Options
WARNING FIRE HAZARD NEVER exhaust air or terminate duct work into spaces between walls, crawl spaces, ceiling, attics or garages. All exhaust must be ducted to the outside, unless using the recirculating option. Use single wall rigid Metal ductwork only. Fasten all connections with sheet metal screws and tape all joints w/ certifi... - Page 10 www.zephyronline.com front of hood side of hood 2 " 16 " 242mm 500mm 16 " 8 " 6 " 4 " 760mm 912mm 153mm 286mm 4 " 8 " 35mm top of hood 16 " 180mm junction box blower outlet...
- Page 11 7” ” 7/8” Fig.1 front edge glass handle Fig.2 1. Determine and mark center line on wall and cabinet bottom with a pencil. 2. If the cabinet bottom is recessed, wood blocking must be installed to ensure proper alignment of the hood with the cabinet bottom. Wood blocking should be fl ush within cabinet bottom.
- Page 12 www.zephyronline.com WARNING: Electrical wiring must be done by a qualified person(s) in accordance with all applicable codes and standards. This range hood must be properly grounded. Turn off electrical power at service entrance before wiring. 1) Prepare electrical wiring and ducting in cabinet. Location of junction box and blower outlet can be found on page 8. Fig.3 Fig.4 2) Unscrew the (10) screws from front panel and place...
-
Page 13: Hood Specifi Cations
Fig.7 Fig.8 6) Place lower installation brackets under upper installation 7) From inside the hood, secure (1) M4x8 screw into brackets located on left and right sides of hood body, each lower installation bracket. The position of this Fig.7. Note: The wider portion of the lower installation screw is adjustable to accomodate various cabinet bracket should be at the bottom. - Page 14 www.zephyronline.com Fig.11 Fig.12A 10) Place 6” round ducting over blower collar and secure 11) Secure (2) 1” wood screws (A) into the screw holes on with aluminum duct tape. If using hood in ductless the left and right sides of the fi lter opening. This will secure recirculating mode turn to page 13.
-
Page 15: Ductless Recirculation
Ductless recirculation is intended for applications where an exhaust duct work is not possible to be installed. When converted, the hood functions as a recirculating hood rather than an exhaust hood. Fumes and exhaust from cooking are drawn and fi ltered by an optional charcoal fi lter. The air is then purifi ed and recirculated back within the home. -
Page 16: Lights
www.zephyronline.com Display (speed level, delay of f, filter clean/replace) Blower On/Off Lights Normal/Dim/Off Speed Selection 5 Min Delay Off NOTE: Blower and lights will automatically shut off when the glass is closed. The hood also has a built in memory function that will automatically turn the blower and lights on at the last setting when the glass is pulled open. - Page 17 When the display starts flashing, the charcoal filter display < C > flashes needs to be replaced. Purchase replacement charcoal filters from Zephyr. Re-setting Function To Reset After charcoal filter is replaced, with hood off, press and hold 5 sec. display from < C > to < >...
-
Page 18: Maintenance
The RF remote control is equipped with a magnet for easy storage. The remote may be placed on any magnetic surface such as a refrigerator or the Zephyr remote holder. Maximum remote control communication distance from power pack is 15 feet. - Page 19 SURFACE MAINTENANCE: Periodically clean with hot soapy water and clean cotton cloth. Do not use corrosive or abrasive detergent steel wool or scouring pads which will scratch and damage surface. For heavier soil use liquid degreaser. After cleaning it is recommended that you use non-abrasive stainless steel polish/cleaners to polish and buff out the stainless luster and grain.
- Page 20 Replacement bulbs are available at specialty lighting stores. Purchase type (MR16) GU-10 50W halogen. For Zephyr part numbers please turn to page 21 of the manual.
- Page 21 370W 270W...
-
Page 22: Troubleshooting
www.zephyronline.com TROUBLESHOOTING PROCEDURES FOR GENOVA Issue Cause What to do After installation, 1. The power source is not turned ON. 1. Make sure the circuit breaker and the unit’s the unit doesn’t power is ON. work. 2. The power line and the cable locking connector 2. - Page 23 DESCRIPTION PART# Replacement Parts Light Bulb GU10 50W (each) Z0B0020 Decorative Mesh Filter 50200036 Optional Accessories Recirculating Kit ZRC-00GE Replacement Charcoal Filter (each) Z0F-C0GE RF Remote Control 14000005 To order parts, visit us online at http://store.zephyronline.com or call us at 1.888.880.8368...
- Page 24 Zephyr Corporation (referred to herein as “we” or “us”) warrants to the original consumer purchaser (referred to herein as “you” or “your”) of Zephyr products (the “Products”) that such Products will be free from defects in materials or work- manship as follows: Three Year Limited Warranty for Parts: For three years from the date of your original purchase of the Products, we will provide, free of charge, Products or parts to replace those that failed due to manufacturing defects.
- Page 25 Genova ZGE-E30AS ZGE-E36AS ZGE-E30AS290 ZGE-E36AS290 Numéro de modèle : Numéro de série : JUL11.0301 © Zephyr Corporation...
- Page 26 www.zephyronline.com...
- Page 27 MISE EN GARDE DE SÉCURITÉ ......LISTE DU MATÉRIEL ............INSTALLATION Feuille de calcul pour le conduit ......Espace libre et hauteur de montage ....Options d’installation pour le conduit ....Spécifi cations de la hotte ......... Préparation de l’armoire ...........
- Page 28 www.zephyronline.com LISEZ ET CONSERVEZ CES INSTRUCTIONS AVERTISSEMENT POUR RÉDUIRE LES RISQUES D’INCENDIE OU DE DÉCHARGE ÉLECTRIQUE, N’UTILISEZ PAS CET APPAREIL AVEC UN TABLEAU DE COMMANDE À SEMI-CONDUCTEURS. AVERTISSEMENT POUR RÉDUIRE LES RISQUES D’INCENDIE, DE DÉCHARGE ÉLECTRIQUE OU DE BLESSURE, RESPECTEZ CES CONSIGNES : a.
- Page 29 ATTENTION POUR RÉDUIRE LES RISQUES D’INCENDIE, N’UTILISEZ QUE DES CONDUITS D’AÉRATION EN MÉTAL. ATTENTION Pour réduire les risques d’incendie et pour évacuer l’air convenablement, assurez-vous de canaliser l’air à l’extérieur de la maison. N’installez pas l’échappement du conduit dans les espaces entre les murs, le plafond, le grenier, les vides sanitaires ou le garage.
- Page 30 www.zephyronline.com (2) M4 x 1”...
- Page 31 Longueur x Longueur x Pièces de conduit Pièces de conduit Total Total Nombre utilisé Nombre utilisé 3-1/ 4” x 10” 1 pi 6” 30 pi rect., droit embout mural circ./registre 6” circ., droit 1 pi 6” 30 pi chapeau de toiture circ.
- Page 32 www.zephyronline.com Il est important d’installer la hotte à la hauteur de montage adéquate. Les hottes installées trop basses pourraient être endommagées par la chaleur en plus de présenter des risques d’incendie plus élevés tandis que les hottes installées trop hautes seront diffi ciles à atteindre et verront leur effi...
- Page 33 AVERTISSEMENT DE RISQUE D’INCENDIE N’évacuez ou ne terminez JAMAIS l’échappement du conduit dans les espaces entre les murs, les vides sanitaires, le plafond, le grenier, ou le garage. Tous les échappements doivent être dirigés à l’extérieur de la maison, à moins que l’option de reprise d’air ne soit utilisée. N’utilisez que des conduits en métal pour cloison simple.
- Page 34 www.zephyronline.com...
- Page 35 7” ” 7/8” Fig.1 Fig.2 1. Calculez et marquez la ligne centrale sur le mur et sur le bas de l’armoire avec un crayon. 2. Si le bas de l’armoire est enfoncé, vous devrez installer des blocs de bois pour aligner correctement le bas de l’armoire avec la hotte.
- Page 36 www.zephyronline.com 1) Préparez le câblage électrique et le conduit dans l’armoire. Les emplacements de la boîte de connexion et l’ouverture de refoulement de ventilateur sont indiqués à la page 8. Fig.3 Fig.4 2) Dévissez les (10) vis du panneau avant et laissez le 3) Ouvrez les portes de l’armoire.
- Page 37 Fig.7 Fig.8 6) Placez les supports d’installation inférieurs sous les 7) À partir de l’intérieur de la hotte, fi xez (1) vis M4x8 dans supports d’installation supérieurs situés sur les côtés chaque support d’installation inférieur. La position de ces gauche et droit du boîtier de la hotte, Fig.7. Note : La partie vis est ajustable et s’adapte à...
- Page 38 www.zephyronline.com Fig.11 Fig.12A 10) Placez le conduit circulaire de 6” par-dessus le collier 11) Secure (2) 1 “vis à bois (A) dans les trous de vis sur les du ventilateur et fi xez le tout avec du ruban à conduit en côtés gauche et droit de l’ouverture du fi...
- Page 39 La confi guration de reprise sans conduit a été conçue pour les applications où il est impossible d’installer un conduit d’aération. Lorsque transformée, la hotte fonctionne comme une hotte de reprise d’air plutôt que comme un système d’évacuation d’air. Les vapeurs et fumées de cuisson sont aspirées et fi ltrées par un ensemble optionnel de fi ltres à charbon. L’air est ensuite purifi...
- Page 40 www.zephyronline.com...
- Page 42 www.zephyronline.com...
- Page 43 La commande à distance radioélectrique est munie d’un aimant pour un entreposage facile. la commande peut être placé sur n’importe quelle surface magnétique, comme un réfrigérateur ou le support à commande zephyr. la distance maximale de l’appareil à laquelle la commande fonctionne est de 15 pieds.
- Page 44 www.zephyronline.com ENTRETIEN DES SURFACES Nettoyez régulièrement les surfaces de la hotte avec de l’eau savonneuse chaude et un chiffon de coton propre. N’utilisez pas de détergent abrasif ou corrosif, de laines d’acier ou de tampons à récurer; ils égratigneront et endommageront les surfaces. Pour les taches plus tenaces, utilisez du produit dégraissant liquide.
- Page 45 Les ampoules de remplacement sont disponibles dans les magasins spécialisés en éclairage. Procurez-vous des ampoules halogènes GU-10 50W (MR16). Consultez la page 22 du présent guide pour obtenir les numéros de pièces Zephyr.
- Page 46 www.zephyronline.com...
- Page 47 PROCÉDURES DE DÉPANNAGE POUR LA HOTTE GENOVA Problème Cause Solution Après 1. Le bloc d’alimentation n’est pas allumé 1. Assurez-vous que l’alimentation du disjoncteur l’installation, et de l’appareil est allumée l’appareil ne 2. La ligne électrique et le raccord de câble ne sont 2.
- Page 48 www.zephyronline.com DESCRIPTION DE PIÈCE Pièces de remplacement Ampoule GU10 50W (chaque) Z0B-0020S Filtre à tamis décoratif 50200036 Accessoires optionnels Ensemble de reprise d’air ZRC-00GE Filtres à charbon de remplacement (chaque) Z0F-C0GE Commande à distance radioélectrique 14000005 Pour commander des pièces, visitez-nous en ligne au www.zephyronline.com ou communiquez avec nous par téléphone au 1-888-880-8368...
- Page 49 Zephyr Corporation (désigné aux présentes sous le nom de « nous ») garantit au premier acheteur (désigné aux présen- tes sous le nom de « vous » ou « votre ») de produits Zephyr (les « Produits ») que lesdits produits sont exempts de défauts de fabrication ou de main-d’œuvre selon les conditions suivantes :...
Need help?
Do you have a question about the Genova ZGE-E36AS290 and is the answer not in the manual?
Questions and answers