Table of Contents
Advertisement
Quick Links
USER'S MANUAL
100 Watt Tube Head
Designed by Bruce Egnater
TM
Vendetta
is a trademark of GHS Corporation Battle Creek MI, USA
May be covered by one or more of the following: U.S. Patents #4538297, 4647876, 4696044, 4745309, 4881047,
4893099, 5124657, 5263091, 5268527, 5319713, 5333201, 5402498 , 5493617 and 5638452.
Other patents pending. Foreign patents pending.
- 1 -
Advertisement
Table of Contents

Related Manuals for Rocktron Vendetta


Summary of Contents for Rocktron Vendetta
- Page 1 USER’S MANUAL 100 Watt Tube Head Designed by Bruce Egnater Vendetta is a trademark of GHS Corporation Battle Creek MI, USA May be covered by one or more of the following: U.S. Patents #4538297, 4647876, 4696044, 4745309, 4881047, 4893099, 5124657, 5263091, 5268527, 5319713, 5333201, 5402498 , 5493617 and 5638452.
- Page 2 Precautions - Please read!! NOTE: IT IS VERY IMPORTANT THAT YOU READ THIS SECTION TO PROVIDE YEARS OF TROUBLE FREE USE. THIS UNIT REQUIRES CAREFUL HANDLING. Read all instructions contained in this manual. Keep these instructions. Heed all warnings. Follow all instructions. Do not use this apparatus near water.
-
Page 3: Front Panel
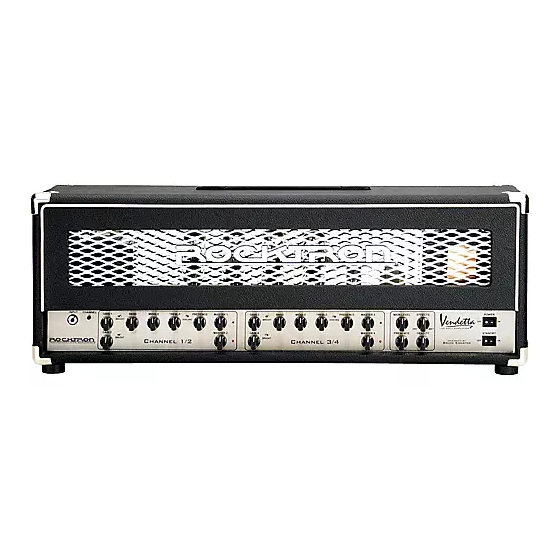
Front Panel INPUT jack This 1/4" jack accepts the output from the guitar. CHANNEL switch Selects one of the four channels in sequence - 1 through 4. Also used to store MIDI data. See the MIDI section for more information. GAIN 1 control Adjusts the amount of drive for Channel 1. - Page 4 This is a master DENSITY control which determines the overall fatness of the VENDETTA. 23. POWER switch This is the MAINS AC power switch. When powering up the VENDETTA, verify that the STANDBY switch (24) is in the "OFF" position. 24. STANDBY switch After powering up the VENDETTA, allow one minute to allow the circuits to stabilize then switch to the "ON"...
-
Page 5: Rear Panel
(See the section on Impedance Settings for more details). MAIN SPEAKER output This jack connects to the internal speaker on the COMBO version of the VENDETTA or to the primary speaker in a head/cabinet setup. A speaker must always be connected to this jack. -
Page 6: Operating Precautions
* Always use the MAIN SPKR jack first for the speaker connection. * Do not operate below 4 ohms. * Never operate the VENDETTA without a load on the output. Always have a speaker cabinet plugged into the speaker output before turning on the unit. - Page 7 MIDI Controller will call up VENDETTA Channel 2..and so on. You may also change which button controls which channel on the VENDETTA as well. For example, if you want MIDI Controller Button 2 to turn on VENDETTA channel 1 -first, select button 2 on the MIDI controller. Next scroll through the channels using the "Channel Select"...
-
Page 8: Impedance Settings
To control the VENDETTA and another MIDI compatible device (like a Rocktron Xpression), plug a standard 5-pin MIDI cable from the MIDI Thru on the VENDETTA into the MIDI IN on the compatible device. At this point refer to your MIDI controller(pedal) manual for program changes, MIDI Mapping and/or advance functions. - Page 9 Proper IMPEDANCE switch settings - 9 -...
- Page 10 Effects Loop Operation The effects loop on the VENDETTA offers two modes of operation, as described below. Series Mode When an effect is inserted into the loop send and return jacks, the direct signal path is interrupted and 100% of the signal is routed through the effects unit. This is the most common style of effects loop in most guitar amplifiers.
-
Page 11: Fuse Replacement
Fuse Replacement We recommend that you use an authorized repair person to change the fuse in this unit. To access the fuse, first power down the unit and unplug the cable from the wall outlet and the amplifier. Using a small screw driver, open the fuse tray by prying open the small tab as shown in the drawing above. Please note that the tray will not come all of the way out. -
Page 12: Tube Replacement
Different tube types can be installed and used in the VENDETTA and biasing has been simplified. The instructions below explain how it works. CAUTION!! DO NOT EXCEED THE VALUESSHOWN. This will shorten tube life, cause possible tube failure and damage to the amplifier. -
Page 13: Specifications
Specifications Input Impedance… …….…………… 1M Output Power…….………..………… 100 watts RMS Load Impedance ………….………… 4Ω, 8Ω or 16Ω(switch selectable) Maximum Gain ……………...……… over 80dB Operating Voltages ………..……… 110 VAC Dimensions ………………..………… 29 1/4" x 9 1/2" x 10 1/2" Weight……………………….……….. 55 lbs. Speaker ……………………..…………... -
Page 14: Other Rocktron Products
Electric Guitar -Acoustic Guitarand BassAmplifiers: Vendetta Head(100 W Head 4-Channels All Tube - MIDI Switchable) Vendetta Combo (100W 2x12 Combo Celestion 90s all Tube4-Channel MIDI Switchable) R80DSP (80W 1x12 Amp w/Digital Effects) RT80 (80W 1x12 Amp w/Reverb & Built-in Tuner) R120DSP (120W 2x10 Amp w/Digital Effects) RT122C (120W 2x12 Amp w/Stereo Chorus, Reverb &... - Page 15 - 15 -...
- Page 16 Rocktron - A Division of GHS Corporation 2813 Wilber Ave Battle Creek MI 49037 Tel: 1-269-968-3351 Fax: 1-269-968-6913 (8am to 5pm Eastern Standard Time) 2007 – 0001 Rev. 12/28/07 - 16 -...
Need help?
Do you have a question about the Vendetta and is the answer not in the manual?
Questions and answers