Rose electronics Vista Installation And Operation Manual
Kvm series
Hide thumbs
Also See for Vista:
- Installation and operation manual (52 pages) ,
- Quick start manual (4 pages)

Related Manuals for Rose electronics Vista


Summary of Contents for Rose electronics Vista
- Page 1 VISTA KVM-SERIES INSTALLATION AND OPERATIONS MANUAL 10707 Stancliff Road Phone: (281) 933-7673 Houston, Texas 77099 WWW.ROSE.COM...
- Page 3 LIMITED WARRANTY Rose Electronics warrants the Vista™ to be in good working order for one year from the date of purchase from Rose Electronics or an authorized dealer. Should this product fail to be in good working order at any time during this one-year warranty period, Rose Electronics will, at its option, repair or replace the Unit as set forth below.
- Page 4 FCC/IC STATEMENTS, EU DECLARATION OF CONFORMITY FEDERAL COMMUNICATIONS COMMISSION AND INDUSTRY CANADA RADIO-FREQUENCY INTERFERENCE STATEMENTS This equipment generates, uses and can radiate radio frequency energy and if not installed and used properly, that is in strict accordance with the manufacturer’s instructions may cause interference to radio communication.
-
Page 5: Table Of Contents
Safety ......................21 Safety and EMC regulatory statements..........22 Tables Table 1. Compatibility .................. 3 Table 2. Front panel description ..............6 Table 3. Vista 2UA/4UA description ............7 Table 4. Vista 4PCA/8PCA description ............8 Table 5. Keyboard commands ..............14... - Page 6 Figure 2. Optional power adapter .............. 5 Figure 3. Vista 2 port ................. 6 Figure 4. Vista 4 port ................. 6 Figure 5. Vista to KVM station ..............9 Figure 6. Vista to CrystalView ..............11 Figure 7. Typical Application ..............12 Appendix Appendix A.
-
Page 7: Introduction
The Vista switch is the result of Rose Electronics commitment to providing state-of-the-art switching solutions for today’s demanding work place. The Vista switch has proven to be a valuable investment for users that have a need to access multiple CPUs from a single KVM station. -
Page 8: Features
Heavy-duty steel, fully shielded chassis Rackmount option for 19", 23", or 24" racks (1 rack unit high, 1.75”) Saves space, reduces equipment and power costs, and eliminates clutter Unlimited technical support Made in USA Vista KVM-Series Installation and Operations Manual... -
Page 9: Compatibility
Power adapter Optional). Installation and operations manual. CPU cables are usually ordered separately. If the package contents are not correct, contact Rose Electronics or your reseller so the problem can be quickly resolved. Vista KVM-Series Installation and Operations Manual... -
Page 10: System Overview
Figure 1 shows a typical configuration using the Vista 4 port switch with DB25 connectors. Up to 4 CPUs can be connected to the Vista 4 port switch and accessed from a single KVM station. -
Page 11: Rose Electronics Web Site
The power connector on the Vista switch is for a supplemental power adapter. Supplemental power may be needed if the cable length from the computers to the Vista switch is long or you are using a wireless keyboard and mouse. (See Figure 2) Supplemental power adapter Figure 2. -
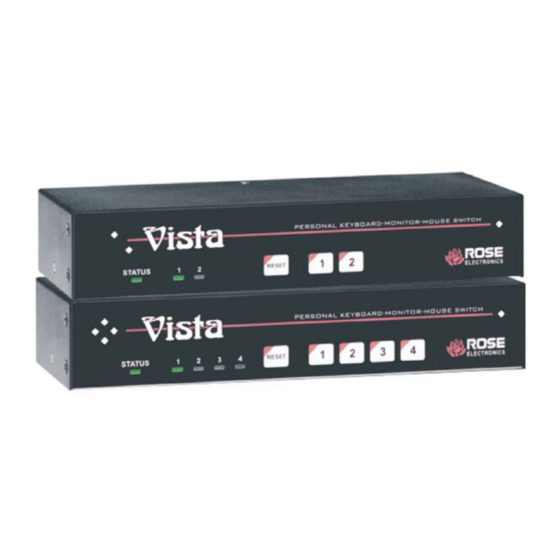
Page 12: Vista Kvm-Series Models
Indicates which computer is selected. Reset button Resets the unit and initializes the keyboard and mouse. CPU Select buttons Selects the computer to be accessed. (1 – 2 or 1 – 4) Table 2. Front panel description Vista KVM-Series Installation and Operations Manual... -
Page 13: Table 3. Vista 2Ua/4Ua Description
(4UA) 1,2,3,4 DB25F Computer connectors Monitor HD15F KVM monitor connector Mouse MiniDin-6F or KVM PS/2 or Serial DB9F mouse connector Keyboard MiniDin-6F or KVM PS/2 or A/T Din5F keyboard connector Table 3. Vista 2UA/4UA description Vista KVM-Series Installation and Operations Manual... -
Page 14: Table 4. Vista 4Pca/8Pca Description
1-8 on 8PC model KVM monitor Monitor HD15F connector KVM PS/2 or MiniDin-6F or Serial mouse Mouse DB9F connector KVM PS/2 or A/T MiniDin-6F or keyboard Keyboard Din5F connector Table 4. Vista 4PCA/8PCA description Vista KVM-Series Installation and Operations Manual... -
Page 15: Installation
INSTALLATION Installation Installation of the Vista switch consists of the following steps: It is recommended that the CPUs be powered off. 1. Connect the KVM station to the Vista switch. 2. Connect the CPUs to the Vista switch. 3. Sequentially apply power, boot the CPUs. -
Page 16: Step 2 - Connect The Cpus
Step 3 - Applying power It is recommended that each connected CPU be booted up starting with the CPU connected to Port #1. Switch the Vista to the CPU port by pressing the appropriate numbered button on the front panel (1-2 or 1-4). -
Page 17: Figure 6. Vista To Crystalview
Your Vista switch is now ready for operation using the initial factory settings. Pressing the numbered buttons (1-2 or 1-4) on the front panel will switch to that port. To take full advantage of the Vista features, refer to the operating instructions for detailed information about each of the Vista commands. -
Page 18: Figure 7. Typical Application
Figure 8. Typical Application Vista KVM-Series Installation and Operations Manual... -
Page 19: Operating Instructions
The Vista switch is very easy to operate. Computer selection and set-up functions are entered from the keyboard. You can also select computers manually from the Vista’s front panel by using buttons 1-2 or buttons 1-4 depending on your model. -
Page 20: Table 5. Keyboard Commands
Port 1. Scan (Off) <Ctrl> X Turns scan mode off. Reset mouse <Ctrl> O Sends reset mouse command command to the currently selected computer. Will recover stuck NT mouse Table 5. Keyboard commands Vista KVM-Series Installation and Operations Manual... -
Page 21: Keyboard Command Description
“X”. Issuing a computer select command also turns off scanning. Scan time interval The “Scan Time interval” command sets the time, in seconds that the Vista switch will pause at each of the computers when scanning. The default setting is 5 seconds. To change the Scan Time to another interval press and release the left <Ctrl>... - Page 22 Vista firmware currently installed. Before entering this command, the selected CPU must be at a command prompt, word processor, or text editor, so when the Vista switch sends the ROM revision level the result can be displayed.
- Page 23 The activity LED will flash three times to signify that the non-volatile memory has been returned to the original factory settings. Only those settings listed in Appendix A are reset, all other settings remain unchanged from their set values. Vista KVM-Series Installation and Operations Manual...
-
Page 24: Troubleshooting
Mouse driver does not load If using a PS/2 type mouse, the CPU must be connected to the Vista or mouse at boot-up time in order for mouse to be recognized by CPU. - Page 25 Mouse does not move The Vista is turned off after or not connected when CPU was booted or the application using the mouse was run. Exit and re-enter application or operating system using mouse or issue reset command. PS/2 mouse was not connected when the Vista was powered up or the mouse was disconnected and reconnected.
-
Page 26: Maintenance And Repair
This unit does not contain any internal user-serviceable parts. In the event a unit needs repair or maintenance, you must first obtain a Return Authorization (RA) number from Rose Electronics or an authorized repair center. This Return Authorization number must appear on the outside of the shipping container. -
Page 27: Safety
SAFETY Safety This Vista switch has been tested for conformance to safety regulations and requirements, and has been certified for international use. Like all electronic equipment, the Vista switch should be used with care. To protect yourself from possible injury and to minimize the risk of damage to this Unit, read and follow these safety instructions. -
Page 28: Safety And Emc Regulatory Statements
Servicing There are no user-serviceable parts inside these products. Only service- trained personnel may perform any servicing, maintenance, or repair. The user may adjust only items mentioned in this manual. Vista KVM-Series Installation and Operations Manual... - Page 29 à la terre ait été réparée. Aucune pièce contenue à l’intérieur de ce produit ne peut être réparée par l’utilisateur. Tout dépannage, réglage, entretien ou réparation devra être confié exclusivement à unpersonnel qualifié. Vista KVM-Series Installation and Operations Manual...
-
Page 30: Appendix A. Initial Factory Settings
Mouse translation 0 (PS/2 mouse output) Press and hold computer select buttons 1 and 2 and press the reset button to reset the Vista switch to the factory settings listed. All other settings remain unchanged. Vista KVM-Series Installation and Operations Manual... -
Page 31: Appendix B. Parts And Cables
*Available in standard lengths of 5, 10, and 20 feet Replace nnn with desired length. **Available in lengths of 5, 10, 20, 35, 50, 75, and 100 feet. Replace nnn with desired length. Vista KVM-Series Installation and Operations Manual... -
Page 32: Appendix C. General Specifications
8 port models - buttons 1-8 Indicators Activity LED Power LEDs: 4 port models LEDs 1-4 8 port models LEDs 1-8 Computer select LEDs: 4 port models LEDs 1-4 8 port models LEDs 1-8 Vista KVM-Series Installation and Operations Manual... -
Page 33: Appendix D. Rack Mount Instructions
Secure the mounting brackets to the rack using the appropriate size bolts, nuts and lock washers. The following general guidelines should be observed when installing your unit into a rack. ο 1. The Vista switch is designed to work in an ambient temperature of 0 ο ο ο to 55 C (32 F –... -
Page 34: Appendix F. Typematic Rate
Keys/sec Value 30.0 15.0 26.7 13.3 24.0 12.0 21.8 10.9 20.0 10.0 18.5 17.1 16.0 Typematic Delay Delay* Delay Delay* Delay Delay* Delay Delay* Delay Value Value Value Value 1000 * Delay in milliseconds Vista KVM-Series Installation and Operations Manual... - Page 36 10707 Stancliff Road Phone: (281) 933-7673 Houston, Texas 77099 WWW.ROSE.COM...
Need help?
Do you have a question about the Vista and is the answer not in the manual?
Questions and answers